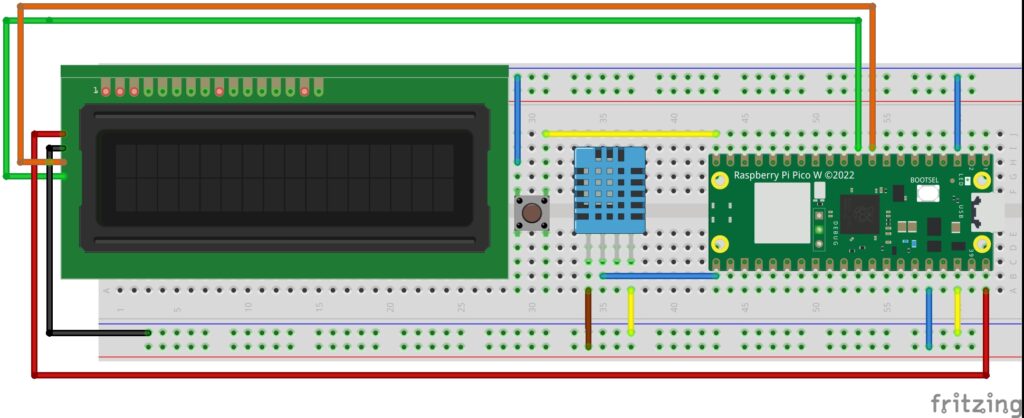
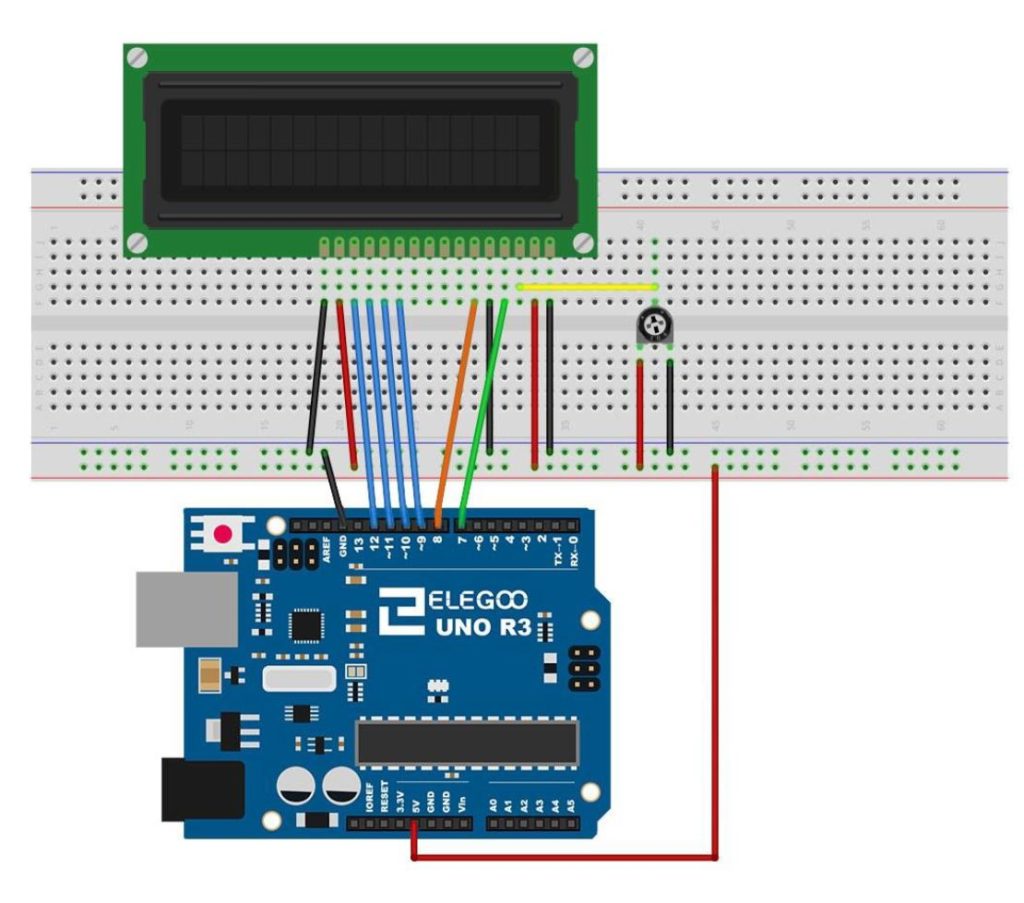
In this video lesson we show how to build a portable Arduino Weather Station. The station is powered by a battery bank, and data is displayed on the SSD1306 OLED display. The station included the BMP180 pressure sensor for barometric pressure, the DHT 11 for temperature and humidity, and a push button to toggle between modes. The schematic of the circuit is shown below.

When using the breadvolt, or any battery power supply on a breadboard project, do not turn the power supply on while the Arduino is connected to USB, as you could generate voltage conflicts. It is an either or. If the USB is connected, the power supply should be OFF. Or if you are going to connect the USB, first turn off the power supply.
The code developed in the video is included for your convenience below:
1 2 3 4 5 6 7 8 9 10 11 12 13 14 15 16 17 18 19 20 21 22 23 24 25 26 27 28 29 30 31 32 33 34 35 36 37 38 39 40 41 42 43 44 45 46 47 48 49 50 51 52 53 54 55 56 57 58 59 60 61 62 63 64 65 66 67 68 69 70 71 72 73 74 75 76 77 78 79 80 81 82 83 84 85 86 87 88 89 90 91 92 93 94 95 96 97 98 99 100 101 102 103 104 105 106 107 108 109 110 111 112 113 114 115 116 117 118 119 120 121 122 123 124 125 126 127 128 129 130 131 132 133 134 135 136 137 138 139 140 141 142 143 144 145 146 147 148 149 150 151 152 153 154 155 156 157 158 159 160 161 162 163 164 165 166 167 168 169 170 171 172 173 174 175 176 177 178 179 180 181 182 183 184 185 186 187 188 189 190 191 192 193 194 195 196 197 198 199 200 201 202 203 204 205 206 207 208 209 210 211 212 213 214 215 216 217 218 219 220 221 222 223 224 225 226 227 228 229 230 231 232 233 234 235 236 237 238 | #include <SPI.h> #include <Wire.h> #include <Adafruit_GFX.h> #include <Adafruit_SSD1306.h> #include <Adafruit_BMP085.h> //********************************************** #include <DHT.h> #define DHTPIN 11 #define DHTTYPE DHT11 DHT dht(DHTPIN,DHTTYPE); int butPin=2; int butVal=0; int butValOld=0; int butCount=0; int butRem=0; float tempF; float tempC; float hum=50; int hReadTime=0; int hReadInt=2000; float humRaw[128]; float normHum[128]; float tempRaw[128]; float normTemp[128]; int lastUpdate = 0; int updateInterval = 600; float rawXdata[128]; int normXdata[128]; float rawYdataP[128]; int normYdataP[128]; float rawYdataH[128]; int normYdataH[128]; float rawYdataT[128]; int normYdataT[128]; float xMin = 0; //************************************ float xMax = 127; float yMinP = 28; float yMaxP = 31; float yMinH=30; float yMaxH=90; float yMinT=60; float yMaxT=90; float Pt = 14; float Pb = 63; float Pl = 0; float Pr = 127; int numPoints = 128; Adafruit_BMP085 BP; bool BMPconnected = false; float BarPress = 30; float BarPressNow = 30; float alt = 1127; //**************************** int screenWidth = 128; int screenHeight = 64; int oledReset = -1; #define SCREEN_ADDRESS 0x3C Adafruit_SSD1306 oled(screenWidth, screenHeight, &Wire, oledReset); void setup() { // put your setup code here, to run once: pinMode(butPin,INPUT_PULLUP); //********************* Serial.begin(9600); BMPconnected = BP.begin(); if (BMPconnected == true) { Serial.println("BMP180 found and Connected"); } if (BMPconnected == false) { Serial.println("BMP180 not found, Check Connections"); } oled.begin(SSD1306_SWITCHCAPVCC, SCREEN_ADDRESS); oled.clearDisplay(); oled.display(); for (int i = 0; i < numPoints; i= i + 1) { rawXdata[i] = i; } dht.begin(); delay(2000); } void loop() { // put your main code here, to run repeatedly: BarPressNow = normPress(alt); BarPress = .95 * BarPress + .05 * BarPressNow; tempC=BP.readTemperature(); //*********************** tempF=tempC*9/5 +32; if (millis()-hReadTime>hReadInt){ hum=dht.readHumidity(); Serial.println(hum); hReadTime=millis(); } if (millis() - lastUpdate >= updateInterval) { for (int i = 0; i < numPoints - 1; i = i + 1) { rawYdataP[i] = rawYdataP[i + 1]; rawYdataT[i] = rawYdataT[i + 1]; rawYdataH[i] = rawYdataH[i + 1]; } lastUpdate=millis(); rawYdataP[numPoints-1]=BarPress; rawYdataT[numPoints-1]=tempF; rawYdataH[numPoints-1]=hum; //normData(); //oled.clearDisplay(); //plotGraph(); } butVal=digitalRead(butPin); if (butVal==0 && butValOld==1){ butCount=butCount+1; butRem=butCount%4; } butValOld=butVal; if (butRem==0){ oled.clearDisplay(); oled.setCursor(0, 0); oled.setTextColor(WHITE); oled.setTextSize(2); oled.print(tempF); oled.println(" F"); oled.print(hum); oled.println(" %Hum"); oled.print(BarPress); oled.println(" InHG"); oled.display(); } if (butRem==1){ oled.clearDisplay(); oled.setCursor(0, 0); oled.setTextColor(WHITE); oled.setTextSize(2); oled.print(BarPress); oled.setTextSize(1); oled.println(" InHG"); normDataP(); //*********************** plotPress(); //*********************** oled.display(); delay(.1); } if (butRem==2){ oled.clearDisplay(); oled.setCursor(0, 0); oled.setTextColor(WHITE); oled.setTextSize(2); oled.print(tempF); oled.setTextSize(1); oled.println(" F"); normDataT(); //*********************** plotTemp(); //*********************** oled.display(); delay(.1); } if (butRem==3){ oled.clearDisplay(); oled.setCursor(0, 0); oled.setTextColor(WHITE); oled.setTextSize(2); oled.print(hum); oled.setTextSize(1); oled.println(" %HUM"); normDataH(); //*********************** plotHum(); //*********************** oled.display(); delay(.1); } } float normPress(float elev) { float BPRaw; float BPNorm; float T0 = 288.15; float L = .0065; float R = 8.3144598; float M = .0289644; float g = 9.8; float c = M * g / (R * L); BPRaw = BP.readPressure() * .0002953; BPNorm = BPRaw / pow(1 - L * elev / T0, c); return BPNorm; } void normDataP() { for (int i = 0; i < numPoints; i = i + 1) { normYdataP[i] = (Pb - Pt) / (yMinP - yMaxP) * (rawYdataP[i] - yMaxP) + Pt; normXdata[i] = (Pr - Pl) / (xMax - xMin) * (rawXdata[i] - xMin) + Pl; } } void normDataT() { for (int i = 0; i < numPoints; i = i + 1) { normYdataT[i] = (Pb - Pt) / (yMinT - yMaxT) * (rawYdataT[i] - yMaxT) + Pt; normXdata[i] = (Pr - Pl) / (xMax - xMin) * (rawXdata[i] - xMin) + Pl; } } void normDataH() { for (int i = 0; i < numPoints; i = i + 1) { normYdataH[i] = (Pb - Pt) / (yMinH - yMaxH) * (rawYdataH[i] - yMaxH) + Pt; normXdata[i] = (Pr - Pl) / (xMax - xMin) * (rawXdata[i] - xMin) + Pl; } } void plotPress() { //plot Pressure oled.drawLine(Pl, Pt, Pl, Pb, WHITE); oled.drawLine(Pl, Pb, Pr, Pb, WHITE); int MID = (Pb - Pt) / (yMinP - yMaxP) * (29.92 - yMaxP) + Pt; //********** oled.drawLine(Pl, MID, Pr, MID, WHITE); for (int i = 0; i < numPoints - 1; i = i + 1) { oled.drawLine(normXdata[i], normYdataP[i], normXdata[i + 1], normYdataP[i + 1], WHITE); //*********** } } void plotTemp() { //plot Pressure oled.drawLine(Pl, Pt, Pl, Pb, WHITE); oled.drawLine(Pl, Pb, Pr, Pb, WHITE); //int MID = (Pb - Pt) / (yMinP - yMaxP) * (29.92 - yMaxP) + Pt; //********** //oled.drawLine(Pl, MID, Pr, MID, WHITE); for (int i = 0; i < numPoints - 1; i = i + 1) { oled.drawLine(normXdata[i], normYdataT[i], normXdata[i + 1], normYdataT[i + 1], WHITE); //*********** } } void plotHum() { //plot Pressure oled.drawLine(Pl, Pt, Pl, Pb, WHITE); oled.drawLine(Pl, Pb, Pr, Pb, WHITE); //int MID = (Pb - Pt) / (yMinP - yMaxP) * (29.92 - yMaxP) + Pt; //********** //oled.drawLine(Pl, MID, Pr, MID, WHITE); for (int i = 0; i < numPoints - 1; i = i + 1) { oled.drawLine(normXdata[i], normYdataH[i], normXdata[i + 1], normYdataH[i + 1], WHITE); //*********** } } |