
In this video lesson I show you how to make your Pi Project talk to you using Text to Speech (TTS). We will use the Piper Model which gives good clear voice, and a choice from a large number of different models.
In this lesson I show you my solution to the Homework assigned in LESSON #8.
In this lesson we demonstrate this program, which makes the Pi talk, through the Fusion HAT+ speaker. The homework was to create a program that smoothly adjust the brightness of an LED using a potentiometer. The project was also to speak to the user, indicating what brightness the LED was set at.
This is the schematic we are using on these projects;
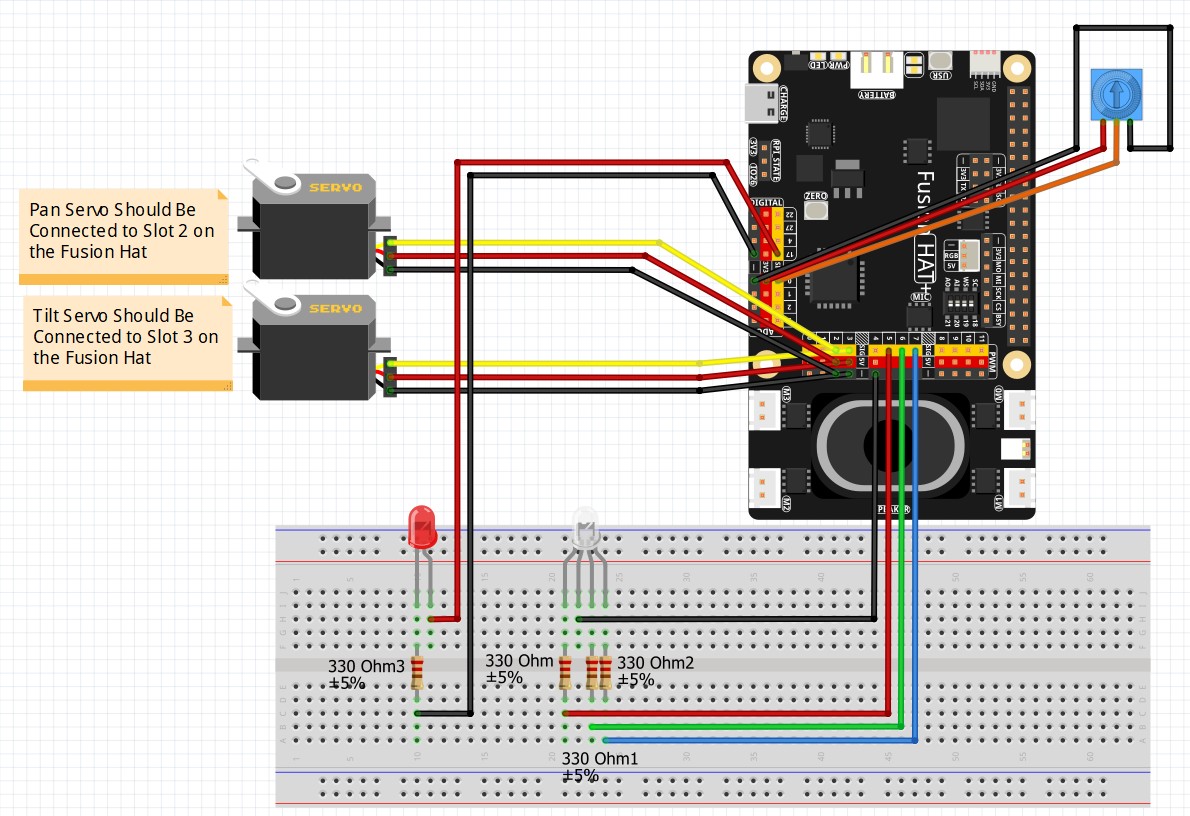
This Schematic is explained in detail in LESSON #5.
Then this is the code we developed in today’s lesson.
1 2 3 4 5 6 7 8 9 10 11 12 13 14 15 16 17 18 19 20 21 22 23 24 25 26 27 28 29 30 31 32 33 34 35 36 37 38 39 40 41 42 43 44 45 46 47 48 49 50 51 52 53 54 55 56 | from fusion_hat.adc import ADC from fusion_hat.pwm import PWM from fusion_hat.tts import Piper from time import sleep tts = Piper() tts.set_model('en_US-amy-low') potPin = 0 myPot = ADC(potPin) redPin = 5 redLED = PWM(redPin) rangeOld = 100 while True: potVal = myPot.read() writeVal=100*(potVal/4095) - .005 if writeVal < 1: msg = "Your LED is Off" range = 0 if writeVal >=1 and writeVal<10: msg = "Your LED is Brightness 1" range = 1 if writeVal >=10 and writeVal<20: msg = "Your LED is Brightness 2" range=2 if writeVal >=20 and writeVal<30: msg = "Your LED is Brightness 3" range=3 if writeVal >=30 and writeVal<40: msg = "Your LED is Brightness 4" range=4 if writeVal >=40 and writeVal<50: msg = "Your LED is Brightness 5" range=5 if writeVal >=50 and writeVal<60: msg = "Your LED is Brightness 6" range=6 if writeVal >=60 and writeVal<70: msg = "Your LED is Brightness 7" range=7 if writeVal >=70 and writeVal<80: msg = "Your LED is Brightness 8" range=8 if writeVal >=80 and writeVal<90: msg = "Your LED is Brightness 9" range=9 if writeVal >=90 and writeVal<99: msg = "Your LED is Brightness 10" range=10 if writeVal >=99: msg = "Your LED is full Brightness" range=11 if rangeOld != range: tts.say(msg, stream = False) rangeOld=range redLED.pulse_width_percent(int(writeVal)) sleep(.1) |