In today’s lesson, we’re taking our first exciting step into giving our Raspberry Pi the ability to understand and respond to our voice. That’s right — we’re going to control a physical LED using nothing but spoken commands! This is a huge milestone in the class because it marks the beginning of building truly interactive AI projects that can listen to us and take action in the real world.
Using the SunFounder Fusion AI Hat’s built-in microphone and the excellent STT (Speech-to-Text) library, we create a simple but powerful voice assistant that can turn an LED on and off with commands like “on”, “off”, and “quit”. I walk you through every single line of the code so you can clearly see how we capture voice input, process the command, and control real hardware.
This lesson is intentionally straightforward because I want you to build a strong foundation. Once you understand how to take a voice command and turn it into physical action, we can start adding more complexity — like controlling multiple devices, adjusting brightness, or even combining voice control with computer vision in future lessons.
One of the things I love most about this project is how it makes the Raspberry Pi feel “alive.” Instead of clicking buttons or typing commands, you can now talk directly to your project. This is the kind of interaction that makes edge AI projects so much fun and so powerful.
By the end of this lesson, you’ll have a working voice-controlled LED and the confidence to start expanding your voice control skills. This is exactly the kind of capability we need as we move forward in the AI on the Edge journey — giving our intelligent systems natural, human-friendly ways to interact with us.
So grab your Fusion AI Hat, hook up that LED, and let’s turn your Raspberry Pi into a voice-controlled device! As always, I strongly encourage you to code along with me in the video and then play around with the program. Try adding more commands, control multiple LEDs, or even have it say something back to you.
This is where things start getting really fun. Let’s get that LED responding to your voice!
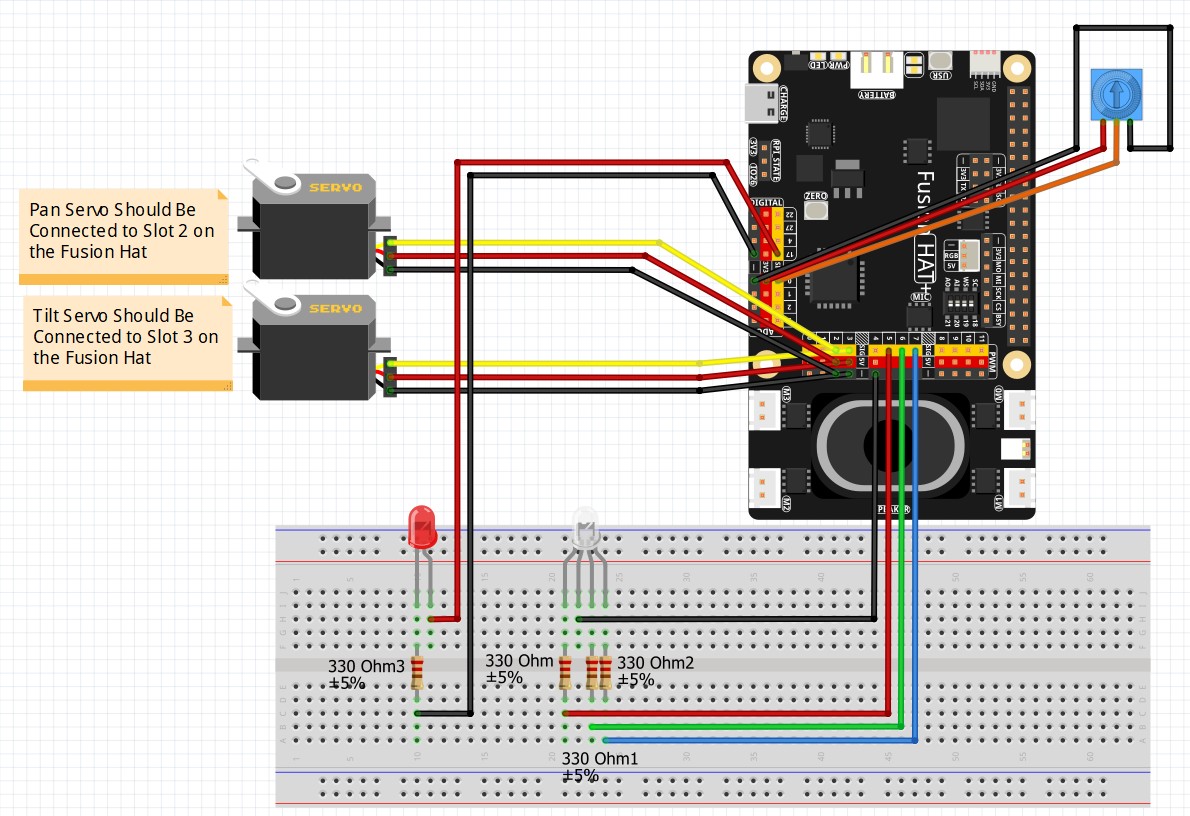
This is the schematic of the circuit we are using for our AI class. We go into great detail on this schematic in LESSON #5 if you want to learn more about it.
Now this is the code we developed in this lesson:
|
1 2 3 4 5 6 7 8 9 10 11 12 13 14 15 16 17 18 19 20 21 |
from fusion_hat.stt import STT from fusion_hat.pin import Pin, Mode from time import sleep redPin = 17 redLED = Pin(redPin,mode=Mode.OUT) stt = STT(language="en-us") while True: print("Voice Assistant At the READY!, Speak at Any Time: ") command = stt.listen(stream=False) command = command.strip() print(command) if command == "on": redLED.high() print("LED ON") if command == "off": redLED.low() print("LED OFF") if command == "quit": break redLED.low() |