Arduino Tutorial 30: Understanding and Using Servos in Projects

In this lesson we explain step-by-step how to incorporate a servo into your Arduino project. This allows you to put motion into your prototypes. Servos act like little motors to create motion, but unlike motors, they do not spin all the way around. A typical servo can move between 0 and 180 degrees. They are relatively easy to program, and this video shows you the ins and outs of using a servo.

If you want to follow along at home, you can order the Arduino Kit we are using HERE.

Typically, the servos in electronics kits are not the best ones, but are suitable to learn with. If you want a more stable and better quality servo, this is the one I user in more of my projects: HiTEC

9-Axis IMU LESSON 7: Understanding Low Pass Filters


In this project, we have shown how accelerometers can be used to approximate tilt. We showed in Lesson 6 how vibration can cause a problem with such a strategy, as the system will interpret vibration to be changes in tilt. A partial solution to this problem can be to program a low pass filter into the project. The video above introduces you to the concept of a low pass filter, and shows some simple examples of programming and using a low pass filter to reduce noise.

The code below is for demo purposes only, and should not be used in any real applications. It just demonstrates how to work with this sensor in benchtop presentations.


Arduino Tutorial 29: Using Push Buttons to Create Dimmable LED

In this lesson we show you how to create a Dimmable LED using two pushbuttons. Pressing one button will gradually increase the brightness, while pressing the other button will gradually decrease the brightness. The project also includes an active buzzer to provide the user feedback that either maximum or minimum brightness have been reached. I encourage you to try and build this yourself before watching the video. Then see if you can do it on your own, and then see if you are doing the way I do it, or if you find an alternative suitable solution.

If you want to follow along at home, you can order the Arduino Kit we are using HERE.

Below is the code we used to achieve the toggle operation. The video gives details on how to connect up the circuit.


9-Axis IMU LESSON 6: Determine Tilt From 3-axis Accelerometer

BNO055
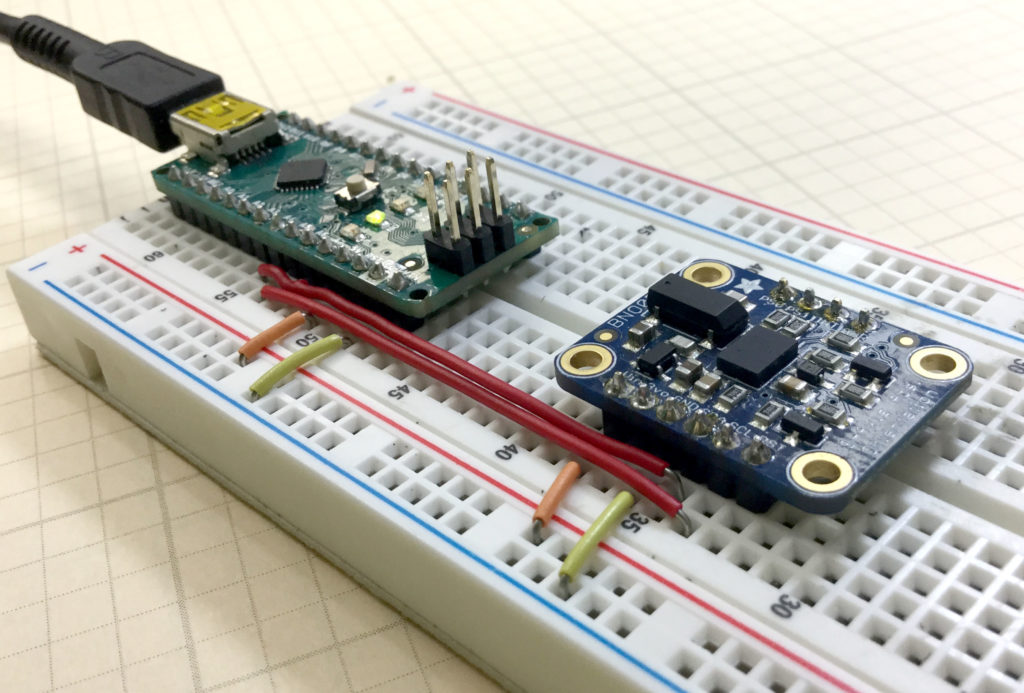
Adafruit BNO055 9-axis Sensor Connected to an Arduino Nano

This lesson shows you some of the simple math, that will allow you to approximate tilt angle from a three axis accelerometer. In this entire series of lessons, we are using the BNO055 9-axis sensor connected to an Arduino Nano. It is possible to approximate tilt along the x-axis and tilt along the y-axis. These could roughly be considered to be like the Euler Angles of Pitch and Roll. It should be noted that the approximations are reasonable for tilt angles less than 45 degrees. Also note, that in this simple demonstration, real acceleration will be interpreted as tilt, hence the system will incorrectly interpret motion as tilt. Because of this, this approach should not be used on things like drones or other moving systems. It is just for simple demonstration purposes.

The code developed in the video above is included below for your convenience.

The code below is for demo purposes only, and should not be used in any real applications. It just demonstrates how to work with this sensor in benchtop presentations.


Arduino Tutorial 28: Using a Pushbutton as a Toggle Switch

In lesson 27 we learned how to incorporate a pushbutton into an arduino project. We learned how to utilize pull-up and pull-down resistors in order to incorporate a button into a circuit. The operation of the button in lesson 27 was pretty simple . . . if the button was held down, the LED would come on. When the button was released, the LED would turn back off. This is an interesting demonstration, but much more interesting is the case where we make a toggle switch. If you press and release the button, the LED comes on, and then if you press and release the button again, the LED goes off. While this sounds very similar to the previous case, it turns out to require a lot more thought. This video lesson explains how to think about this problem, and how to make it work.

If you want to follow along at home, you can order the Arduino Kit we are using HERE.

Below is the code we used to achieve the toggle operation. The video gives details on how to connect up the circuit.


Making The World a Better Place One High Tech Project at a Time. Enjoy!