
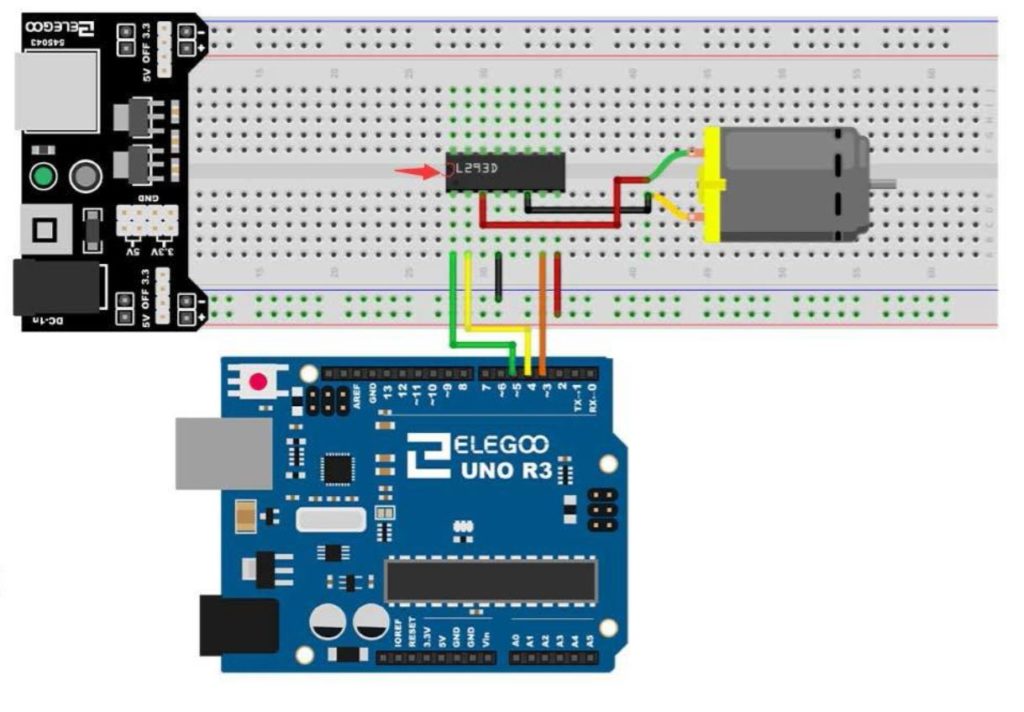
In this lesson we explore how to control the speed and direction of a DC motor using two buttons. We are using the L293D motor controller and a small DC motor for demonstration purposes. An official Arduino Uno R3 is available HERE. In this new series of lessons, I will be using the sensor and other components found in this KIT. The basic circuit was explained in Lesson 37, and we are using that work as a starting point. The schematic below will get you started in connecting your circuit. Be sure and connect one of the Arduino ground pins to the ground rail in the second to the bottom row in the diagram below. It is good practice to connect all your grounds together.
The code we developed in the video lesson is shown below for your convenience.
|
1 2 3 4 5 6 7 8 9 10 11 12 13 14 15 16 17 18 19 20 21 22 23 24 25 26 27 28 29 30 31 32 33 34 35 36 37 38 39 40 41 42 43 44 45 46 47 48 49 50 51 52 53 54 55 56 57 58 59 60 61 62 63 64 65 66 67 68 69 70 71 72 |
int speedPin=5; int dir1=4; int dir2=3; int BP1=8; int BP2=9; int B1Val; int B2Val; int mSpeed=0; int dt=500; void setup() { // put your setup code here, to run once: pinMode(speedPin,OUTPUT); pinMode(dir1,OUTPUT); pinMode(dir2,OUTPUT); pinMode(BP1,INPUT); pinMode(BP2,INPUT); digitalWrite(BP1, HIGH); digitalWrite(BP2, HIGH); Serial.begin(9600); } void loop() { // put your main code here, to run repeatedly: B1Val=digitalRead(BP1); B2Val=digitalRead(BP2); Serial.print("Motor Speed "); Serial.println(mSpeed); if (B1Val==0){ mSpeed=mSpeed-10; delay(dt); } if (B2Val==0){ mSpeed=mSpeed+10; delay(dt); } if (mSpeed>255){ mSpeed=255; } if (mSpeed<-255){ mSpeed=-255; } if (mSpeed==10){ mSpeed=100; } if (mSpeed==-10){ mSpeed=-100; } if (mSpeed==90 || mSpeed ==95){ mSpeed=0; } if (mSpeed==-90 || mSpeed==-95){ mSpeed=0; } if (mSpeed==0){ analogWrite(speedPin,0); } if (mSpeed>0){ digitalWrite(dir1,LOW); digitalWrite(dir2,HIGH); analogWrite(speedPin,mSpeed); } if (mSpeed<0){ digitalWrite(dir1,HIGH); digitalWrite(dir2,LOW); analogWrite(speedPin,abs(mSpeed)); } } |