
Be sure to tune into the LiveStream of our Launch of Eagle VI. Things begin at 7:45 AM CST on March 8. Tune in live, and give us a shout out on the Live Stream!
Tag Archives: Edge of Space
LESSON 27: Instrument Package
In this lesson we bring together a lot of the material from the first 26 lessons to create an instrument package that could be deployed in a demonstration project. We will wire wrap up an Arduino Nano, a Virtuabotix SD card reader, and the Adafruit Ultimate GPS to create a system that will track and log position and altitude, and save the data in a format that can be displayed on Google Earth.
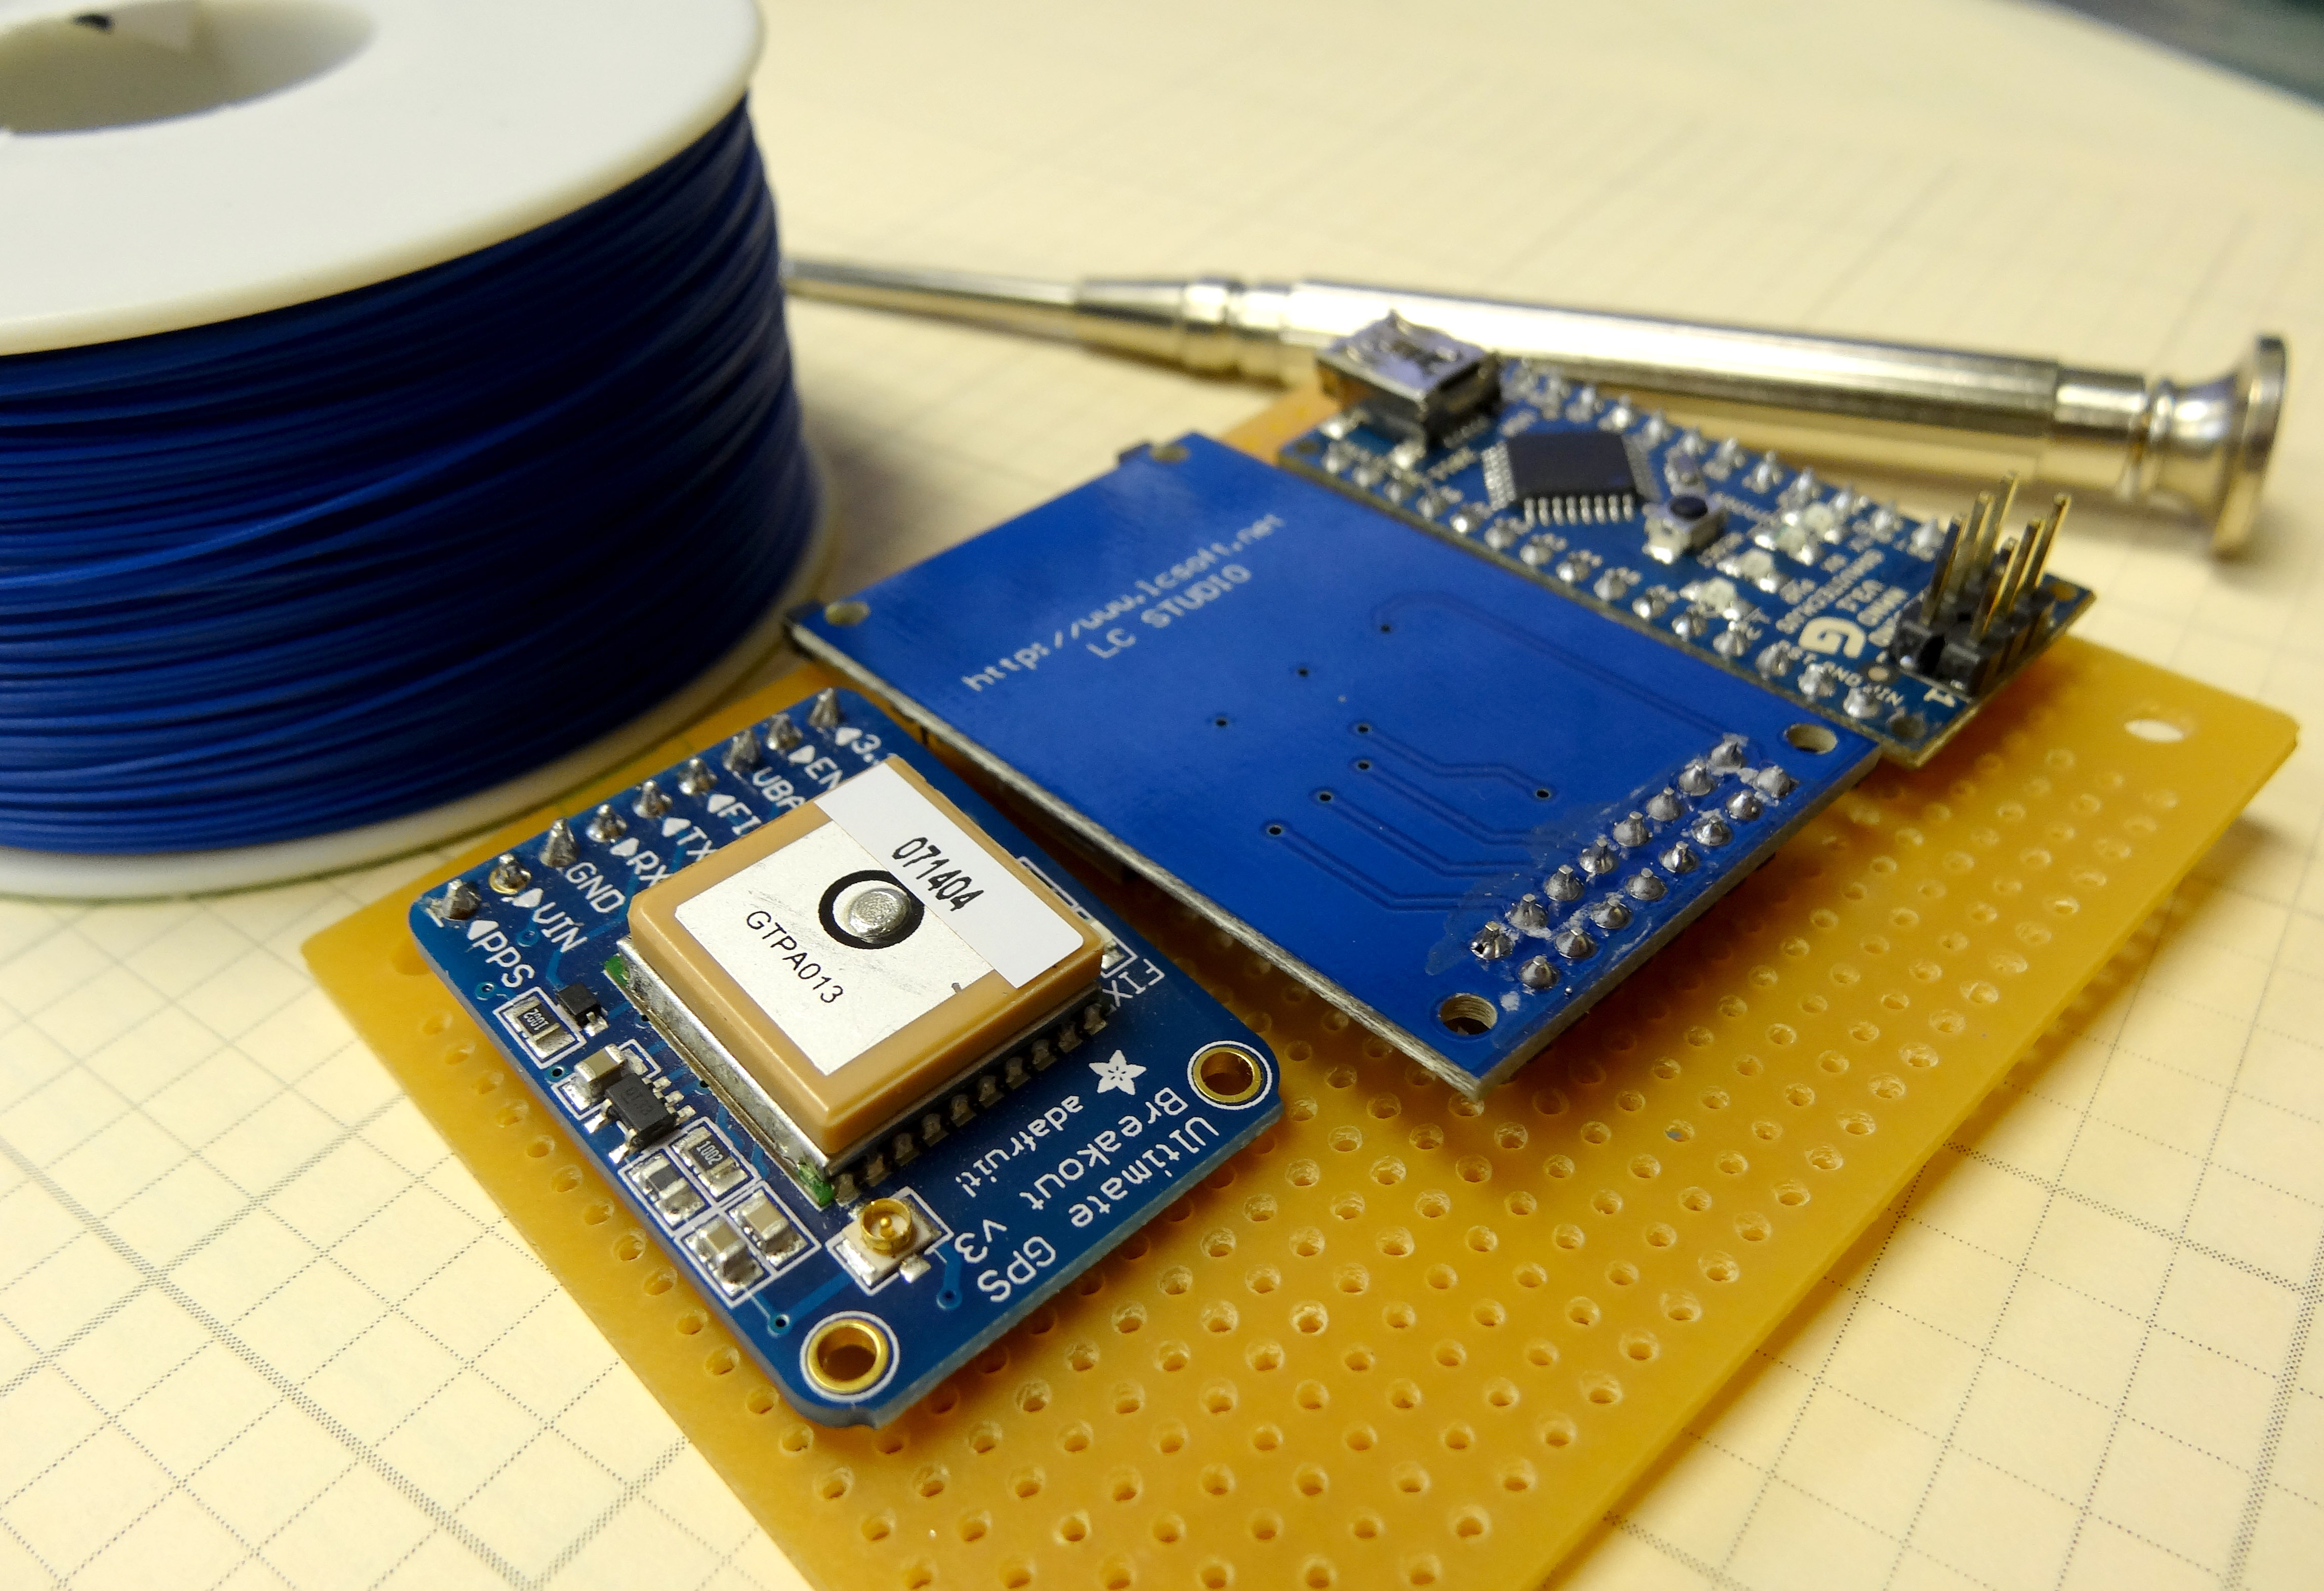
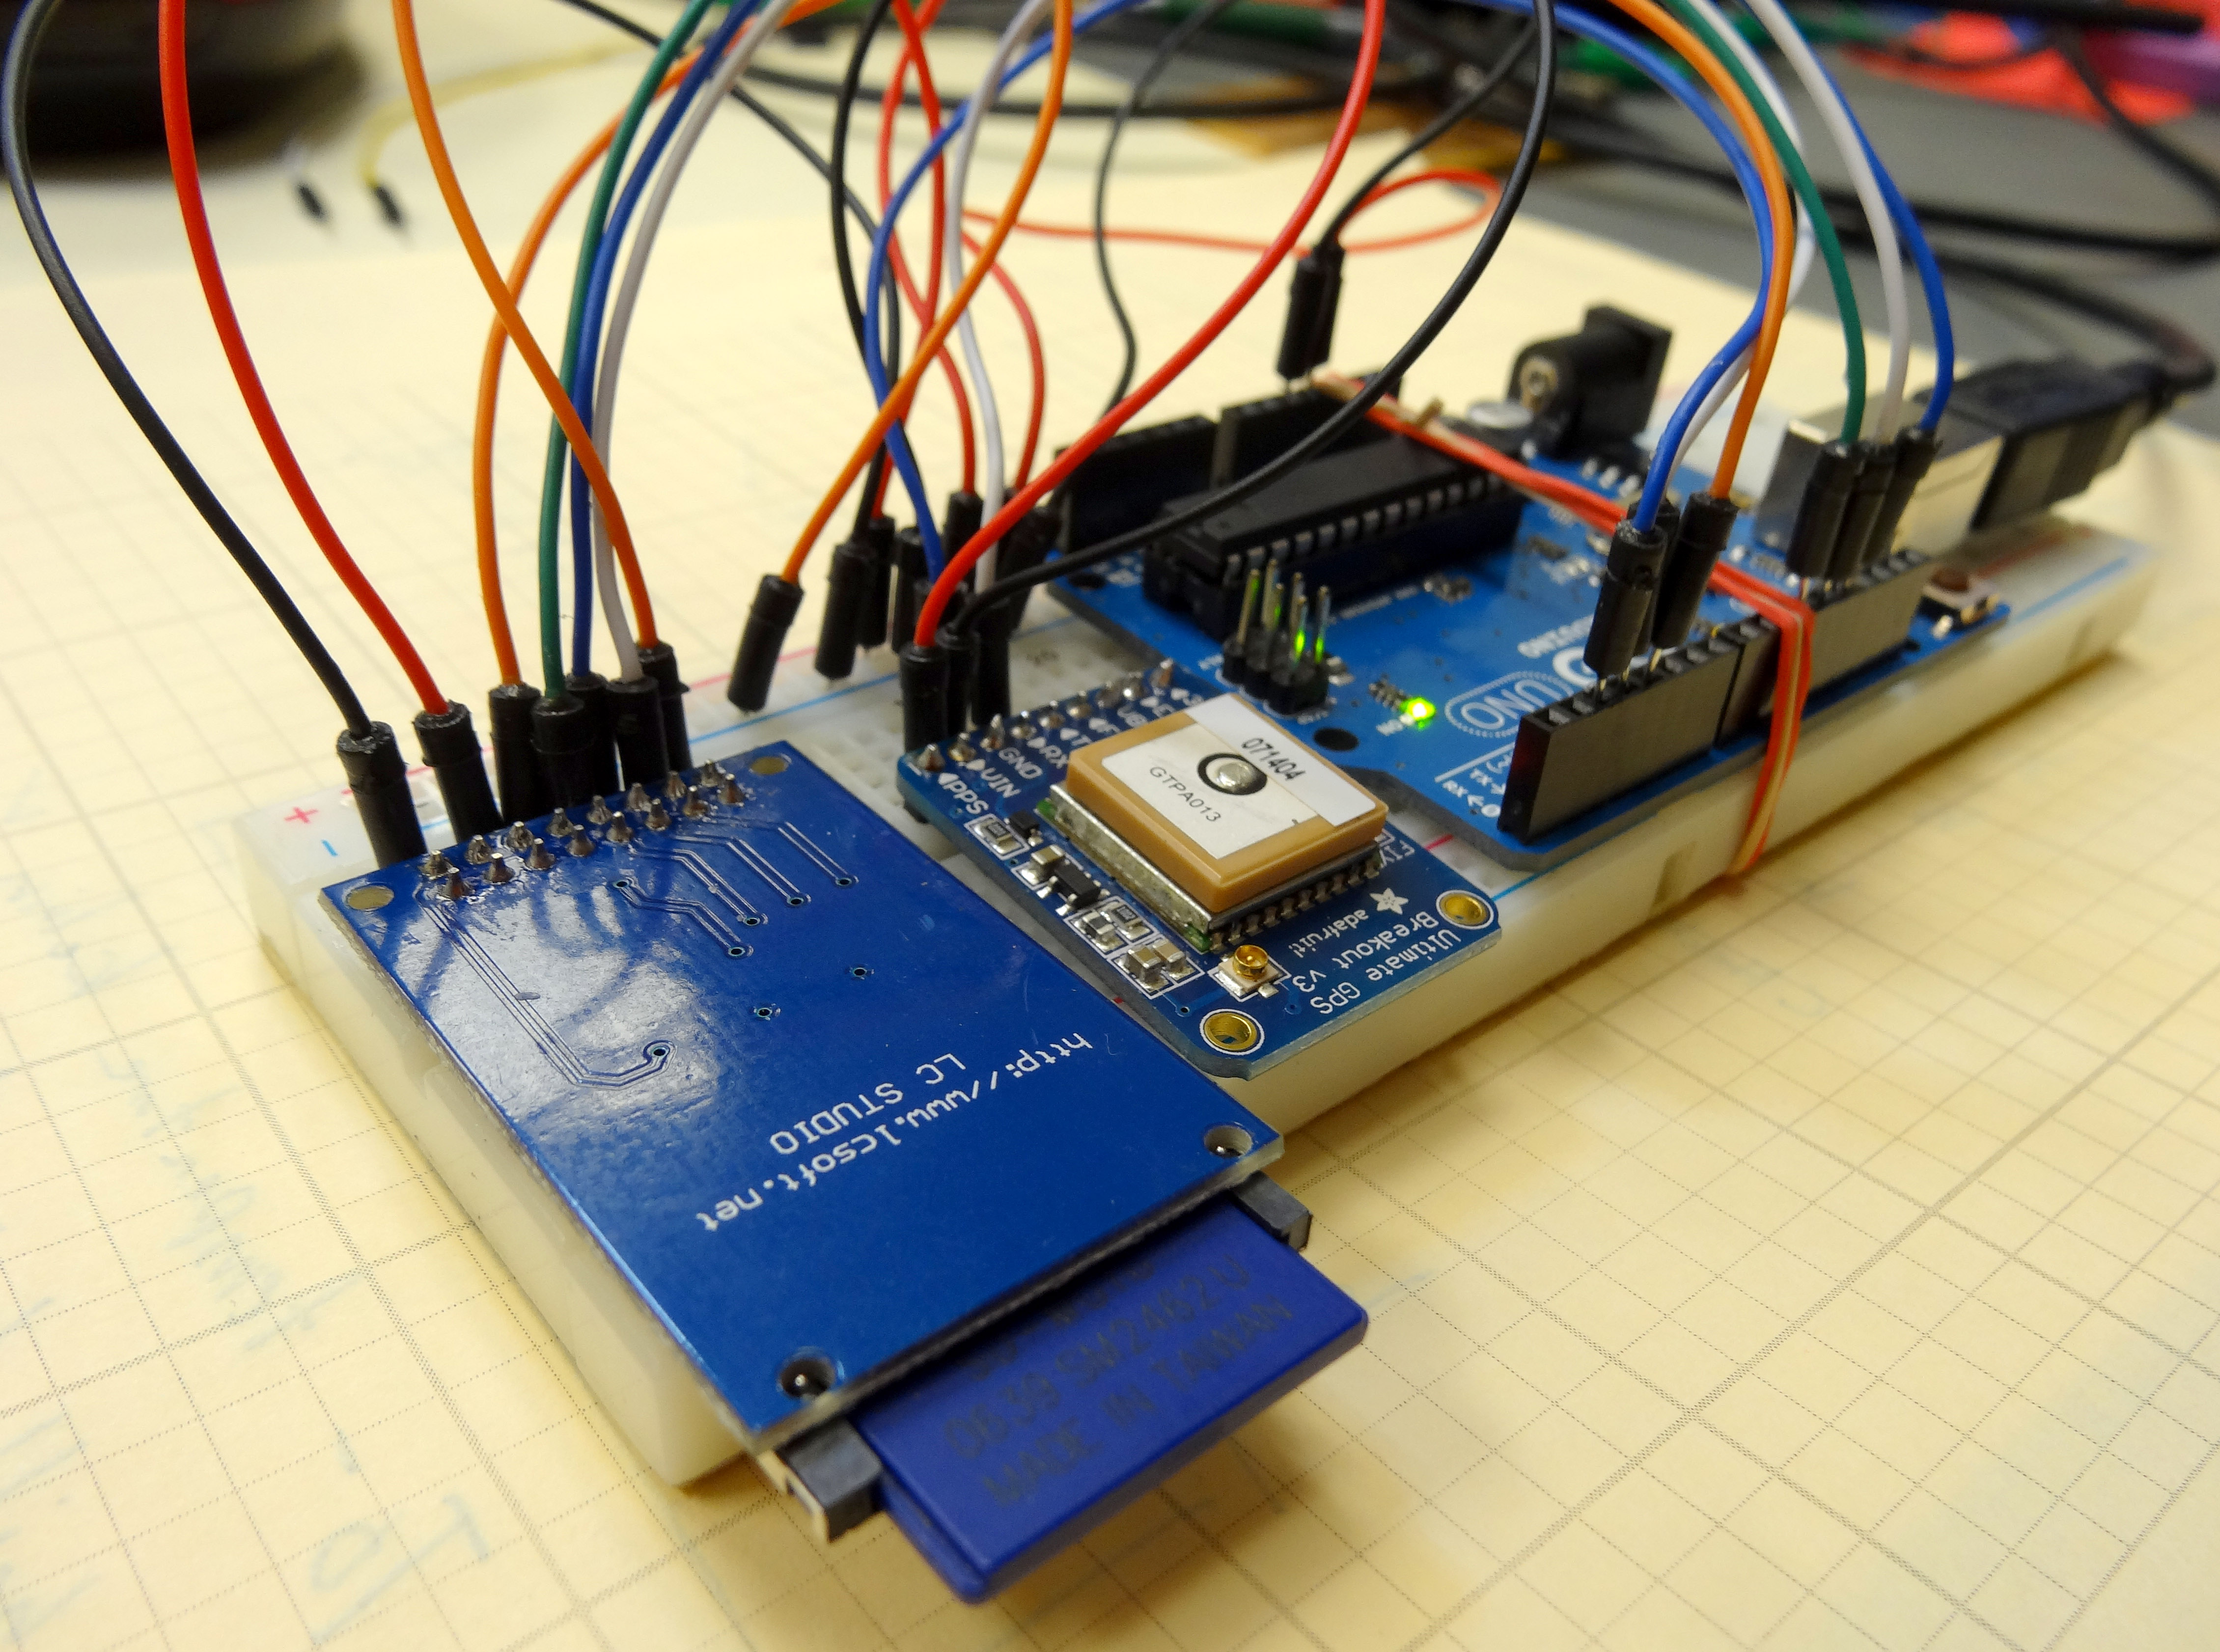
You will want to place the Adafruit GPS, the SD Card Reader, and the Arduino Nano into a perf board. Then, you will want to carefully wire wrap the components as follows:
Connecting the Adafruit Ultimate GPS Unit to Arduino |
|
| GPS Pin | Arduino Pin |
| Vin | 5V |
| GND | GND |
| RX | Pin 2 |
| TX | Pin 3 |
Connecting the SD Card Reader |
||
| Sd Card Reader Pin | Arduino Pin | Details |
| GND | GND | Common Ground |
| 3.3 V – (NOT USED) | ||
| +5 | 5V | Power |
| CS | 4 | Chip Select |
| MOSI | 11 | SPI Data |
| SCK | 13 | Clock |
| MISO | 12 | SPI Data |
| GND | GND | Common Ground |
Now the code you developed in LESSON 26 should run on this prototype. The code creates a Google Earth friendly set of coordinates. Just put a KML wrapper on the coordinates as described in LESSON 26. Putting it all together, I took the system outside and walked around, and this is the data track I got.

LESSON 23: Arduino GPS with Data Logger
In this lesson we will extend what we did in lesson 22 to include a data logger with our GPS. You should be sure and do lesson 22 first, as that shows you how to hook up and program the GPS. In this project we will connect an SD Card Reader/Writer, and will power the whole thing with a 9 Volt battery. With this, you can walk around, and the device will constantly monitor and log your position. You can then bring it back inside, and look at where you have been using Google Earth.
To start with, lets talk about what you will need to do this project. As described earlier, you need to start by doing lesson 22 which will get you going on the GPS hookup and initial software. Now, to move forward, you will need an Arduino, Adafruit Ultimate GPS, Virtuabotix SD card reader, and a Battery Clip to power the arduino during your mobile jaunts. You will need a 9V battery. If you are going to be doing a lot of mobile work, it is probably worth it to invest in a good 9v Rechargable battery system.
When you get your gear gathered up, you will be ready to get this project going. First, hook the GPS up to the arduino as we did in lesson 22:
Connecting the Adafruit Ultimate GPS Unit to Arduino |
|
| GPS Pin | Arduino Pin |
| Vin | 5V |
| GND | GND |
| RX | Pin 2 |
| TX | Pin 3 |
You also need to hook up the SC Card Reader/Writer. You should be familiar with this from lesson 21.
Connecting the SD Card Reader |
||
| Sd Card Reader Pin | Arduino Pin | Details |
| GND | GND | Common Ground |
| 3.3 V – (NOT USED) | ||
| +5 | 5V | Power |
| CS | 4 | Chip Select |
| MOSI | 11 | SPI Data |
| SCK | 13 | Clock |
| MISO | 12 | SPI Data |
| GND | GND | Common Ground |
Remember that this SD card reader has two rows of pins. Don’t let that confuse you, both rows are equivalent. You can connect to either row.
Most of the code has already been written in Lesson 22. In this lesson, the main thing we will be doing is to write the GPS data to the SD card. This way, as we walk around outside, it will log our positions to the SD card. We will create two files. One will hold the raw NMEA sentences, and the other our location data, as parsed by the adafruit GPS library. You should be able to figure most of this out from what you already know from lesson 22 and lesson 21. In the video above, we take you through this code step-by-step, so watch the video to understand what we are doing. If you get stuck, you can look at the code below.
|
1 2 3 4 5 6 7 8 9 10 11 12 13 14 15 16 17 18 19 20 21 22 23 24 25 26 27 28 29 30 31 32 33 34 35 36 37 38 39 40 41 42 43 44 45 46 47 48 49 50 51 52 53 54 55 56 57 58 59 60 61 62 63 64 65 66 67 68 69 70 71 72 73 74 75 76 77 78 79 80 81 82 83 84 85 86 87 88 89 90 91 92 93 94 95 96 |
#include <SD.h> //Load SD card library #include<SPI.h> //Load SPI Library #include <Adafruit_GPS.h> //Install the adafruit GPS library #include <SoftwareSerial.h> //Load the Software Serial library SoftwareSerial mySerial(3,2); //Initialize the Software Serial port Adafruit_GPS GPS(&mySerial); //Create the GPS Object String NMEA1; //Variable for first NMEA sentence String NMEA2; //Variable for second NMEA sentence char c; //to read characters coming from the GPS int chipSelect = 4; //chipSelect pin for the SD card Reader File mySensorData; //Data object you will write your sesnor data to void setup() { Serial.begin(115200); //Turn on serial monitor GPS.begin(9600); //Turn on GPS at 9600 baud GPS.sendCommand("$PGCMD,33,0*6D"); //Turn off antenna update nuisance data GPS.sendCommand(PMTK_SET_NMEA_OUTPUT_RMCGGA); //Request RMC and GGA Sentences only GPS.sendCommand(PMTK_SET_NMEA_UPDATE_1HZ); //Set update rate to 1 hz delay(1000); pinMode(10, OUTPUT); //Must declare 10 an output and reserve it to keep SD card happy SD.begin(chipSelect); //Initialize the SD card reader if (SD.exists("NMEA.txt")) { //Delete old data files to start fresh SD.remove("NMEA.txt"); } if (SD.exists("GPSData.txt")) { //Delete old data files to start fresh SD.remove("GPSData.txt"); } } void loop() { readGPS(); if(GPS.fix==1) { //Only save data if we have a fix mySensorData = SD.open("NMEA.txt", FILE_WRITE); //Open file on SD card for writing mySensorData.println(NMEA1); //Write first NMEA to SD card mySensorData.println(NMEA2); //Write Second NMEA to SD card mySensorData.close(); //Close the file mySensorData = SD.open("GPSData.txt", FILE_WRITE); mySensorData.print(GPS.latitude,4); //Write measured latitude to file mySensorData.print(GPS.lat); //Which hemisphere N or S mySensorData.print(","); mySensorData.print(GPS.longitude,4); //Write measured longitude to file mySensorData.print(GPS.lon); //Which Hemisphere E or W mySensorData.print(","); mySensorData.println(GPS.altitude); mySensorData.close(); } } void readGPS() { clearGPS(); while(!GPS.newNMEAreceived()) { //Loop until you have a good NMEA sentence c=GPS.read(); } GPS.parse(GPS.lastNMEA()); //Parse that last good NMEA sentence NMEA1=GPS.lastNMEA(); while(!GPS.newNMEAreceived()) { //Loop until you have a good NMEA sentence c=GPS.read(); } GPS.parse(GPS.lastNMEA()); //Parse that last good NMEA sentence NMEA2=GPS.lastNMEA(); Serial.println(NMEA1); Serial.println(NMEA2); Serial.println(""); } void clearGPS() { //Clear old and corrupt data from serial port while(!GPS.newNMEAreceived()) { //Loop until you have a good NMEA sentence c=GPS.read(); } GPS.parse(GPS.lastNMEA()); //Parse that last good NMEA sentence while(!GPS.newNMEAreceived()) { //Loop until you have a good NMEA sentence c=GPS.read(); } GPS.parse(GPS.lastNMEA()); //Parse that last good NMEA sentence while(!GPS.newNMEAreceived()) { //Loop until you have a good NMEA sentence c=GPS.read(); } GPS.parse(GPS.lastNMEA()); //Parse that last good NMEA sentence } |
LESSON 22: Build an Arduino GPS Tracker
OK, it is time for us to take our projects up to that next level. We are going to build a GPS tracker from scratch. This is going to take several lessons to complete, but it will build on what you already know, and is really not going to be that difficult of a project. We will be using the most excellent Adafruit Ultimate GPS module. This is an excellent GPS. I like it because it is affordable, easy to use, and is one of the few that will work at extreme elevations, making it ideal for our Edge of Space/High Altitude Balloon work.
This unit is pretty easy to hook up, as you can see in the Table below:
Connecting the Adafruit Ultimate GPS Unit to Arduino |
|
| GPS Pin | Arduino Pin |
| Vin | 5V |
| GND | GND |
| RX | Pin 2 |
| TX | Pin 3 |
Our goal in this lesson is to get the GPS connected, and get it reading NMEA sentences. NMEA is a data format used by GPS and mapping devices and software to keep track of position coordinates. There are lots of different NMEA sentences, but the two that contain the most useful information are the $GPRMC and $GPGGA sentences.
Our interest is in creating a location tracker for our High Altitude Balloon work, and the $GPRMC and $GPGGA sentences contain all the information and data we would need for that work. These sentences contain the lattitude, longitude, time, altitude, and velocity.
The GPS modules are pretty easy to work with. When you apply power to the GPS, it immediately starts spitting out NMEA sentences to its serial port. Our job on the arduino side is to simply read these data strings, and then parse them into useful data. The thing that is a challenge is that they constantly spit out data, whether you want it, or whether you are ready for it or not. In developing the software, we have to be mindful the the data is always spewing out of the GPS. Typically, we will have other components on our package, like temperature, pressure and inertial sensors. While our arduino is out making measurements on these other sensors, data continues to stream in from the GPS, likely overflowing our serial buffer. When we return to make a GPS measurement, it is very likely that the serial buffer will have old or corrupt GPS data in it. Hence, we must be mindful to deal with this issue in developing our software.
The video above takes you step-by-step through connecting and reading the NMEA sentences step-by-step. Then in the next lesson we will parse and log the data to create a portable GPS tracker. The code below is explained in the video. You need to watch the video to understand this code, and so you will be able to begin to work with this code to create a portable GPS tracker.
In order for this software to work, you need to download and install the Adafruit GPS Library.
|
1 2 3 4 5 6 7 8 9 10 11 12 13 14 15 16 17 18 19 20 21 22 23 24 25 26 27 28 29 30 31 32 33 34 35 36 37 38 39 40 41 42 43 44 45 46 47 48 49 50 51 52 53 |
//Make sure to install the adafruit GPS library from https://github.com/adafruit/Adafruit-GPS-Library #include <Adafruit_GPS.h> //Load the GPS Library. Make sure you have installed the library form the adafruit site above #include <SoftwareSerial.h> //Load the Software Serial Library. This library in effect gives the arduino additional serial ports SoftwareSerial mySerial(3, 2); //Initialize SoftwareSerial, and tell it you will be connecting through pins 2 and 3 Adafruit_GPS GPS(&mySerial); //Create GPS object String NMEA1; //We will use this variable to hold our first NMEA sentence String NMEA2; //We will use this variable to hold our second NMEA sentence char c; //Used to read the characters spewing from the GPS module void setup() { Serial.begin(115200); //Turn on the Serial Monitor GPS.begin(9600); //Turn GPS on at baud rate of 9600 GPS.sendCommand("$PGCMD,33,0*6D"); // Turn Off GPS Antenna Update GPS.sendCommand(PMTK_SET_NMEA_OUTPUT_RMCGGA); //Tell GPS we want only $GPRMC and $GPGGA NMEA sentences GPS.sendCommand(PMTK_SET_NMEA_UPDATE_1HZ); // 1 Hz update rate delay(1000); //Pause } void loop() // run over and over again { readGPS(); //This is a function we define below which reads two NMEA sentences from GPS } void readGPS(){ //This function will read and remember two NMEA sentences from GPS clearGPS(); //Serial port probably has old or corrupt data, so begin by clearing it all out while(!GPS.newNMEAreceived()) { //Keep reading characters in this loop until a good NMEA sentence is received c=GPS.read(); //read a character from the GPS } GPS.parse(GPS.lastNMEA()); //Once you get a good NMEA, parse it NMEA1=GPS.lastNMEA(); //Once parsed, save NMEA sentence into NMEA1 while(!GPS.newNMEAreceived()) { //Go out and get the second NMEA sentence, should be different type than the first one read above. c=GPS.read(); } GPS.parse(GPS.lastNMEA()); NMEA2=GPS.lastNMEA(); Serial.println(NMEA1); Serial.println(NMEA2); Serial.println(""); } void clearGPS() { //Since between GPS reads, we still have data streaming in, we need to clear the old data by reading a few sentences, and discarding these while(!GPS.newNMEAreceived()) { c=GPS.read(); } GPS.parse(GPS.lastNMEA()); while(!GPS.newNMEAreceived()) { c=GPS.read(); } GPS.parse(GPS.lastNMEA()); } |
From the Edge of Space
I want to whet your appetite a little today about the types of projects we will be covering in this blog. One of the things I love to do is send instrument packages to the edge of space. As this blog develops, I hope to be able to share with you lots of the technology, logistics and rules associated with this fascinating endeavor. For now, let me share a video from our last flight. Enjoy the serenity as our probe hovers at 120,000 feet. At this altitude, you can see the blackness of space and the curvature of the earth. The thin blue line is the earth’s atmosphere. Enjoy!