
In today’s lesson we discuss the topic of Hexadecimal numbers, and why they are important. As discussed previously, digital devices are nothing more than an incredibly large number of simple on/off switches connected together in clever ways to achieve useful functions. Since there is a need to represent numbers using only on/off switches, the binary number system is used. A switch that is in the on condition can be thought of as a “1” while a switch in the off condition can be thought of as a “0”. by stacking these switches side by side, we can represent almost any number by simply working with enough switches. As things got more complex, and the number of switches increased, it became untenable to keep up with all the 0’s and 1’s. Hence, groups of 4 switches were bunched together, and the Hexadecimal system was born. Understand Hexadecimal is simply a way to keep track of switches that is more convenient than the Binary system. This video discusses in detail, and gives lots of examples.
Category Archives: Tutorial
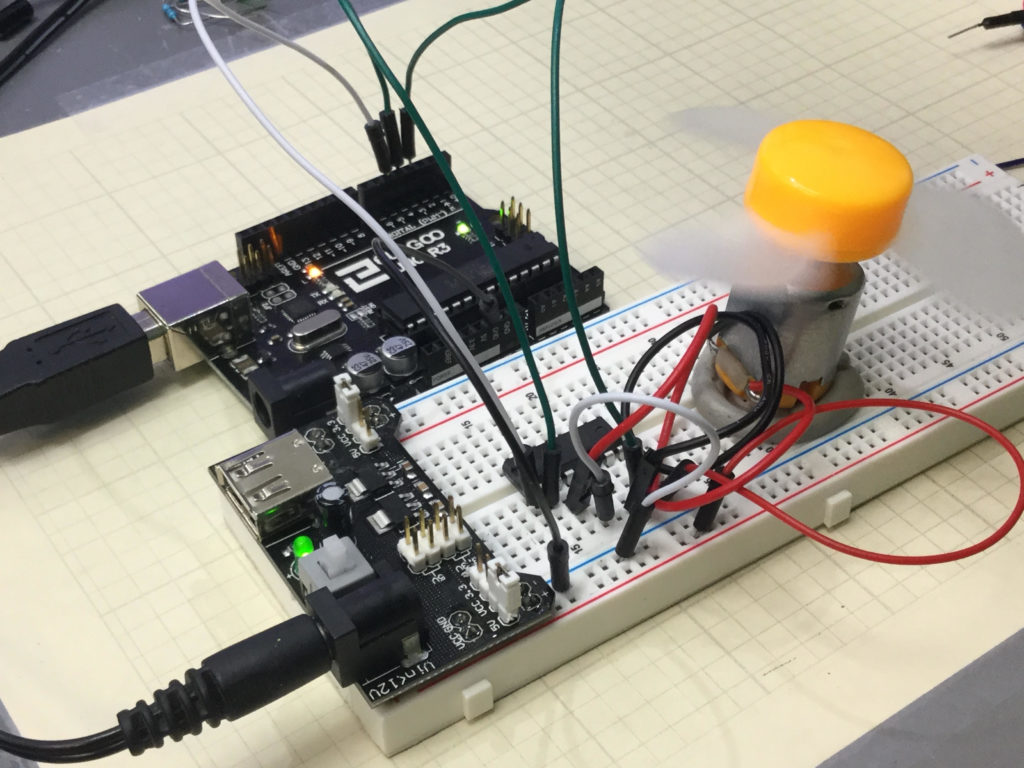
Arduino Tutorial 40: Controlling DC Motor Speed and Direction with Pushbuttons
In this lesson we explore how to control the speed and direction of a DC motor using two buttons. We are using the L293D motor controller and a small DC motor for demonstration purposes. An official Arduino Uno R3 is available HERE. In this new series of lessons, I will be using the sensor and other components found in this KIT. The basic circuit was explained in Lesson 37, and we are using that work as a starting point. The schematic below will get you started in connecting your circuit. Be sure and connect one of the Arduino ground pins to the ground rail in the second to the bottom row in the diagram below. It is good practice to connect all your grounds together.
The code we developed in the video lesson is shown below for your convenience.
1 2 3 4 5 6 7 8 9 10 11 12 13 14 15 16 17 18 19 20 21 22 23 24 25 26 27 28 29 30 31 32 33 34 35 36 37 38 39 40 41 42 43 44 45 46 47 48 49 50 51 52 53 54 55 56 57 58 59 60 61 62 63 64 65 66 67 68 69 70 71 72 | int speedPin=5; int dir1=4; int dir2=3; int BP1=8; int BP2=9; int B1Val; int B2Val; int mSpeed=0; int dt=500; void setup() { // put your setup code here, to run once: pinMode(speedPin,OUTPUT); pinMode(dir1,OUTPUT); pinMode(dir2,OUTPUT); pinMode(BP1,INPUT); pinMode(BP2,INPUT); digitalWrite(BP1, HIGH); digitalWrite(BP2, HIGH); Serial.begin(9600); } void loop() { // put your main code here, to run repeatedly: B1Val=digitalRead(BP1); B2Val=digitalRead(BP2); Serial.print("Motor Speed "); Serial.println(mSpeed); if (B1Val==0){ mSpeed=mSpeed-10; delay(dt); } if (B2Val==0){ mSpeed=mSpeed+10; delay(dt); } if (mSpeed>255){ mSpeed=255; } if (mSpeed<-255){ mSpeed=-255; } if (mSpeed==10){ mSpeed=100; } if (mSpeed==-10){ mSpeed=-100; } if (mSpeed==90 || mSpeed ==95){ mSpeed=0; } if (mSpeed==-90 || mSpeed==-95){ mSpeed=0; } if (mSpeed==0){ analogWrite(speedPin,0); } if (mSpeed>0){ digitalWrite(dir1,LOW); digitalWrite(dir2,HIGH); analogWrite(speedPin,mSpeed); } if (mSpeed<0){ digitalWrite(dir1,HIGH); digitalWrite(dir2,LOW); analogWrite(speedPin,abs(mSpeed)); } } |
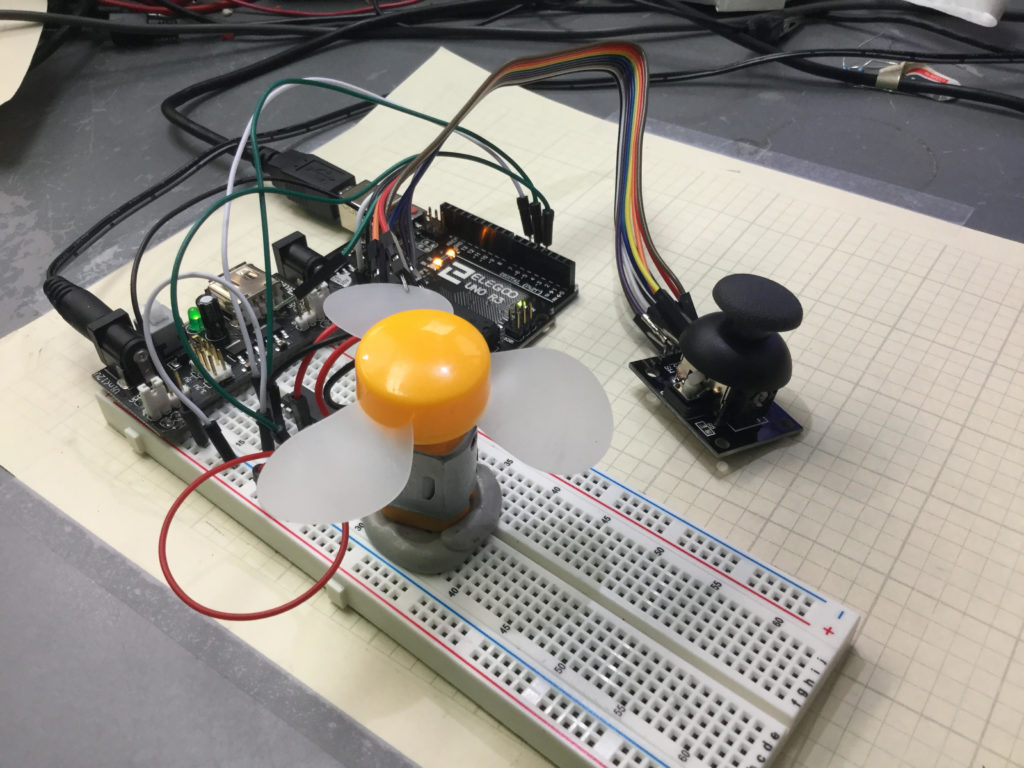
Arduino Tutorial 39: Using a Joystick to Control DC Motor Speed and Direction
Lesson 37 and 38 showed some preliminary concepts in controlling a DC motor using an arduino and the L293D motor controller. In the video above we show how to control the speed and direction of a simple DC motor using a joystick. In the neutral position, the motor is stationary. Then the speed smoothly increases as you move the joystick forward, until you reach maximum speed.
Lesson 37 and 38 showed some preliminary concepts in controlling a DC motor using an arduino and the L293D motor controller. In the video above we show how to control the speed and direction of a simple DC motor using a joystick. In the neutral position, the motor is stationary. Then the speed smoothly increases as you move the joystick forward, until you reach maximum speed. Similarly, in pulling the joystick back from the neutral position, the motor gradually increases speed in the reverse direction. The diagram below shows the basic motor control schematic we are working from.
In the circuit diagram above, we also add a wire to connect the arduino ground to the power supply ground. It is always good to have all components connected to a common ground rail. Of course, you also need to add the joystick controller as shown in the video.
This is the code we used in this
1 2 3 4 5 6 7 8 9 10 11 12 13 14 15 16 17 18 19 20 21 22 23 24 25 26 27 28 29 30 31 32 33 34 35 | int speedPin=5; int dir1=4; int dir2=3; int mSpeed; int jPin=A1; int jVal; void setup() { // put your setup code here, to run once: pinMode(speedPin,OUTPUT); pinMode(dir1,OUTPUT); pinMode(dir2,OUTPUT); pinMode(jPin,INPUT); Serial.begin(9600); } void loop() { // put your main code here, to run repeatedly: jVal=analogRead(jPin); Serial.println(jVal); if (jVal<512){ digitalWrite(dir1,LOW); digitalWrite(dir2,HIGH); mSpeed=-255./512.*jVal+255.; analogWrite(speedPin,mSpeed); } if(jVal>=512){ digitalWrite(dir1,HIGH); digitalWrite(dir2,LOW); mSpeed=(255./512.)*jVal-255.; analogWrite(speedPin,mSpeed); } } |
An official Arduino Uno R3 is available HERE. In this new series of lessons, I will be using the sensor and other components found in this KIT.
Arduino Tutorial 38: Using a Tilt Switch Cut Off With a DC Motor
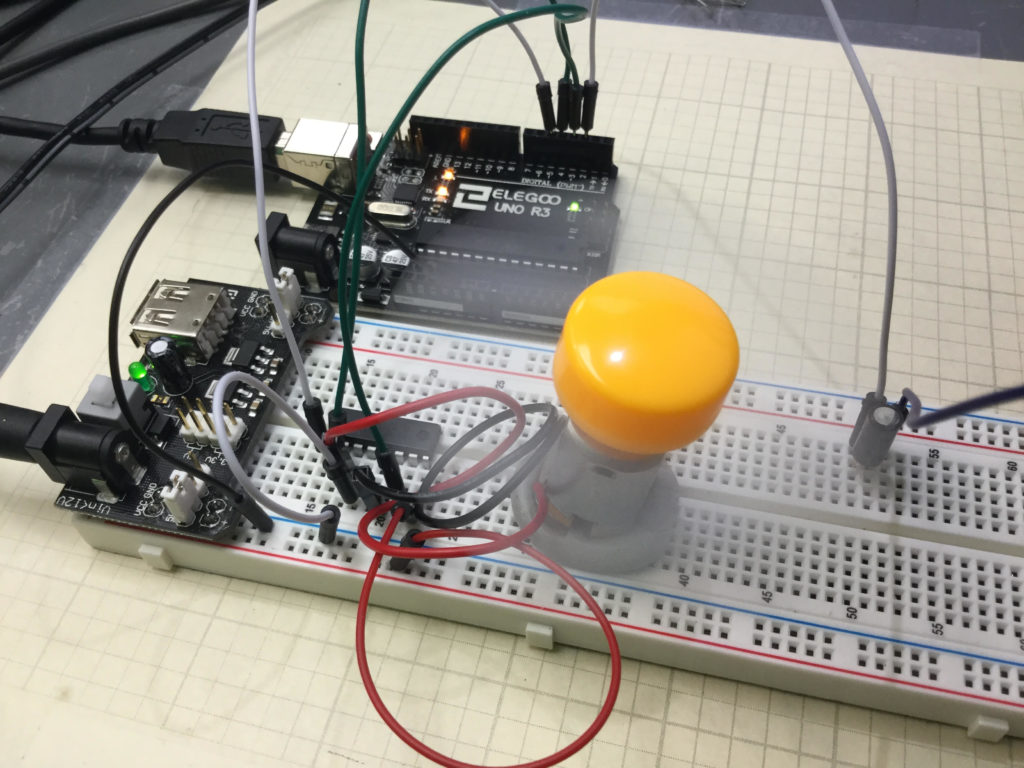
In this lesson we explore how to add a tilt cutoff to our DC motor project. In many cases, you may want to automatically turn your motors off in the case where your project or robot tips over. The tilt switch is a simple way to do this. The video below takes you through the process step-by-step.
If you need help hooking the circuit up, the diagram below shows you a schematic of what we are working with. An official Arduino Uno R3 is available HERE. In this new series of lessons, I will be using the sensor and other components found in this KIT.
In addition, you will need to add the tilt switch, as shown in the video.
Below is the code we used, with the tilt switch connected to pin 2 on the arduino.
1 2 3 4 5 6 7 8 9 10 11 12 13 14 15 16 17 18 19 20 21 22 23 24 25 26 27 28 29 30 31 32 | int speedPin=5; int dir1=4; int dir2=3; int mSpeed=255; int tiltPin=2; int tiltVal; void setup() { // put your setup code here, to run once: pinMode(speedPin,OUTPUT); pinMode(dir1,OUTPUT); pinMode(dir2,OUTPUT); pinMode(tiltPin,INPUT); digitalWrite(tiltPin,HIGH); Serial.begin(9600); } void loop() { // put your main code here, to run repeatedly: digitalWrite(dir1,LOW); digitalWrite(dir2,HIGH); tiltVal=digitalRead(tiltPin); Serial.println(tiltVal); if (tiltVal==0){ analogWrite(speedPin,mSpeed); } if (tiltVal==1){ analogWrite(speedPin,0); } } |
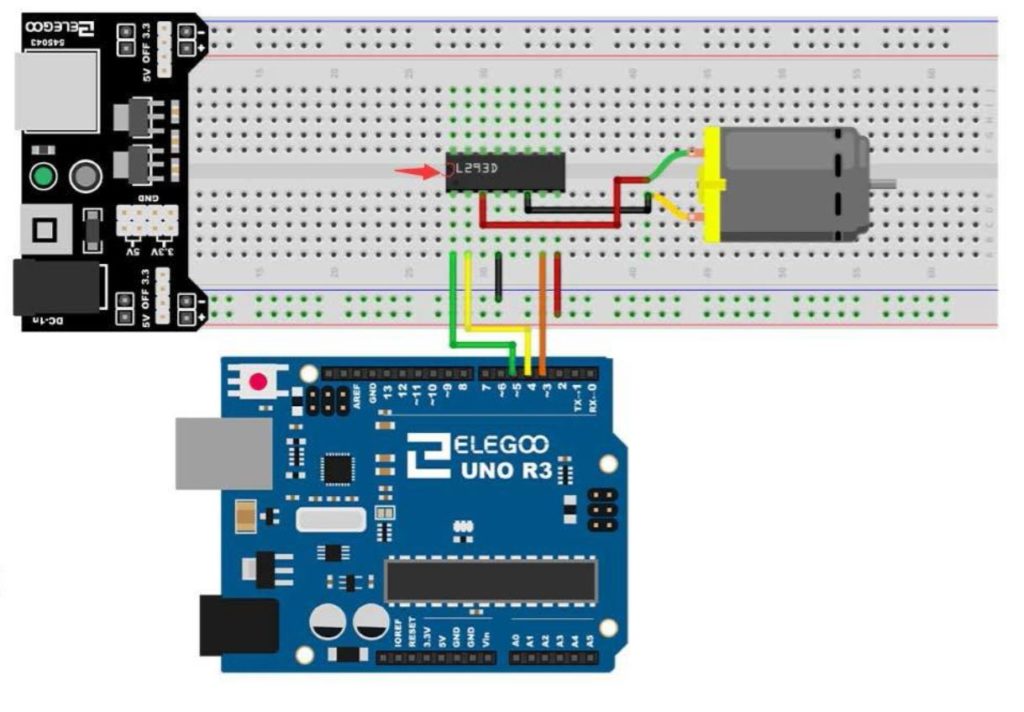
Arduino Tutorial 37: Understanding How to Control DC Motors in Projects
In this lesson we learn the ins and outs of controlling a DC Motor from an Arduino. A key aspect of this is to understand you must not connect a motor directly to an arduino. You need to either build a suitable transistor and diode circuit, or you need to utilize a motor controller, such as the L293D motor control chip.
The video below explains how to hook things up and how the code works. You must always be mindful that you are using a motor with current requirements that are consistent with the motor controller and power supply you are working with. Failure to do so could result in damage to components or injury.
The circuit used in this video tutorial is shown below:
It is a good practice to have all grounds connected in a circuit, so I would connect an arduino ground to the ground rail of the breadboard.
An official Arduino Uno R3 is available HERE. In this new series of lessons, I will be using the sensor and other components found in this KIT.
The code is described in the video, but if you need help, this is the code we used in the lesson.
1 2 3 4 5 6 7 8 9 10 11 12 13 14 15 16 17 18 19 20 21 22 23 | int speedPin=5; int dir1=4; int dir2=3; int mSpeed=90; void setup() { // put your setup code here, to run once: pinMode(speedPin,OUTPUT); pinMode(dir1,OUTPUT); pinMode(dir2,OUTPUT); Serial.begin(9600); } void loop() { // put your main code here, to run repeatedly: digitalWrite(dir1,LOW); digitalWrite(dir2,HIGH); analogWrite(speedPin,255); delay(25); analogWrite(speedPin,mSpeed); delay(5000); } |