
This lesson describes how to program the Xbee Series 1 radios. It will work with either the standard Series 1 (S1) or the Series 1 Pro models. The Pro radios are higher power and will give greater range, but they cost more. The radios are configured using X-CTU software, which can be downloaded here. The video gives step by step instructions on how to configure and use the radios to communicate wirelessly over the serial port. Lesson 14 gives information on the hardware needed. Lessons 1-13 sill show you how to communicate between Python and Arduino if you need to get caught up on basic serial communication and interfacing arduino and python. The techniques provided in the video above, however, should work for just about any arduino project where you want to communicate between two arduinos, an arduino and PC, or between two PCs.
Tag Archives: Tutorial
Python with Arduino Lesson 14: Introduction to Xbee Radios and Wireless Communication
In the video lesson above, we introduce our next series of lessons, which will step you through using Xbee radios to allow your arduino projects to wirelessly communicate with your PC. The good news is that you already know how to communicate between your Arduino and the PC over the serial cable based on our previous lessons. Using Xbee radios is very similar, you just remove the cable. You are still communicating over the serial ports, so the coding remains virtually unchanged . . . you just have to configure and connect the radios. In order to do these lessons, you will need a pair of Series 1 (S1) Xbee Radios (you will need two). If you want longer range, and are willing to pay more, you can get the Seris 1 (S1) Xbee Pro Radios.
To program the radios, you will need a SparkFun USB Explorer.
The final equipment you need will be an Xbee Shield. The shield allows you to plug the Xbee radio into the Arduino.
LESSON 27: Instrument Package
In this lesson we bring together a lot of the material from the first 26 lessons to create an instrument package that could be deployed in a demonstration project. We will wire wrap up an Arduino Nano, a Virtuabotix SD card reader, and the Adafruit Ultimate GPS to create a system that will track and log position and altitude, and save the data in a format that can be displayed on Google Earth.
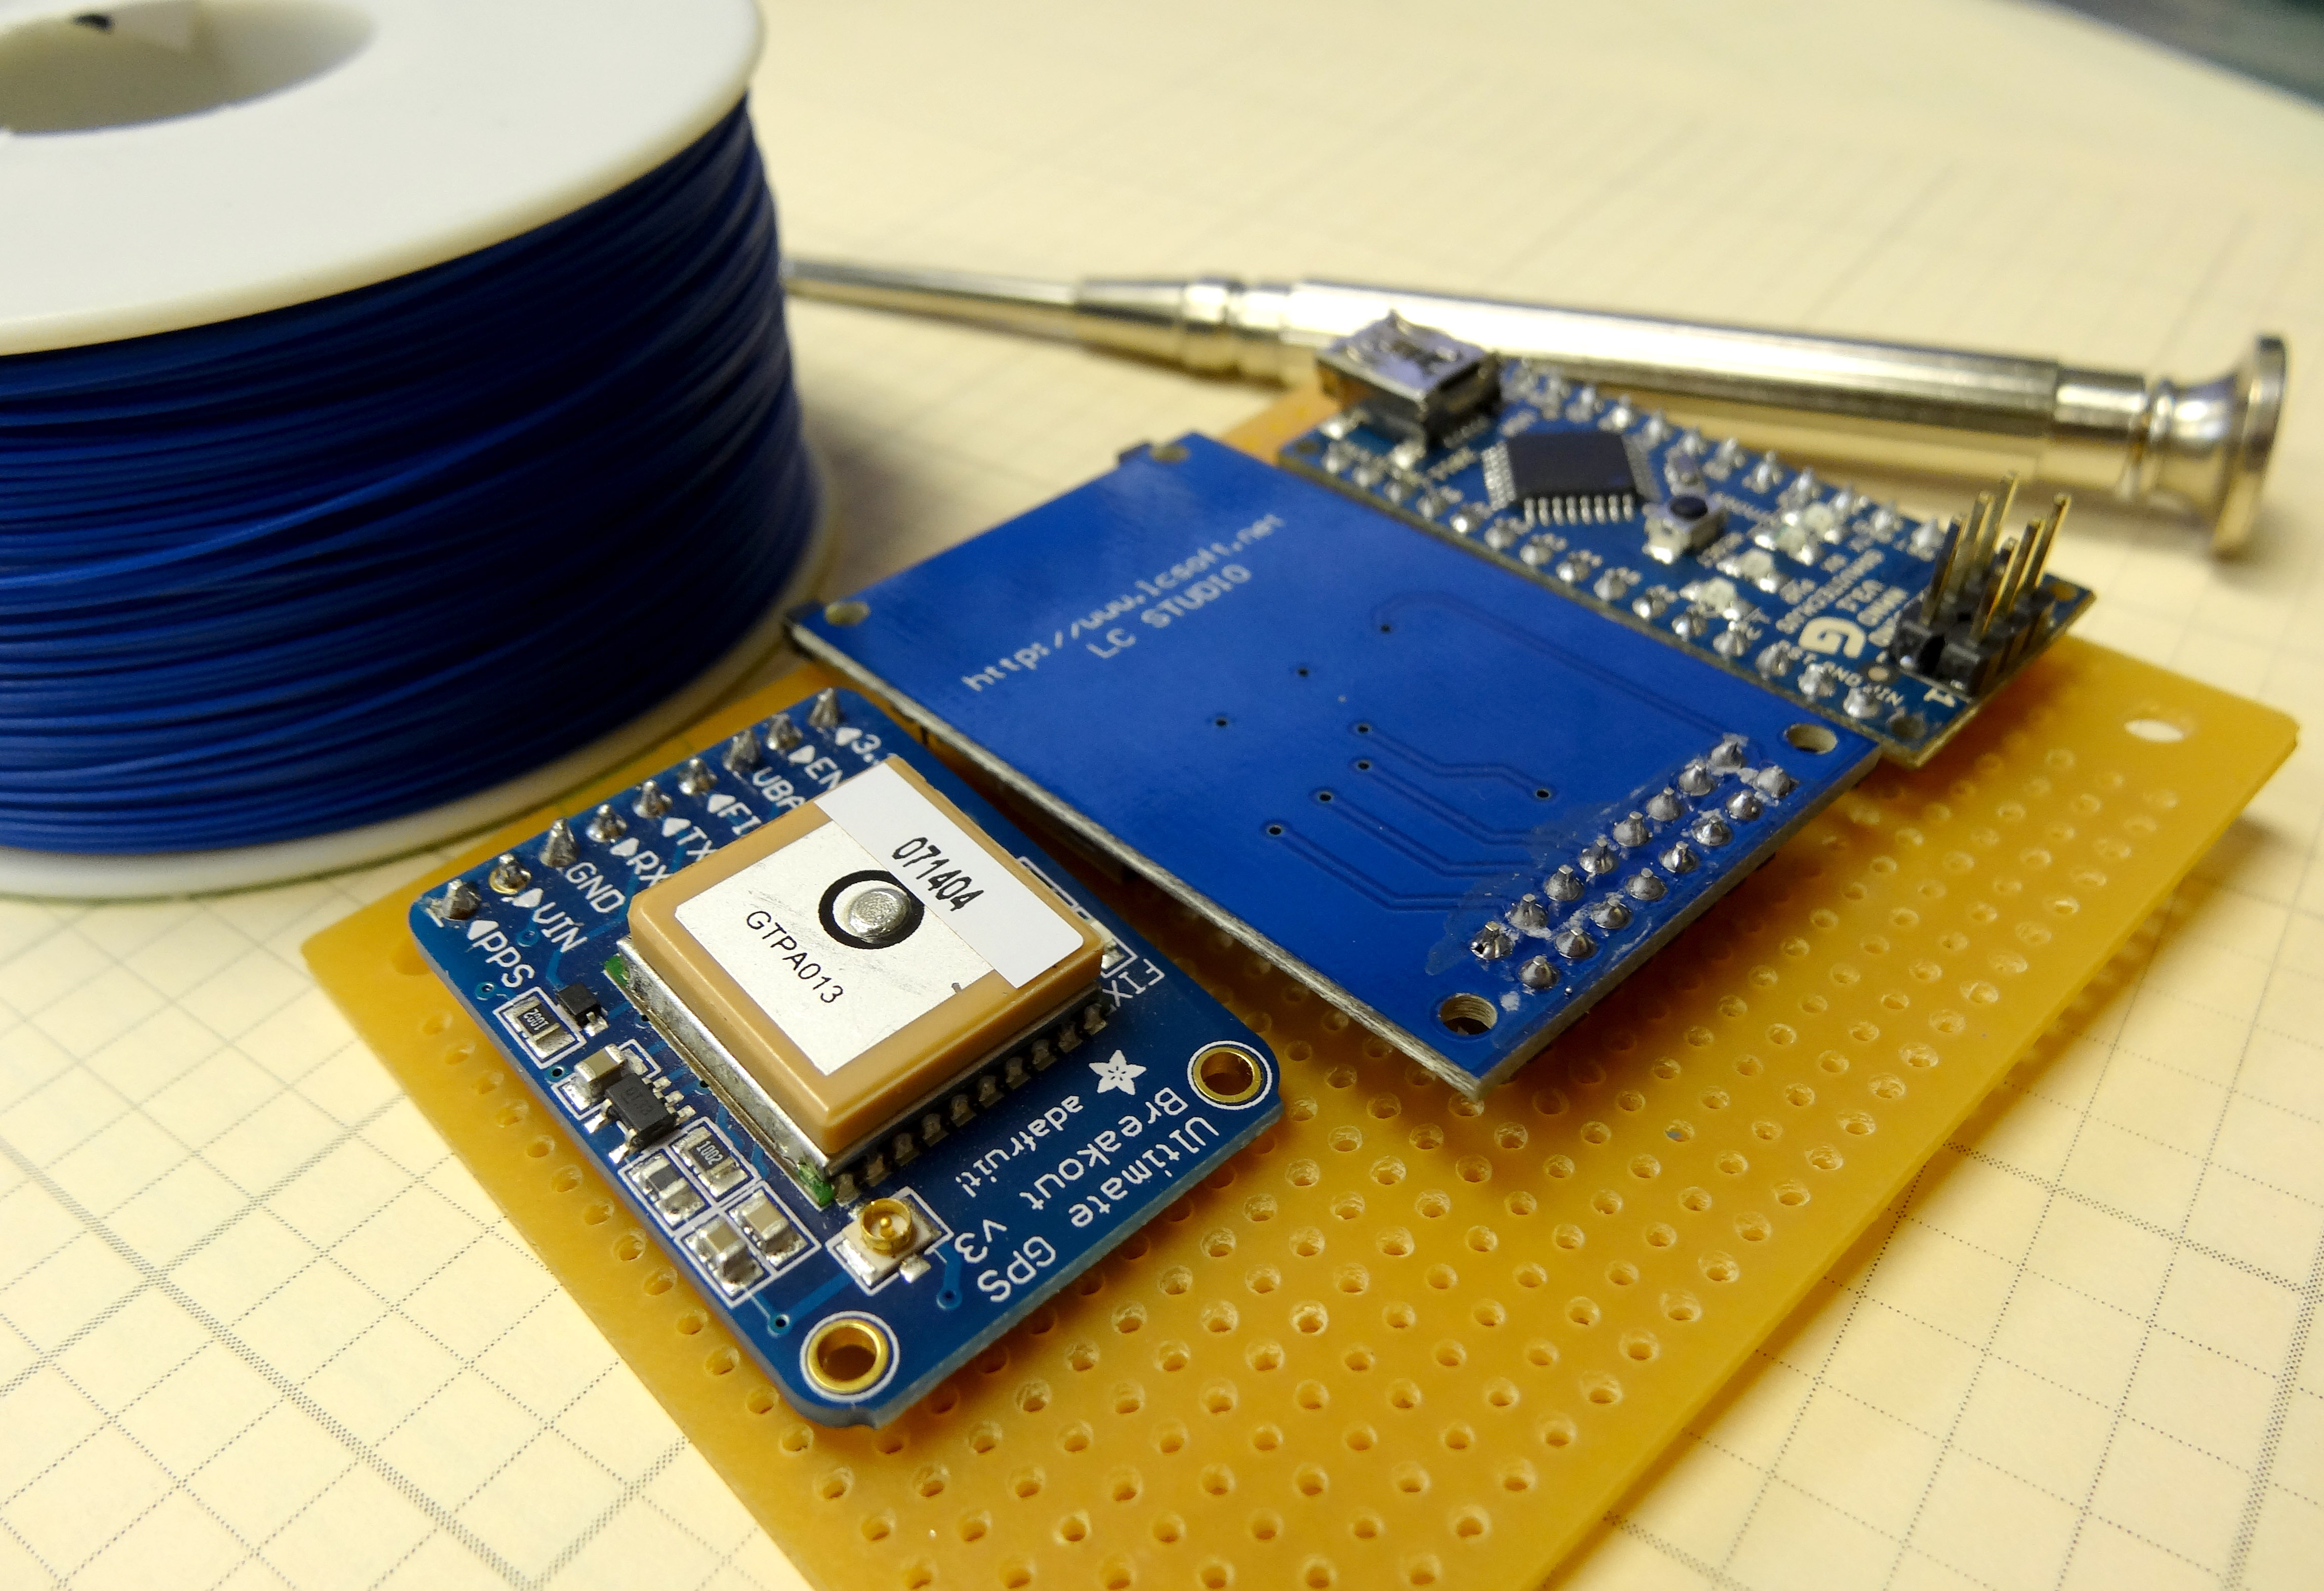
You will want to place the Adafruit GPS, the SD Card Reader, and the Arduino Nano into a perf board. Then, you will want to carefully wire wrap the components as follows:
Connecting the Adafruit Ultimate GPS Unit to Arduino |
|
| GPS Pin | Arduino Pin |
| Vin | 5V |
| GND | GND |
| RX | Pin 2 |
| TX | Pin 3 |
Connecting the SD Card Reader |
||
| Sd Card Reader Pin | Arduino Pin | Details |
| GND | GND | Common Ground |
| 3.3 V – (NOT USED) | ||
| +5 | 5V | Power |
| CS | 4 | Chip Select |
| MOSI | 11 | SPI Data |
| SCK | 13 | Clock |
| MISO | 12 | SPI Data |
| GND | GND | Common Ground |
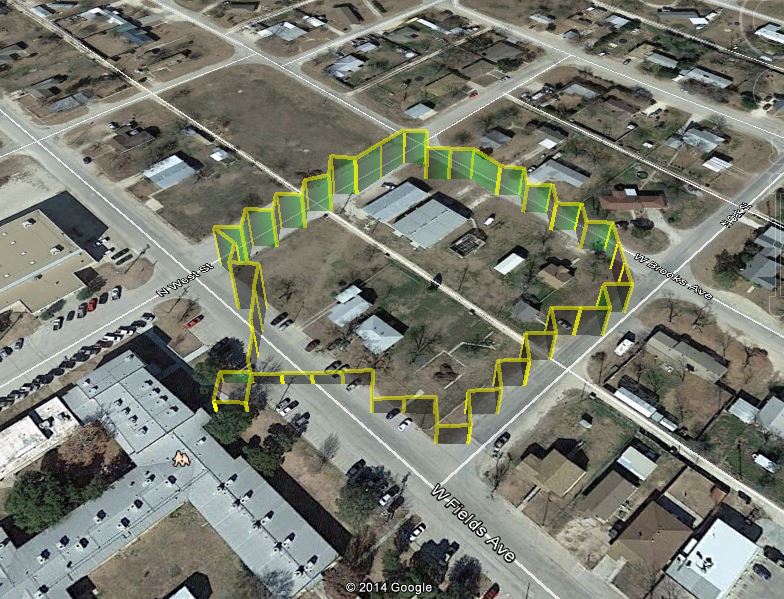
Now the code you developed in LESSON 26 should run on this prototype. The code creates a Google Earth friendly set of coordinates. Just put a KML wrapper on the coordinates as described in LESSON 26. Putting it all together, I took the system outside and walked around, and this is the data track I got.
LESSON 25: Display Your GPS Data as Track on Google Earth
In this lesson we will learn how to take the data we are logging from our GPS, and display it properly on Google Earth. This lesson builds on Lesson 22, Lesson 23 and Lesson 24. You will need to complete those lessons before undertaking this lesson. In this series of lessons we are using the Arduino, Adafruit Ultimate GPS, Virtuabotix SD card reader, and a Battery Clip to power the arduino during your mobile jaunts. You will need a 9V battery. If you are going to be doing a lot of mobile work, it is probably worth it to invest in a good 9v Rechargable battery system.
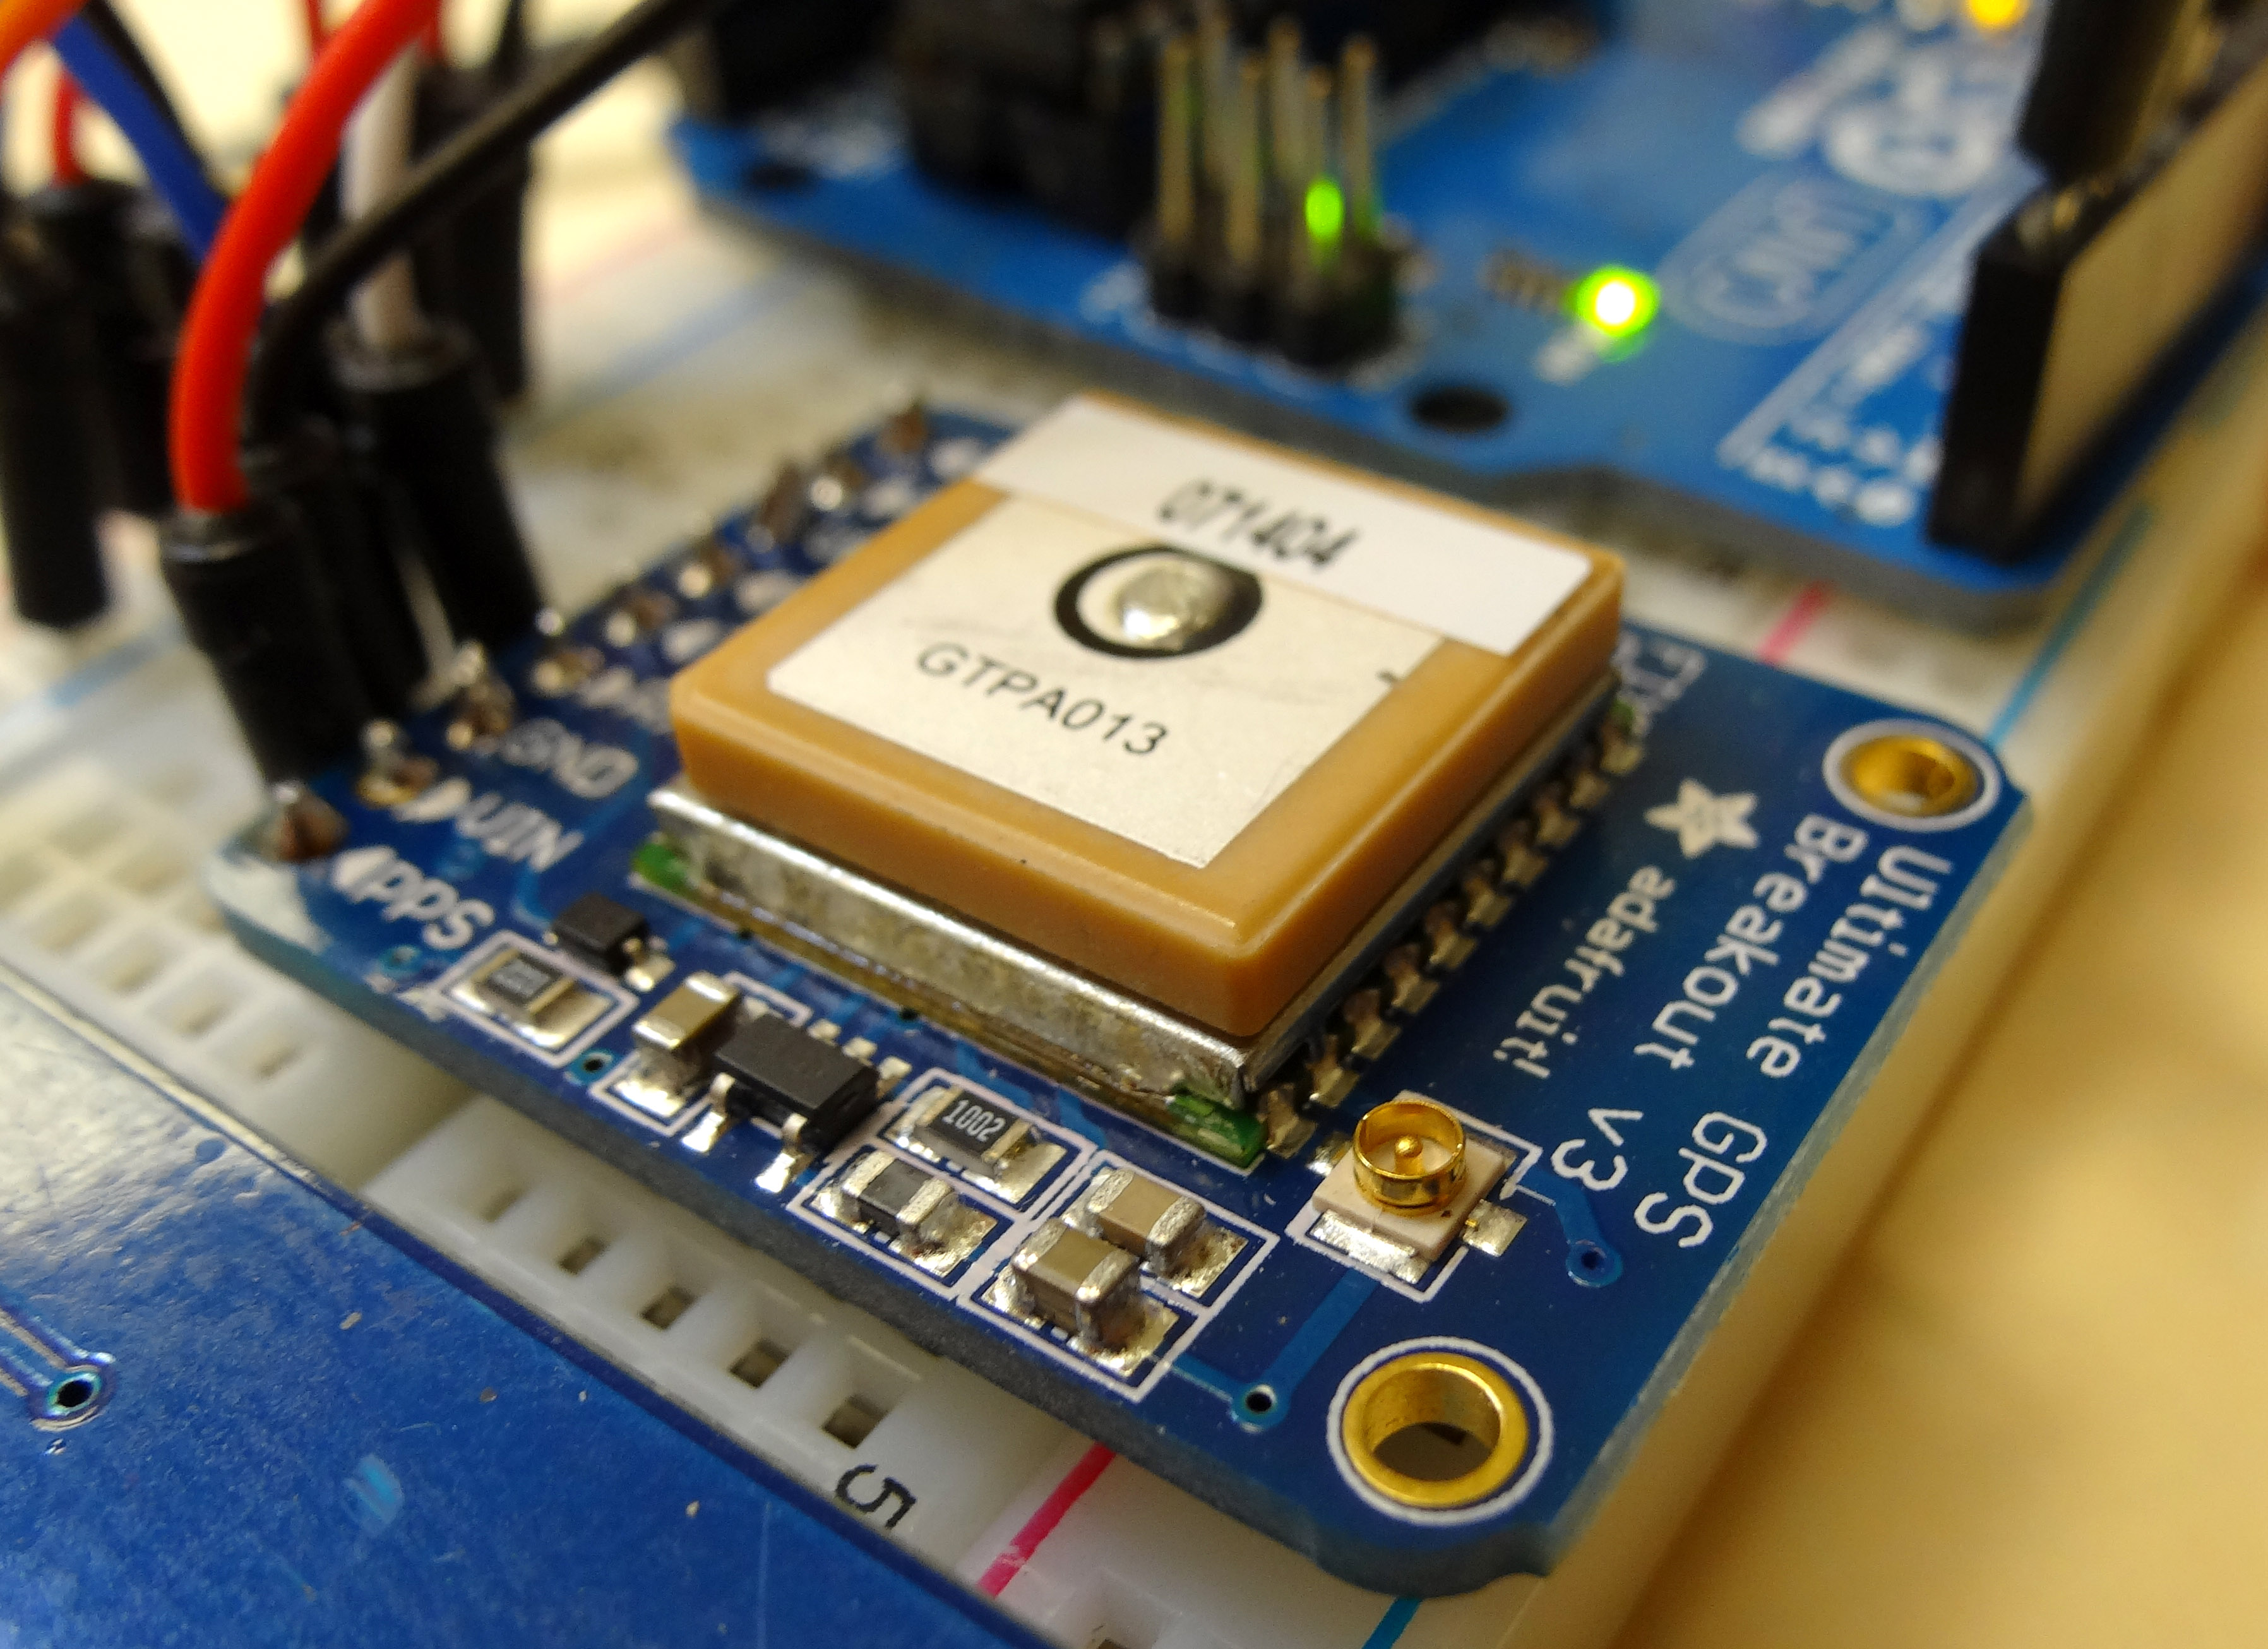
When you get your gear gathered up, you will be ready to get this project going. First, hook the GPS and Card Reader up as we did in Lesson 23. We will start with the software that we used in Lesson 23. This software correctly reads data from the GPS and then logs the data into two data files on the SD card. The problem, though, we did not really do any fine tuning of the data file we were creating.
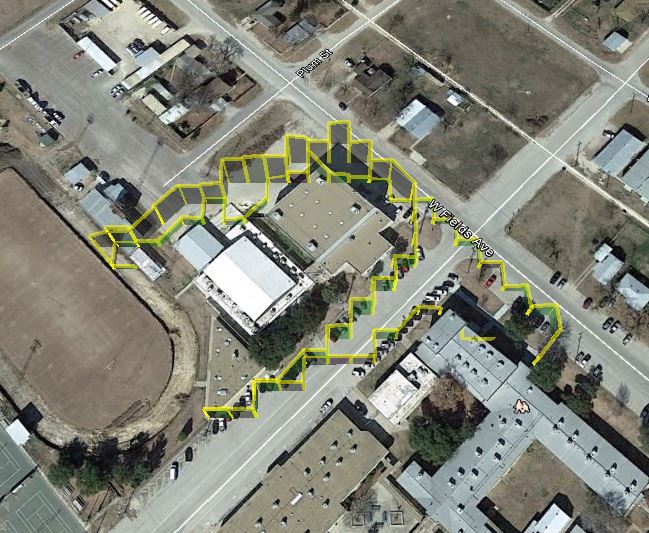
In this lesson we want to create a data file that we can display as a track in Google Earth. In order for this to work, we have to save the data in the manner a KML file wants to see. We have to save the data as:
Decimal Longitude, Decimal latitude, Altitude
I find it works to not use a line ending, but put a single white space after the Altitude. That is, delimit with commas as shown above, but then use one white space to delimit between successive lines of data.
Lesson 24 explained in great detail how to interpret the NMEA sentences. The challenge here is that the Arduino is very poor at parsing strings. The NMEA sentence would be easy to parse in Python, because Python is so good at easily manipulating strings. Since it is tedious to manipulate strings in Arduino, we are going to try and parse the data using numbers and math, not strings. To explain this, I will give an example for Latitude, and Longitude will work in a similar manner. The latitude data we get from the parsed data from the Adafruit GPS looks like this:
3051.8007
From lesson 24, we know that this represents 30 degrees and 51.8007 minutes. In order to parse this in Arduino using just numbers I do the following. First create three variables deg, degWhole, and degDec. The variable deg will hold the final answer, degWhole holds the whole part of the number, and degDec whole the part to the right of the decimal. Adding degWhole to degDec gives you deg, your final answer. So, lets assume x = 3051.8007, our Latitude from the GPS.
|
1 |
degWhole = float(int(x/100)); |
Dividing by 100 moves the decimal to the left two spots, and taking the int removes anything to the right of the decimal. Then converting back to float gives us a round number with no values to the right of the decimal. For 3051.8007 it turns it into 30.0, the whole number part of degrees. Now to get the fractional part, we need to take minutes and divide by 60. This will always be a number less than one. To get fractional part of the latitude in degrees, we do the following:
|
1 |
degDec=(x-degWhole*100)/60; |
We have to multiply degWhoe by 100 to get the decimal moved back to the right by 2. Then we subtract that number from the original latitude, and we are left with minutes. Then divide by 60 and we have converted minutes to a fraction of a degree. We now have the whole part and the fractional part of the answer, so we just add those together:
|
1 |
deg=degWhole + degDec; |
We now have a nice decimal number, deg, which is the decimal representation of our Latitude. We have one more thing to deal with. If the GPS is reporting ‘N’, leave the number positive. If the GPS is reporting ‘S’ (that we are in the Southern Hemisphere), you need to make your latitude number negative. Similarly, when you are doing your longitude, you need to make the longitude negative if you are in the Western Hemisphere.
Finally, when you write the file, Google Earth will want you to store the data as:
Longitude, Latitude,altitude
It is curious that this is reverse from what you would do if you were entering coordinates into the Google Earth search bar. That wants Latitude first.
In any event, with the parsing and formatting described above, you can create a file that is almost ready to read into Google Earth. The code below will create your coordinates in the correct format for KML, which Google Earth will read. Please watch the video for a complete description of the code.
|
1 2 3 4 5 6 7 8 9 10 11 12 13 14 15 16 17 18 19 20 21 22 23 24 25 26 27 28 29 30 31 32 33 34 35 36 37 38 39 40 41 42 43 44 45 46 47 48 49 50 51 52 53 54 55 56 57 58 59 60 61 62 63 64 65 66 67 68 69 70 71 72 73 74 75 76 77 78 79 80 81 82 83 84 85 86 87 88 89 90 91 92 93 94 95 96 97 98 99 100 101 102 103 104 105 106 107 108 109 110 111 112 113 114 115 116 |
#include <SD.h> //Load SD card library #include<SPI.h> //Load SPI Library #include <Adafruit_GPS.h> //Install the adafruit GPS library #include <SoftwareSerial.h> //Load the Software Serial library SoftwareSerial mySerial(3,2); //Initialize the Software Serial port Adafruit_GPS GPS(&mySerial); //Create the GPS Object String NMEA1; //Variable for first NMEA sentence String NMEA2; //Variable for second NMEA sentence char c; //to read characters coming from the GPS float deg; //Will hold positin data in simple degree format float degWhole; //Variable for the whole part of position float degDec; //Variable for the decimal part of degree int chipSelect = 4; //chipSelect pin for the SD card Reader File mySensorData; //Data object you will write your sesnor data to void setup() { Serial.begin(115200); //Turn on serial monitor GPS.begin(9600); //Turn on GPS at 9600 baud GPS.sendCommand("$PGCMD,33,0*6D"); //Turn off antenna update nuisance data GPS.sendCommand(PMTK_SET_NMEA_OUTPUT_RMCGGA); //Request RMC and GGA Sentences only GPS.sendCommand(PMTK_SET_NMEA_UPDATE_1HZ); //Set update rate to 1 hz delay(1000); pinMode(10, OUTPUT); //Must declare 10 an output and reserve it to keep SD card happy SD.begin(chipSelect); //Initialize the SD card reader if (SD.exists("NMEA.txt")) { //Delete old data files to start fresh SD.remove("NMEA.txt"); } if (SD.exists("GPSData.txt")) { //Delete old data files to start fresh SD.remove("GPSData.txt"); } } void loop() { readGPS(); if(GPS.fix==1) { //Only save data if we have a fix mySensorData = SD.open("NMEA.txt", FILE_WRITE); //Open file on SD card for writing mySensorData.println(NMEA1); //Write first NMEA to SD card mySensorData.println(NMEA2); //Write Second NMEA to SD card mySensorData.close(); //Close the file mySensorData = SD.open("GPSData.txt", FILE_WRITE); degWhole=float(int(GPS.longitude/100)); //gives me the whole degree part of Longitude degDec = (GPS.longitude - degWhole*100)/60; //give me fractional part of longitude deg = degWhole + degDec; //Gives complete correct decimal form of Longitude degrees if (GPS.lon=='W') { //If you are in Western Hemisphere, longitude degrees should be negative deg= (-1)*deg; } mySensorData.print(deg,4); //writing decimal degree longitude value to SD card mySensorData.print(","); //write comma to SD card degWhole=float(int(GPS.latitude/100)); //gives me the whole degree part of latitude degDec = (GPS.latitude - degWhole*100)/60; //give me fractional part of latitude deg = degWhole + degDec; //Gives complete correct decimal form of latitude degrees if (GPS.lat=='S') { //If you are in Southern hemisphere latitude should be negative deg= (-1)*deg; } mySensorData.print(deg,4); //writing decimal degree longitude value to SD card mySensorData.print(","); //write comma to SD card mySensorData.print(GPS.altitude); //write altitude to file mySensorData.print(" "); //format with one white space to delimit data sets mySensorData.close(); } } void readGPS() { clearGPS(); while(!GPS.newNMEAreceived()) { //Loop until you have a good NMEA sentence c=GPS.read(); } GPS.parse(GPS.lastNMEA()); //Parse that last good NMEA sentence NMEA1=GPS.lastNMEA(); while(!GPS.newNMEAreceived()) { //Loop until you have a good NMEA sentence c=GPS.read(); } GPS.parse(GPS.lastNMEA()); //Parse that last good NMEA sentence NMEA2=GPS.lastNMEA(); Serial.println(NMEA1); Serial.println(NMEA2); Serial.println(""); } void clearGPS() { //Clear old and corrupt data from serial port while(!GPS.newNMEAreceived()) { //Loop until you have a good NMEA sentence c=GPS.read(); } GPS.parse(GPS.lastNMEA()); //Parse that last good NMEA sentence while(!GPS.newNMEAreceived()) { //Loop until you have a good NMEA sentence c=GPS.read(); } GPS.parse(GPS.lastNMEA()); //Parse that last good NMEA sentence while(!GPS.newNMEAreceived()) { //Loop until you have a good NMEA sentence c=GPS.read(); } GPS.parse(GPS.lastNMEA()); //Parse that last good NMEA sentence } |
The final thing we have to do is to put a “wrapper” around the coordinates to turn the coordinates into a .kml file Google Earth will like. I just do this manually. I open the text file on the SD card created by the code above, and then just paste it into this KML wrapper, and save the file with a .kml extension. The KML wrapper is as follows:
|
1 2 3 4 5 6 7 8 9 10 11 12 13 14 15 16 17 18 19 20 21 22 23 24 25 26 |
<?xml version="1.0" encoding="UTF-8"?> <kml xmlns="http://www.opengis.net/kml/2.2"> <Document> <Style id="yellowPoly"> <LineStyle> <color>7f00ffff</color> <width>4</width> </LineStyle> <PolyStyle> <color>7f00ff00</color> </PolyStyle> </Style> <Placemark><styleUrl>#yellowPoly</styleUrl> <LineString> <extrude>1</extrude> <tesselate>1</tesselate> <altitudeMode>absolute</altitudeMode> <coordinates> </coordinates> </LineString></Placemark> </Document></kml> |
Just paste your coordinate data in the file above between <coordinates> and </coordinates>, save with a .kml extension, and you should be able to open it with Google Earth and see your track. Good luck!
LESSON 23: Arduino GPS with Data Logger
In this lesson we will extend what we did in lesson 22 to include a data logger with our GPS. You should be sure and do lesson 22 first, as that shows you how to hook up and program the GPS. In this project we will connect an SD Card Reader/Writer, and will power the whole thing with a 9 Volt battery. With this, you can walk around, and the device will constantly monitor and log your position. You can then bring it back inside, and look at where you have been using Google Earth.
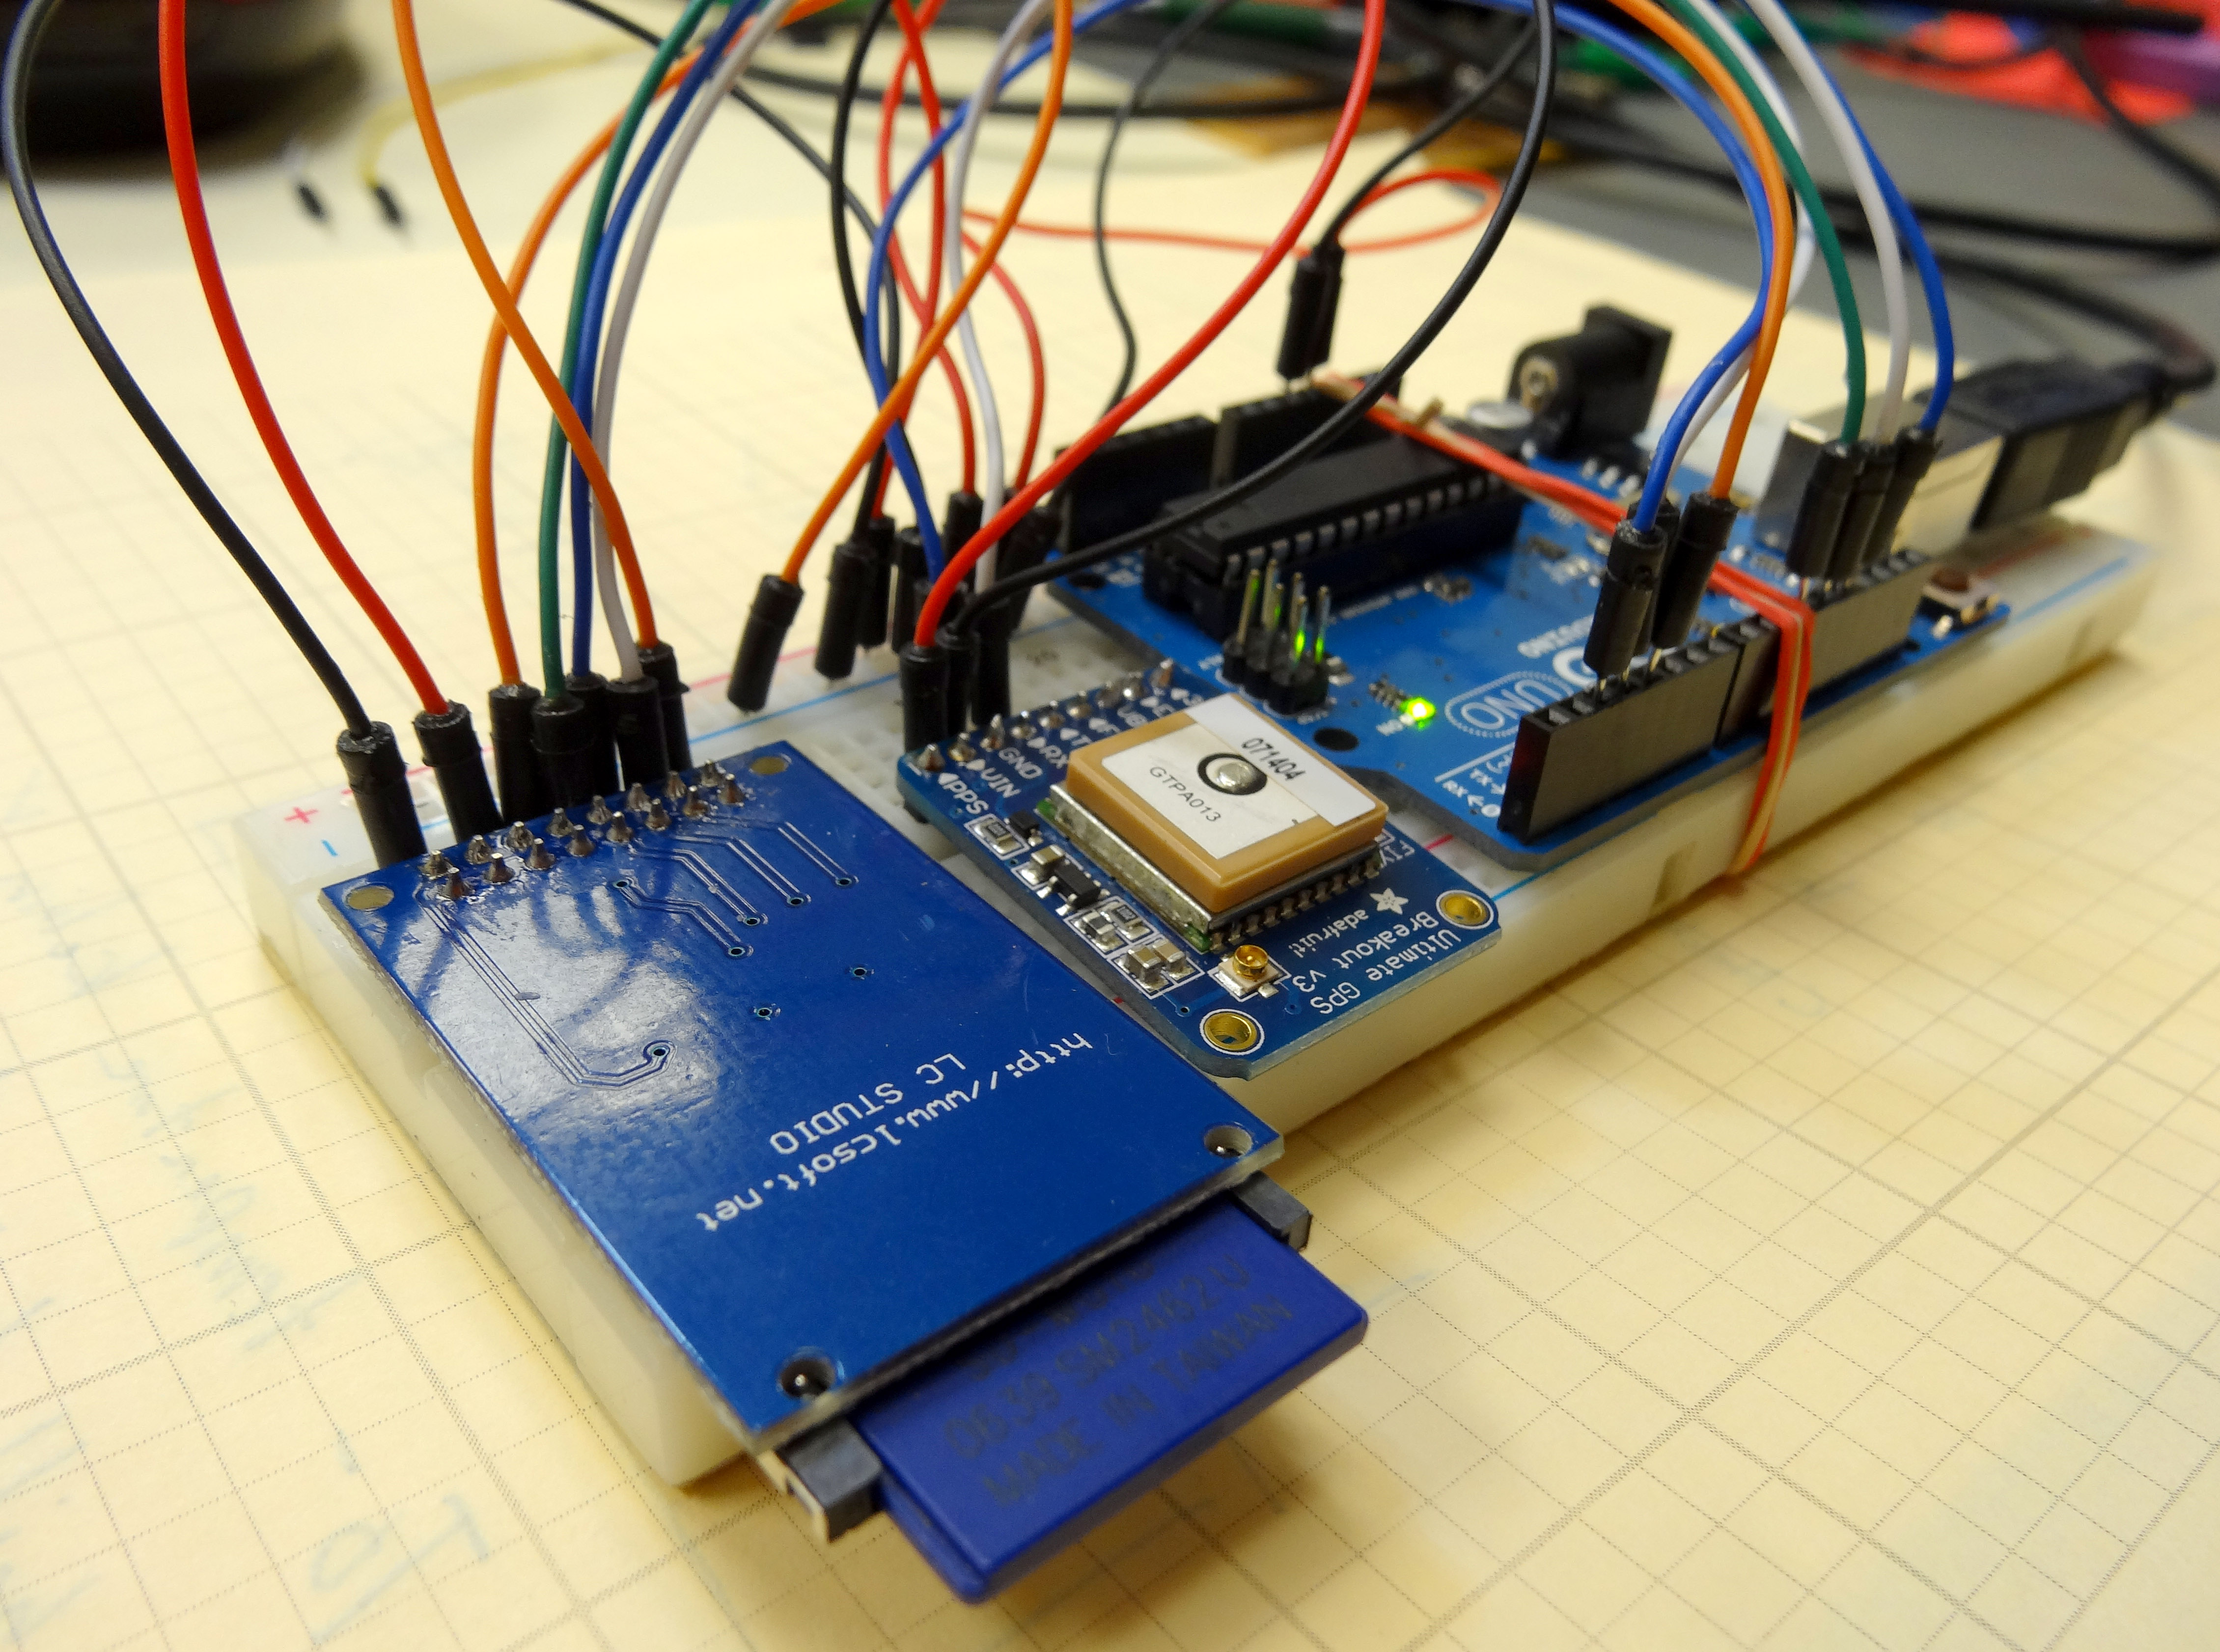
To start with, lets talk about what you will need to do this project. As described earlier, you need to start by doing lesson 22 which will get you going on the GPS hookup and initial software. Now, to move forward, you will need an Arduino, Adafruit Ultimate GPS, Virtuabotix SD card reader, and a Battery Clip to power the arduino during your mobile jaunts. You will need a 9V battery. If you are going to be doing a lot of mobile work, it is probably worth it to invest in a good 9v Rechargable battery system.
When you get your gear gathered up, you will be ready to get this project going. First, hook the GPS up to the arduino as we did in lesson 22:
Connecting the Adafruit Ultimate GPS Unit to Arduino |
|
| GPS Pin | Arduino Pin |
| Vin | 5V |
| GND | GND |
| RX | Pin 2 |
| TX | Pin 3 |
You also need to hook up the SC Card Reader/Writer. You should be familiar with this from lesson 21.
Connecting the SD Card Reader |
||
| Sd Card Reader Pin | Arduino Pin | Details |
| GND | GND | Common Ground |
| 3.3 V – (NOT USED) | ||
| +5 | 5V | Power |
| CS | 4 | Chip Select |
| MOSI | 11 | SPI Data |
| SCK | 13 | Clock |
| MISO | 12 | SPI Data |
| GND | GND | Common Ground |
Remember that this SD card reader has two rows of pins. Don’t let that confuse you, both rows are equivalent. You can connect to either row.
Most of the code has already been written in Lesson 22. In this lesson, the main thing we will be doing is to write the GPS data to the SD card. This way, as we walk around outside, it will log our positions to the SD card. We will create two files. One will hold the raw NMEA sentences, and the other our location data, as parsed by the adafruit GPS library. You should be able to figure most of this out from what you already know from lesson 22 and lesson 21. In the video above, we take you through this code step-by-step, so watch the video to understand what we are doing. If you get stuck, you can look at the code below.
|
1 2 3 4 5 6 7 8 9 10 11 12 13 14 15 16 17 18 19 20 21 22 23 24 25 26 27 28 29 30 31 32 33 34 35 36 37 38 39 40 41 42 43 44 45 46 47 48 49 50 51 52 53 54 55 56 57 58 59 60 61 62 63 64 65 66 67 68 69 70 71 72 73 74 75 76 77 78 79 80 81 82 83 84 85 86 87 88 89 90 91 92 93 94 95 96 |
#include <SD.h> //Load SD card library #include<SPI.h> //Load SPI Library #include <Adafruit_GPS.h> //Install the adafruit GPS library #include <SoftwareSerial.h> //Load the Software Serial library SoftwareSerial mySerial(3,2); //Initialize the Software Serial port Adafruit_GPS GPS(&mySerial); //Create the GPS Object String NMEA1; //Variable for first NMEA sentence String NMEA2; //Variable for second NMEA sentence char c; //to read characters coming from the GPS int chipSelect = 4; //chipSelect pin for the SD card Reader File mySensorData; //Data object you will write your sesnor data to void setup() { Serial.begin(115200); //Turn on serial monitor GPS.begin(9600); //Turn on GPS at 9600 baud GPS.sendCommand("$PGCMD,33,0*6D"); //Turn off antenna update nuisance data GPS.sendCommand(PMTK_SET_NMEA_OUTPUT_RMCGGA); //Request RMC and GGA Sentences only GPS.sendCommand(PMTK_SET_NMEA_UPDATE_1HZ); //Set update rate to 1 hz delay(1000); pinMode(10, OUTPUT); //Must declare 10 an output and reserve it to keep SD card happy SD.begin(chipSelect); //Initialize the SD card reader if (SD.exists("NMEA.txt")) { //Delete old data files to start fresh SD.remove("NMEA.txt"); } if (SD.exists("GPSData.txt")) { //Delete old data files to start fresh SD.remove("GPSData.txt"); } } void loop() { readGPS(); if(GPS.fix==1) { //Only save data if we have a fix mySensorData = SD.open("NMEA.txt", FILE_WRITE); //Open file on SD card for writing mySensorData.println(NMEA1); //Write first NMEA to SD card mySensorData.println(NMEA2); //Write Second NMEA to SD card mySensorData.close(); //Close the file mySensorData = SD.open("GPSData.txt", FILE_WRITE); mySensorData.print(GPS.latitude,4); //Write measured latitude to file mySensorData.print(GPS.lat); //Which hemisphere N or S mySensorData.print(","); mySensorData.print(GPS.longitude,4); //Write measured longitude to file mySensorData.print(GPS.lon); //Which Hemisphere E or W mySensorData.print(","); mySensorData.println(GPS.altitude); mySensorData.close(); } } void readGPS() { clearGPS(); while(!GPS.newNMEAreceived()) { //Loop until you have a good NMEA sentence c=GPS.read(); } GPS.parse(GPS.lastNMEA()); //Parse that last good NMEA sentence NMEA1=GPS.lastNMEA(); while(!GPS.newNMEAreceived()) { //Loop until you have a good NMEA sentence c=GPS.read(); } GPS.parse(GPS.lastNMEA()); //Parse that last good NMEA sentence NMEA2=GPS.lastNMEA(); Serial.println(NMEA1); Serial.println(NMEA2); Serial.println(""); } void clearGPS() { //Clear old and corrupt data from serial port while(!GPS.newNMEAreceived()) { //Loop until you have a good NMEA sentence c=GPS.read(); } GPS.parse(GPS.lastNMEA()); //Parse that last good NMEA sentence while(!GPS.newNMEAreceived()) { //Loop until you have a good NMEA sentence c=GPS.read(); } GPS.parse(GPS.lastNMEA()); //Parse that last good NMEA sentence while(!GPS.newNMEAreceived()) { //Loop until you have a good NMEA sentence c=GPS.read(); } GPS.parse(GPS.lastNMEA()); //Parse that last good NMEA sentence } |