
Windows is pretty forgiving in how you name your files and folders. In Linux, you must remember that things are case sensitive, and you want to avoid using spaces in your file names and folder names. Also remember, that in linux folders are also called directories. This video shows three suitable naming conventions in Linux that allow the files names to be both descriptive and readable.
Tag Archives: Tutorial
Raspberry Pi Linux LESSON 4: Creating and Editing Text Files Using Nano Command
As we learn more about the Raspberry Pi, we will get to the point that we will need to write programs. We have learned how to write python programs in our earlier tutorial series on the Arduino. Good news is that we can apply what we learned there to the Raspberry Pi. But, we will first have to learn how to create and edit text files. The text editor we will use on the Raspberry Pi is called “nano”. We will learn how to use nano by creating and editing simple text files. Also in this lesson we learn how to make new directories in Linux using the mkdir command. We also learn that we can view a file without opening it by using the “cat” command.
Watch the video above for all this information. These concepts are best taught and learned by watching and doing. So, watch the video and do the commands along with me. You will be an expert in no time!
Raspberry Pi Linux Lesson 3: Navigating the Folders and Files in Linux
The first thing we need to learn with Linux is how to navigate the file/folder structure in Linux. In windows we do this by just clicking on pictures of folders and files. The file structure in Linux operates the same way. We have a top level folder we call the root folder, and then we have folders and files inside of folders, and then those folders can have more folders and files. It is a tree type structure that you are already familiar with. What is different is we navigate through the files in Linux from the command lines, and not by clicking on pictures of windows and folders. Once you master the command line, you will prefer that to the clicking on pictures method of Windows.
In this lesson we will learn how to navigate through the files. In Linux, you first give the “waht”, that is what you want to do, or the command you want to do, and then you give the “where”, that is, where in the file structure you want to execute the command.
The first command we can learn is pwd. By typing pwd in the command line it will show you what folder you are presently in. That is useful as you are learning to navigate as it will always show you where you are.
The next command is ls. ls simply lists the files and folders in the present folder.
The final command covered in the video lesson above is cd, which stands for change directory.
After the command, you give the “where”, which is the path to where you want to do the command.
The method of navigating and understanding the file structure is easier to communicate by showing you, so please watch the video above. If you follow the video, you should clearly understand how the path methodology works in linux.
Raspberry Pi Linux LESSON 1: Introduction to the Pi
If you have followed us through our series of lessons on the Arduino, and then the lessons on using Arduino with Python you have already learned some really cool stuff. You have probably learned so much, in fact, that you are starting to contemplate projects that will stretch the resources available on the arduino. For example, if you decided to add an LCD display to our GPS tracker project, you would probably find that you had run out of memory on the Arduino.
So while we all love, and will continue to love, the Arduino, you do finally reach the point you need a microcontroller with a little more horsepower. This is where the Raspberry Pi comes in. The raspberry pi is about the same size as the arduino, but it has the power of a desktop computer. With the Raspberry Pi, you still have direct access to ports and pins to build your own custom projects, but you have the speed, memory and CPU needed for much more sophisticated projects. The Raspberry Pi runs Linux, which we will have to learn in these lessons. The good news is that when we get the Pi up and running you can write and run python programs on it, and we have already spent quiet a bit of time learning python. So, with your background in Arduino and Python, you will be up and running on the Pi in no time.
To start with you will need to get your gear together. I definitely recommend the Raspberry Pi model 2, as it is the latest and greatest at the time this lesson is being made. You will need the Pi, a power supply, a micro SD card, and a monitor cable. You will also need a monitor, keyboard and mouse, but you probably already have those things laying around. I have found that the best thing is to buy a kit that includes the pi, power supply, micro SD card, monitor cable and USB WIFI adapter. A kit I really like that I think is an excellent value can be found HERE. Please note that this kit (and most all kits) contain an HDMI to HDMI cable. The output of the Raspberry Pi is HDMI. However, many monitors to not have an HDMI input but want a DVI connector. If your monitor only has DVI input, you will need an additional cable, which you can find HERE. For most people, getting the kit and the cable will be all you need to get started.
If you only have a really old monitor with a VGA input, please note that the HDMI to VGA cables available on amazon do not work. (At least all that I have tried to not work). It is not just a matter of getting a cable with the right connectors on the end. You have to convert HDMI to analog, which the cable does not do. For the case of making the Pi work with a VGA monitor, I have found the Belkin HDMI to VGA adapter will work with the Pi and you can get it HERE.
Please note that I have found the trickiest part of getting the Pi up and running is getting the right cable for your monitor. Please carefully check what type of monitor you have, and get the right cable.
So, get your gear ordered and in the next lesson we will cover how to get things hooked up and configured.
Python with Arduino LESSON 17: Sending and Receiving Data Over Ethernet
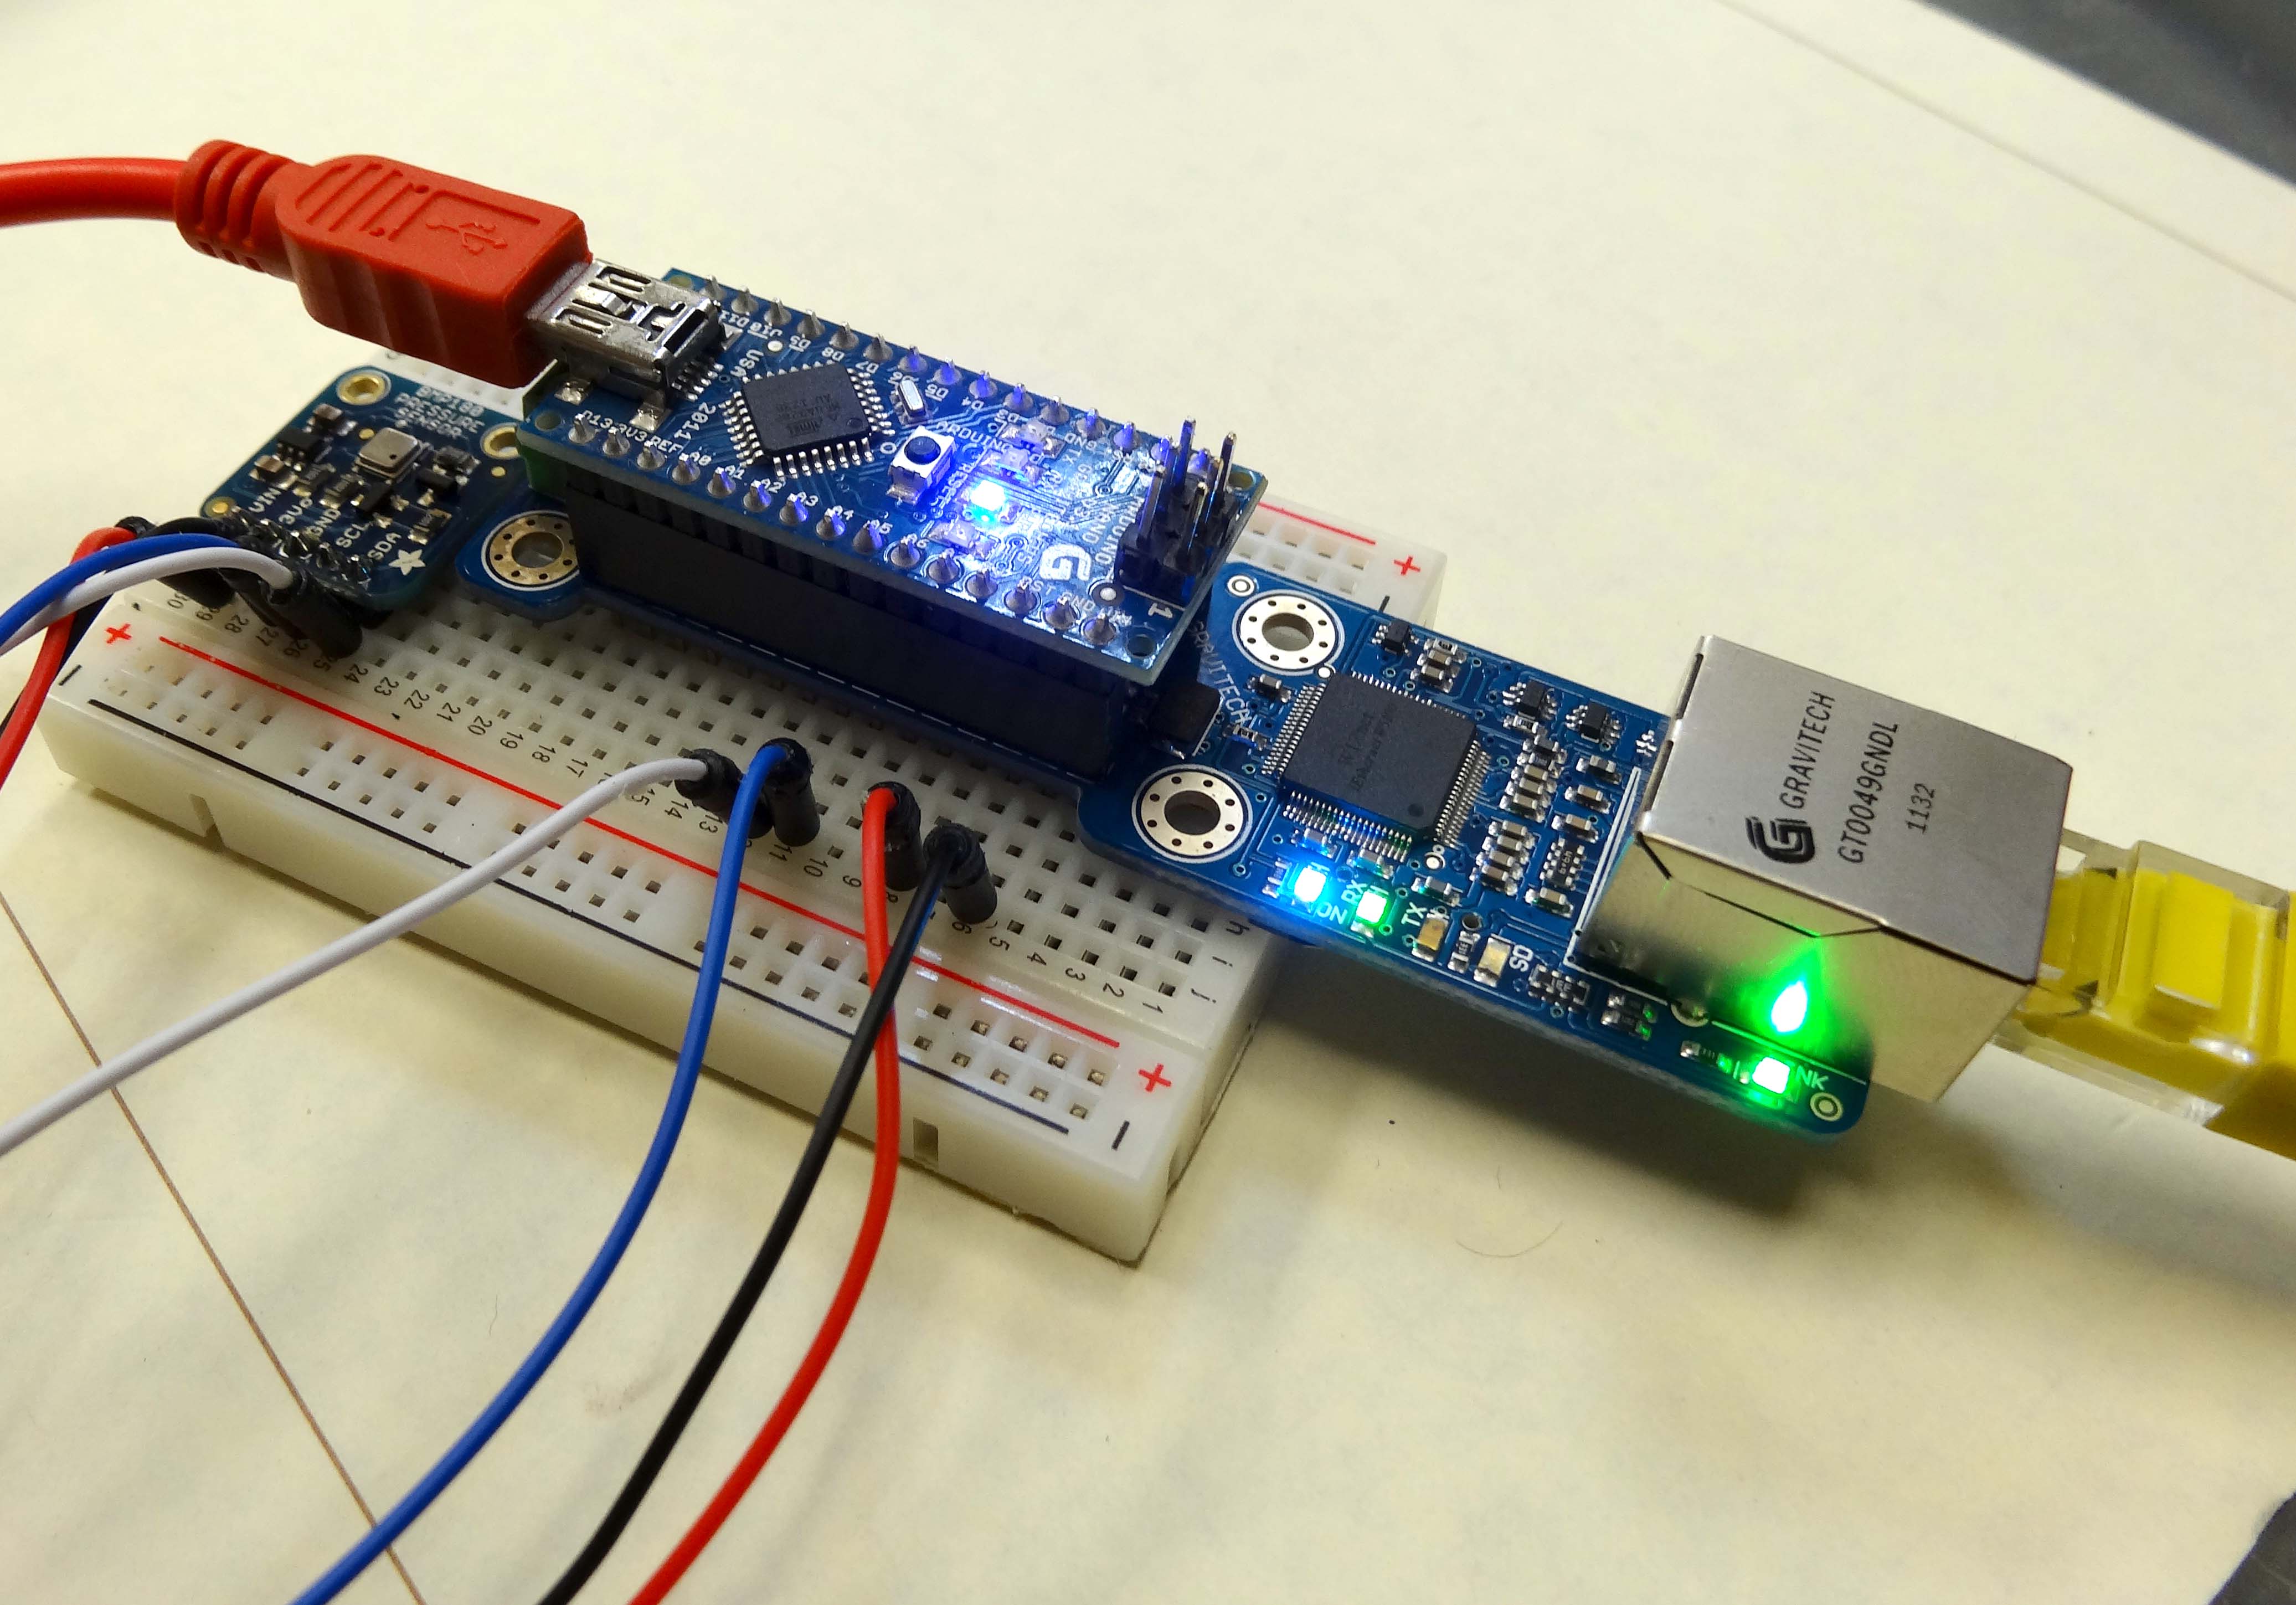
In LESSON 16 we showed a simple Client Server model that allows us to send strings between Python running on a PC and the arduino over Ethernet. That lesson simply passed strings back and forth to show a very basic Server on Arduino, and Python acting as the Client. In this lesson we show a more practical example, with the Arduino connected to an Adafruit BMP180 Pressure Sensor. In order to complete this lesson, you will need an Arduino, an Ethernet Shield, and the Pressure Sensor. If you do not have this particular pressure sensor, you can probably follow along in the lesson using whatever sensor you have that is of interest. The video will take you through the tutorial step-by-step, and then the code we developed is shown below.
The key issue in getting this project to work is to get your mac address and IP address from your router or network. If you are at school, simply speak to your network administrator, and he will help you get an IP address for your arduino. If you are at home, you will need to connect to your router from a browser, and configure it to assign an IP address and agree on a mac address for your arduino. Some arduino Ethernet shields have a sticker with a mac address. If your Ethernet shield has a sticker with mac address, use that one. If it does not, you will need to come up with a unique mac address. There are thousands of possible routers and networks out there, so I can not help you with that part. But if you look in the router documentation, you should be able to get the IP address and mac address worked out. The arduino itself does not have a hard wired mac address, but you set the mac address in the arduino software, and the IP address as well. The key thing is that the mac address is unique on your network, and the router and arduino agree on the IP address and mac address. If you have a clearer way to explain this, please leave a comment below.
This is the server side software to run on the arduino. Again, you should use a suitable IP address and mac address for your network. Do not think you can just copy the ones I use in the code below.
|
1 2 3 4 5 6 7 8 9 10 11 12 13 14 15 16 17 18 19 20 21 22 23 24 25 26 27 28 29 30 31 32 33 34 35 36 37 38 39 40 41 42 43 44 45 46 47 48 49 50 51 52 53 54 55 56 57 58 59 60 61 62 63 64 |
#include <Ethernet.h> //Load Ethernet Library #include <EthernetUdp.h> //Load the Udp Library #include <SPI.h> //Load SPI Library #include "Wire.h" //imports the wire library #include "Adafruit_BMP085.h" // import the Pressure/Temperature sensor library Adafruit_BMP085 mySensor; //Create a sensor object float tempC; //Declare variable for Temp in C float tempF; //Declare variable for Temp in F float Pressure; //Declare a variable for Pressure byte mac[] ={ 0xDE, 0xAD, 0xBE, 0xEF, 0xFE, 0xEE}; //Assign mac address IPAddress ip(10, 1, 15, 243); //Assign the IP Adress unsigned int localPort = 5000; // Assign a port to talk over char packetBuffer[UDP_TX_PACKET_MAX_SIZE]; //dimensian a char array to hold our data packet String datReq; //String for our data int packetSize; //Size of the packet EthernetUDP Udp; // Create a UDP Object void setup() { Serial.begin(9600); //Initialize Serial Port Ethernet.begin( mac, ip); //Inialize the Ethernet Udp.begin(localPort); //Initialize Udp delay(1500); //delay mySensor.begin(); //initialize pressure-temp sensor } void loop() { packetSize =Udp.parsePacket(); //Reads the packet size if(packetSize>0) { //if packetSize is >0, that means someone has sent a request Udp.read(packetBuffer, UDP_TX_PACKET_MAX_SIZE); //Read the data request String datReq(packetBuffer); //Convert char array packetBuffer into a string called datReq if (datReq =="Temperature") { //Do the following if Temperature is requested tempC = mySensor.readTemperature(); //Read the temperature tempF = tempC*1.8 + 32; //Convert temp to F Udp.beginPacket(Udp.remoteIP(), Udp.remotePort()); //Initialize packet send Udp.print(tempF); //Send the temperature data Udp.endPacket(); //End the packet } if (datReq== "Pressure") { //Do the following if Pressure is requested Pressure=mySensor.readPressure(); //read the pressure Udp.beginPacket(Udp.remoteIP(), Udp.remotePort()); //Initialize packet send Udp.print(Pressure); //Send the Pressure data Udp.endPacket(); //End the packet } } memset(packetBuffer, 0, UDP_TX_PACKET_MAX_SIZE); //clear out the packetBuffer array } |
Once you have this on your arduino, and the arduino connected to the internet via an Ethernet cable, you can test by opening a command line in Windows. Then ping the address you have assigned to the Arduino. If it pings correctly and you get a reply, you are ready to develop the Python code. The Python will be the client. It will send the requests to the Arduino, and the Arduino will respond with data. Since our circuit can measure pressure or temperature, you can request either of those. When the arduino receives a request for temperature, it will go out, make the temperature measurement and then return the data to Python. Similarly, if you request Pressure the arduino will read the request, will make the Pressure measurement, and then return pressure reading to the client (Python).
|
1 2 3 4 5 6 7 8 9 10 11 12 13 14 15 16 17 18 19 20 21 22 23 24 25 26 27 28 29 30 31 32 33 34 35 36 37 38 39 40 |
from socket import * import time address= ( '10.1.15.243', 5000) #define server IP and port client_socket =socket(AF_INET, SOCK_DGRAM) #Set up the Socket client_socket.settimeout(1) #Only wait 1 second for a response while(1): data = "Temperature" #Set data request to Temperature client_socket.sendto( data, address) #Send the data request try: rec_data, addr = client_socket.recvfrom(2048) #Read response from arduino temp = float(rec_data) #Convert string rec_data to float temp print "The Measured Temperature is ", temp, " degrees F." # Print the result except: pass time.sleep(2) #delay before sending next command data = "Pressure" #Set data request to Pressure client_socket.sendto( data, address) #Send the data request try: rec_data, addr = client_socket.recvfrom(2048) #Read response from arduino Pressure = float(rec_data) #Convert string rec_data to float temp print "The Measured Pressure is ", Pressure, " Pa." # Print the result except: pass time.sleep(2) #delay before sending next command print "" |
This python code will request Temperature, will then read the response, and then will print the data. It then requests Pressure, reads the response, and then prints it. If you look at our earlier lessons you can see graphical techniques to visually present the data. The hard part is getting the data passed back and forth, which we show how to do in this lesson.