
As we move forward, we could really benefit from a better text editor than IDLE to edit our Python Code. In today’s lesson I show you how to download and install Pyscripter, which will make your python coding much easier. I suggest you follow these instructions and move to Pyscripter, as I will be using it for future lessons.
Tag Archives: Python
9-Axis IMU LESSON 12: Passing Data From Arduino to Python
In this lesson we show how to pass data from Arduino to Python using a Com Port. This is important for our 9-Axis IMU project as we want to take advantage of the processing power and 3D graphics capabilities of Python. Our goal is to get the date from Arduino to Python, and then create a dynamic 3D visualization of our system. The first step in this goal is to pass the data from arduino to Python.
In order to do this, a first step is to install the pyserial library. If you followed our python installation tutorial in lesson 11, then it is easy to install pyserial by just opening a windows command prompt, and then typing:
pip install pyserial
If this does not work, likely you did not install python according to the instruction in lesson 11.
In order to show a simple demonstration of passing data, we can use the following code on the arduino side, which just generates x, y, and z numbers and passes them to Python.
1 2 3 4 5 6 7 8 9 10 11 12 13 14 15 16 17 18 19 20 21 22 23 | int x=0; int y=0; int z=0; void setup() { // put your setup code here, to run once: Serial.begin(115200); } void loop() { // put your main code here, to run repeatedly: x=x+1; y=y+2; z=z+4; Serial.print(x); Serial.print(","); Serial.print(y); Serial.print(","); Serial.println(z); delay(100); } |
We can grab these numbers from the Com port on the Python side with the following code. Note that you should use the com port your arduino is on, which likely will not be the same as mine (which was ‘com5’).
1 2 3 4 5 6 7 8 9 10 11 12 13 14 15 16 | import time import serial arduinoData=serial.Serial('com5',115200) time.sleep(1) while (True): while (arduinoData.inWaiting()==0): pass dataPacket = arduinoData.readline() #reply dataPacket=str(dataPacket,'utf-8') print(dataPacket) splitPacket=dataPacket.split(",") print (splitPacket) X=float(splitPacket[0]) Y=float(splitPacket[1]) Z=float(splitPacket[2]) print ("X=",X," Y=",Y," Z=",Z) |
The above example is just a simple method for passing different channels from Arduino to Python.
For our IMU project, we want to use the code we left off with Lesson 10. However, note we can scale back on the number of data channels, because we just want the calibration data and then the final roll, pitch and yaw numbers. This is the arduino code that will pass those parameters.
1 2 3 4 5 6 7 8 9 10 11 12 13 14 15 16 17 18 19 20 21 22 23 24 25 26 27 28 29 30 31 32 33 34 35 36 37 38 39 40 41 42 43 44 45 46 47 48 49 50 51 52 53 54 55 56 57 58 59 60 61 62 63 64 65 66 67 68 69 70 71 72 73 74 75 76 77 78 79 80 81 82 83 84 85 86 87 88 89 | #include <Wire.h> #include <Adafruit_Sensor.h> #include <Adafruit_BNO055.h> #include <utility/imumaths.h> #include <math.h> float thetaM; float phiM; float thetaFold=0; float thetaFnew; float phiFold=0; float phiFnew; float thetaG=0; float phiG=0; float theta; float phi; float thetaRad; float phiRad; float Xm; float Ym; float psi; float dt; unsigned long millisOld; #define BNO055_SAMPLERATE_DELAY_MS (100) Adafruit_BNO055 myIMU = Adafruit_BNO055(); void setup() { // put your setup code here, to run once: Serial.begin(115200); myIMU.begin(); delay(1000); int8_t temp=myIMU.getTemp(); myIMU.setExtCrystalUse(true); millisOld=millis(); } void loop() { // put your main code here, to run repeatedly: uint8_t system, gyro, accel, mg = 0; myIMU.getCalibration(&system, &gyro, &accel, &mg); imu::Vector<3> acc =myIMU.getVector(Adafruit_BNO055::VECTOR_ACCELEROMETER); imu::Vector<3> gyr =myIMU.getVector(Adafruit_BNO055::VECTOR_GYROSCOPE); imu::Vector<3> mag =myIMU.getVector(Adafruit_BNO055::VECTOR_MAGNETOMETER); thetaM=-atan2(acc.x()/9.8,acc.z()/9.8)/2/3.141592654*360; phiM=-atan2(acc.y()/9.8,acc.z()/9.8)/2/3.141592654*360; phiFnew=.95*phiFold+.05*phiM; thetaFnew=.95*thetaFold+.05*thetaM; dt=(millis()-millisOld)/1000.; millisOld=millis(); theta=(theta+gyr.y()*dt)*.95+thetaM*.05; phi=(phi-gyr.x()*dt)*.95+ phiM*.05; thetaG=thetaG+gyr.y()*dt; phiG=phiG-gyr.x()*dt; phiRad=phi/360*(2*3.14); thetaRad=theta/360*(2*3.14); Xm=mag.x()*cos(thetaRad)-mag.y()*sin(phiRad)*sin(thetaRad)+mag.z()*cos(phiRad)*sin(thetaRad); Ym=mag.y()*cos(phiRad)+mag.z()*sin(phiRad); psi=atan2(Ym,Xm)/(2*3.14)*360; Serial.print(accel); Serial.print(","); Serial.print(gyro); Serial.print(","); Serial.print(mg); Serial.print(","); Serial.print(system); Serial.print(","); Serial.print(theta); Serial.print(","); Serial.print(phi); Serial.print(","); Serial.println(psi); phiFold=phiFnew; thetaFold=thetaFnew; delay(BNO055_SAMPLERATE_DELAY_MS); } |
Then, on the Python side we can grab and parse the data with this code.
1 2 3 4 5 6 7 8 9 10 11 12 13 14 15 16 17 18 19 | import serial import time arduinoData=serial.Serial('com5',115200) time.sleep(1) while (1==1): while (arduinoData.inWaiting()==0): pass dataPacket=arduinoData.readline() dataPacket=str(dataPacket,'utf-8') splitPacket=dataPacket.split(',') Acal=float(splitPacket[0]) Gcal=float(splitPacket[1]) Mcal=float(splitPacket[2]) Scal=float(splitPacket[3]) Pitch=float(splitPacket[4]) Roll=float(splitPacket[5]) Yaw=float(splitPacket[6]) print("Acal=",Acal,"Gcal=",Gcal,"Mcal=",Mcal,"Scal",Scal, "Pitch=",Pitch,"Roll=",Roll,"Yaw=",Yaw) |
In the next lesson we will install Vpython and begin building our code to create dynamic 3D visualizations of our system.
9-Axis IMU LESSON 11: Install Python
This is a quick lesson where we show you how to install Python on a Windows 10 machine. We have gone about as far as we can go on our 9-axis IMU project using only the arduino. What we want to do now is to pass the data we are taking from arduino to Python, and then use python to do animations and 3D renderings. So, to move forward, we will need to install Python, which is explained in the video.
Beaglebone Black GPS Tracker LESSON 3: Parsing the NMEA Sentences in Python
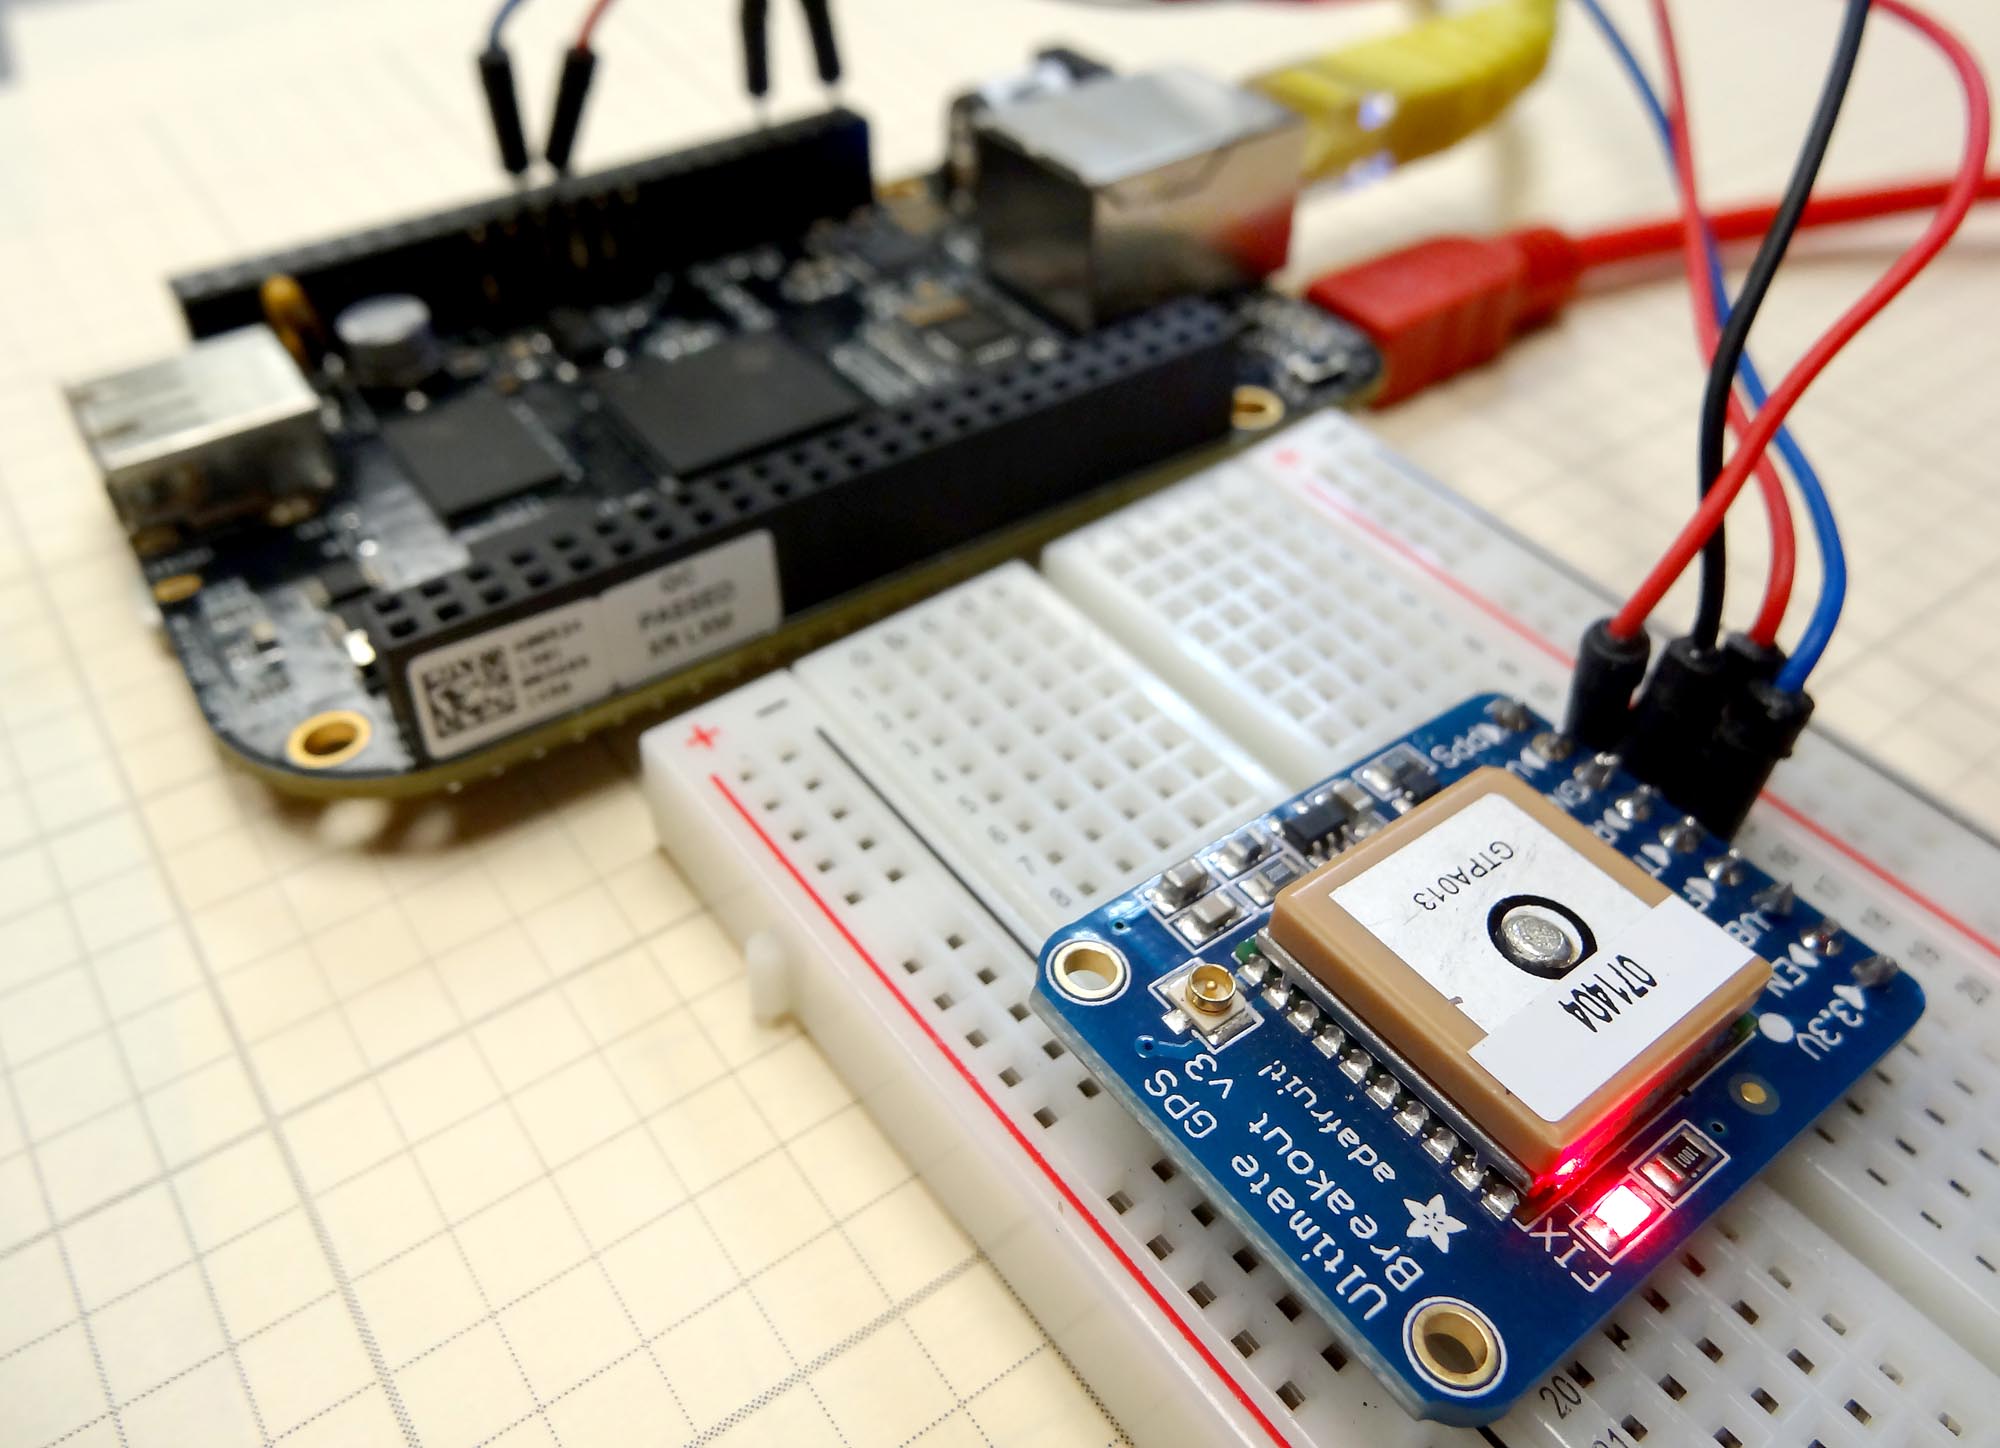
In the first two lessons in this series, you learned how to hook the Beaglebone Black to the Adafruit Ultimate GPS breakout board. We then learned to read NMEA sentences from the GPS, and how to control the data the GPS spits out. In this lesson we will learn to parse the NMEA sentences into useful data. You need to make sure you go back and review the first two lessons, as this one draws heavily on those. Also, you need to start with the code we had developed in LESSON 2. (If you need the gear we are using, you can get the Beaglebone Black HERE, and you can get the Adafruit GPS HERE.)
In this code we move most of the work up into our GPS class. That makes the main part of the program simple and intuitive to use.
1 2 3 4 5 6 7 8 9 10 11 12 13 14 15 16 17 18 19 20 21 22 23 24 25 26 27 28 29 30 31 32 33 34 35 36 37 38 39 40 41 42 43 44 45 46 47 48 49 50 51 52 53 54 55 56 57 58 59 60 61 62 63 64 65 66 67 68 69 70 71 72 73 74 75 76 77 78 79 80 81 82 83 84 85 86 87 88 | import serial import Adafruit_BBIO.UART as UART from time import sleep UART.setup("UART1") ser=serial.Serial('/dev/ttyO1',9600) class GPS: def __init__(self): #This sets up variables for useful commands. #This set is used to set the rate the GPS reports UPDATE_10_sec= "$PMTK220,10000*2F\r\n" #Update Every 10 Seconds UPDATE_5_sec= "$PMTK220,5000*1B\r\n" #Update Every 5 Seconds UPDATE_1_sec= "$PMTK220,1000*1F\r\n" #Update Every One Second UPDATE_200_msec= "$PMTK220,200*2C\r\n" #Update Every 200 Milliseconds #This set is used to set the rate the GPS takes measurements MEAS_10_sec = "$PMTK300,10000,0,0,0,0*2C\r\n" #Measure every 10 seconds MEAS_5_sec = "$PMTK300,5000,0,0,0,0*18\r\n" #Measure every 5 seconds MEAS_1_sec = "$PMTK300,1000,0,0,0,0*1C\r\n" #Measure once a second MEAS_200_msec= "$PMTK300,200,0,0,0,0*2F\r\n" #Meaure 5 times a second #Set the Baud Rate of GPS BAUD_57600 = "$PMTK251,57600*2C\r\n" #Set Baud Rate at 57600 BAUD_9600 ="$PMTK251,9600*17\r\n" #Set 9600 Baud Rate #Commands for which NMEA Sentences are sent ser.write(BAUD_57600) sleep(1) ser.baudrate=57600 GPRMC_ONLY= "$PMTK314,0,1,0,0,0,0,0,0,0,0,0,0,0,0,0,0,0,0,0*29\r\n" #Send only the GPRMC Sentence GPRMC_GPGGA="$PMTK314,0,1,0,1,0,0,0,0,0,0,0,0,0,0,0,0,0,0,0*28\r\n"#Send GPRMC AND GPGGA Sentences SEND_ALL ="$PMTK314,1,1,1,1,1,1,0,0,0,0,0,0,0,0,0,0,0,0,0*28\r\n" #Send All Sentences SEND_NOTHING="$PMTK314,0,0,0,0,0,0,0,0,0,0,0,0,0,0,0,0,0,0,0*28\r\n" #Send Nothing ser.write(UPDATE_200_msec) sleep(1) ser.write(MEAS_200_msec) sleep(1) ser.write(GPRMC_GPGGA) sleep(1) ser.flushInput() ser.flushInput() print "GPS Initialized" def read(self): ser.flushInput() ser.flushInput() while ser.inWaiting()==0: pass self.NMEA1=ser.readline() while ser.inWaiting()==0: pass self.NMEA2=ser.readline() NMEA1_array=self.NMEA1.split(',') NMEA2_array=self.NMEA2.split(',') if NMEA1_array[0]=='$GPRMC': self.timeUTC=NMEA1_array[1][:-8]+':'+NMEA1_array[1][-8:-6]+':'+NMEA1_array[1][-6:-4] self.latDeg=NMEA1_array[3][:-7] self.latMin=NMEA1_array[3][-7:] self.latHem=NMEA1_array[4] self.lonDeg=NMEA1_array[5][:-7] self.lonMin=NMEA1_array[5][-7:] self.lonHem=NMEA1_array[6] self.knots=NMEA1_array[7] if NMEA1_array[0]=='$GPGGA': self.fix=NMEA1_array[6] self.altitude=NMEA1_array[9] self.sats=NMEA1_array[7] if NMEA2_array[0]=='$GPRMC': self.timeUTC=NMEA2_array[1][:-8]+':'+NMEA1_array[1][-8:-6]+':'+NMEA1_array[1][-6:-4] self.latDeg=NMEA2_array[3][:-7] self.latMin=NMEA2_array[3][-7:] self.latHem=NMEA2_array[4] self.lonDeg=NMEA2_array[5][:-7] self.lonMin=NMEA2_array[5][-7:] self.lonHem=NMEA2_array[6] self.knots=NMEA2_array[7] if NMEA2_array[0]=='$GPGGA': self.fix=NMEA2_array[6] self.altitude=NMEA2_array[9] self.sats=NMEA2_array[7] myGPS=GPS() while(1): myGPS.read() print myGPS.NMEA1 print myGPS.NMEA2 if myGPS.fix!=0: print 'Universal Time: ',myGPS.timeUTC print 'You are Tracking: ',myGPS.sats,' satellites' print 'My Latitude: ',myGPS.latDeg, 'Degrees ', myGPS.latMin,' minutes ', myGPS.latHem print 'My Longitude: ',myGPS.lonDeg, 'Degrees ', myGPS.lonMin,' minutes ', myGPS.lonHem print 'My Speed: ', myGPS.knots print 'My Altitude: ',myGPS.altitude |
Beaglebone Black GPS LESSON 2: Sending Commands to the Adafruit GPS Module
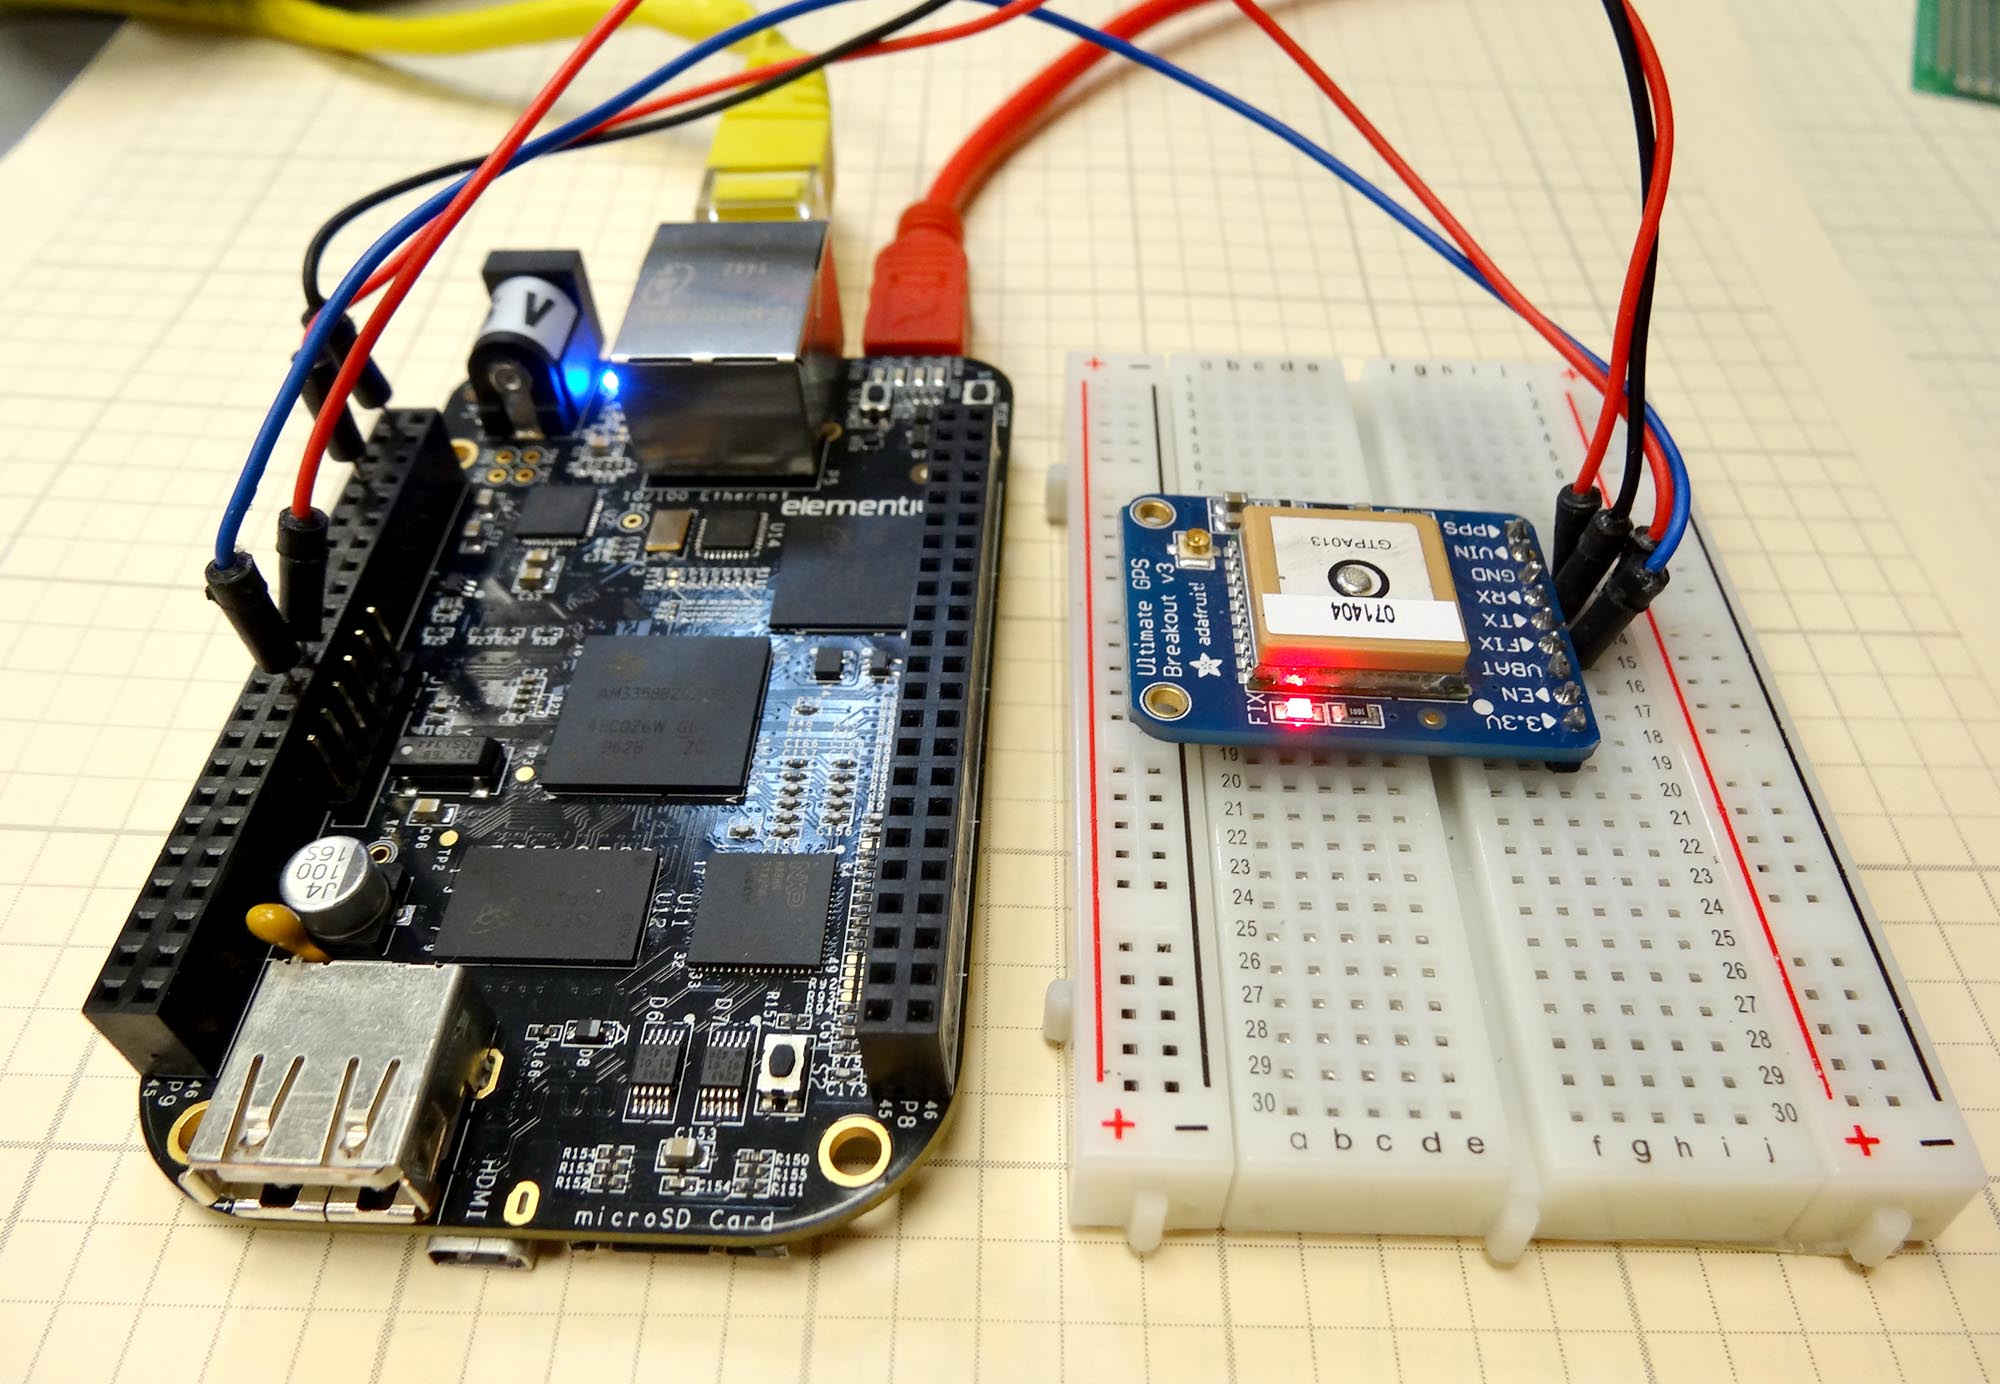
In lesson 1 we showed you how to connect the Adafruit Ultimate GPS breakout board to the Beaglebone Black and how to read the NMEA sentences streaming off the GPS over the UART pins. In this lesson we will show you how to send commands to the GPS to better tailor its operation for our needs. There are a number of commands that can be sent to it. Some of the things we we can control are the baud rate it communicates at, and the rate that it takes and sends data. We can also influence which NMEA sentences it sends. In this video we will go over the different commands we can use.
To review, you should connect the GPS as follows:

The video explains the code step-by-step, but here it is for your reference.
1 2 3 4 5 6 7 8 9 10 11 12 13 14 15 16 17 18 19 20 21 22 23 24 25 26 27 28 29 30 31 32 33 34 35 36 37 38 39 40 41 42 43 44 45 46 47 48 49 50 51 | import serial #import pyserial library import Adafruit_BBIO.UART as UART #import UART Library UART.setup("UART1") #Initialize UART1 ser=serial.Serial('/dev/ttyO1',9600) #Initialize Serial Port from time import sleep #import sleep library class GPS: #Create GPS class def __init__(self): #This init will run when you create a GPS object. #This sets up variables for useful commands. #This set is used to set the rate the GPS reports UPDATE_10_sec= "$PMTK220,10000*2F\r\n" #Update Every 10 Seconds UPDATE_5_sec= "$PMTK220,5000*1B\r\n" #Update Every 5 Seconds UPDATE_1_sec= "$PMTK220,1000*1F\r\n" #Update Every One Second UPDATE_200_msec= "$PMTK220,200*2C\r\n" #Update Every 200 Milliseconds #This set is used to set the rate the GPS takes measurements MEAS_10_sec = "$PMTK300,10000,0,0,0,0*2C\r\n" #Measure every 10 seconds MEAS_5_sec = "$PMTK300,5000,0,0,0,0*18\r\n" #Measure every 5 seconds MEAS_1_sec = "$PMTK300,1000,0,0,0,0*1C\r\n" #Measure once a second MEAS_200_msec= "$PMTK300,200,0,0,0,0*2F\r\n" #Meaure 5 times a second #Set the Baud Rate of GPS BAUD_57600 = "$PMTK251,57600*2C\r\n" #Set Baud Rate at 57600 BAUD_9600 ="$PMTK251,9600*17\r\n" #Set 9600 Baud Rate #Commands for which NMEA Sentences are sent GPRMC_ONLY= "$PMTK314,0,1,0,0,0,0,0,0,0,0,0,0,0,0,0,0,0,0,0*29\r\n" #Send only the GPRMC Sentence GPRMC_GPGGA="$PMTK314,0,1,0,1,0,0,0,0,0,0,0,0,0,0,0,0,0,0,0*28\r\n"#Send GPRMC AND GPGGA Sentences SEND_ALL ="$PMTK314,1,1,1,1,1,1,0,0,0,0,0,0,0,0,0,0,0,0,0*28\r\n" #Send All Sentences SEND_NOTHING="$PMTK314,0,0,0,0,0,0,0,0,0,0,0,0,0,0,0,0,0,0,0*28\r\n" #Send Nothing ser.write(BAUD_57600) #Set Baud Rate to 57600 sleep(1) #Paulse ser.baudrate=57600 #IMPORTANT Since change ser baudrate to match GPS ser.write(UPDATE_200_msec) #Set update rate sleep(1) ser.write(MEAS_200_msec) #Set measurement rate sleep(1) ser.write(GPRMC_GPGGA) #Ask for only GPRMC and GPGGA Sentences sleep(1) ser.flushInput() #clear buffers ser.flushOutput() print "GPS is Initialized" #Print message myGPS=GPS() while(1): ser.flushInput() #Clear Buffers ser.flushInput() while ser.inWaiting()==0: #Wait for input pass NMEA1=ser.readline() #Read NMEA1 while ser.inWaiting()==0: pass NMEA2=ser.readline() print NMEA1 print NMEA2 |
This code sets the GPS to communicate at baud rate of 57600, and set it to read and report 5 readings a second. It then sets the GPS to only report the $GPRMC and the $GPGGA sentences. It then constantly reads and reports the NMEA sentences.