Hey everyone, welcome to Lesson 15 of the AI on the Edge series!
In today’s lesson, we take a very important step forward. We finally bring the Raspberry Pi Camera into our OpenCV world so we can capture live video and start building real computer vision projects. Today we learn how to pull live frames directly from the official Raspberry Pi camera using picamera2 and display them smoothly with OpenCV.
This lesson is all about building a clean, reliable foundation. I walk you through how to properly configure the Pi Camera with the modern picamera2 library — setting the resolution to 1280×720, choosing the right format, and pushing the frame rate up to 60fps. Then we bring those frames straight into OpenCV so we can see live video in a window. You’ll also learn why we use RGB888 format and how to organize your code so it stays clean as our projects get more complex.
Getting reliable live video from the Pi Camera is one of those foundational skills that opens the door to everything we’re going to do in this class — face detection, object tracking, color tracking, motion detection, and all the exciting AI projects still ahead. Once you have solid camera access, the real fun begins.
I kept this lesson straightforward on purpose. I want you to have a rock-solid base that you can build upon without fighting technical problems later. By the end of this video, you’ll have a clean, responsive live video stream running from your Raspberry Pi Camera, ready for all the computer vision magic we’re about to add in the coming lessons.
So fire up your Raspberry Pi, grab your camera module, and let’s get that live video rolling! As always, I encourage you to type the code along with me and experiment with it. Change the resolution, try different frame rates, and make it your own.
Are you ready? Let’s dive in!
In today’s lesson, this is the code which we developed:
|
1 2 3 4 5 6 7 8 9 10 11 12 13 14 15 16 17 18 19 20 21 |
import cv2 from picamera2 import Picamera2 piCam = Picamera2() W=1280 H=720 RES = (W,H) piCam.preview_configuration.main.size = RES piCam.preview_configuration.main.format = "RGB888" piCam.preview_configuration.controls.FrameRate=60 piCam.preview_configuration.align() piCam.configure("preview") piCam.start() while True: frame= piCam.capture_array() #frame=cv2.flip(frame,-1) cv2.imshow("Camera", frame) cv2.moveWindow("Camera",0,60) if cv2.waitKey(1)==ord('q'): break cv2.destroyAllWindows() print('Program Terminated') |
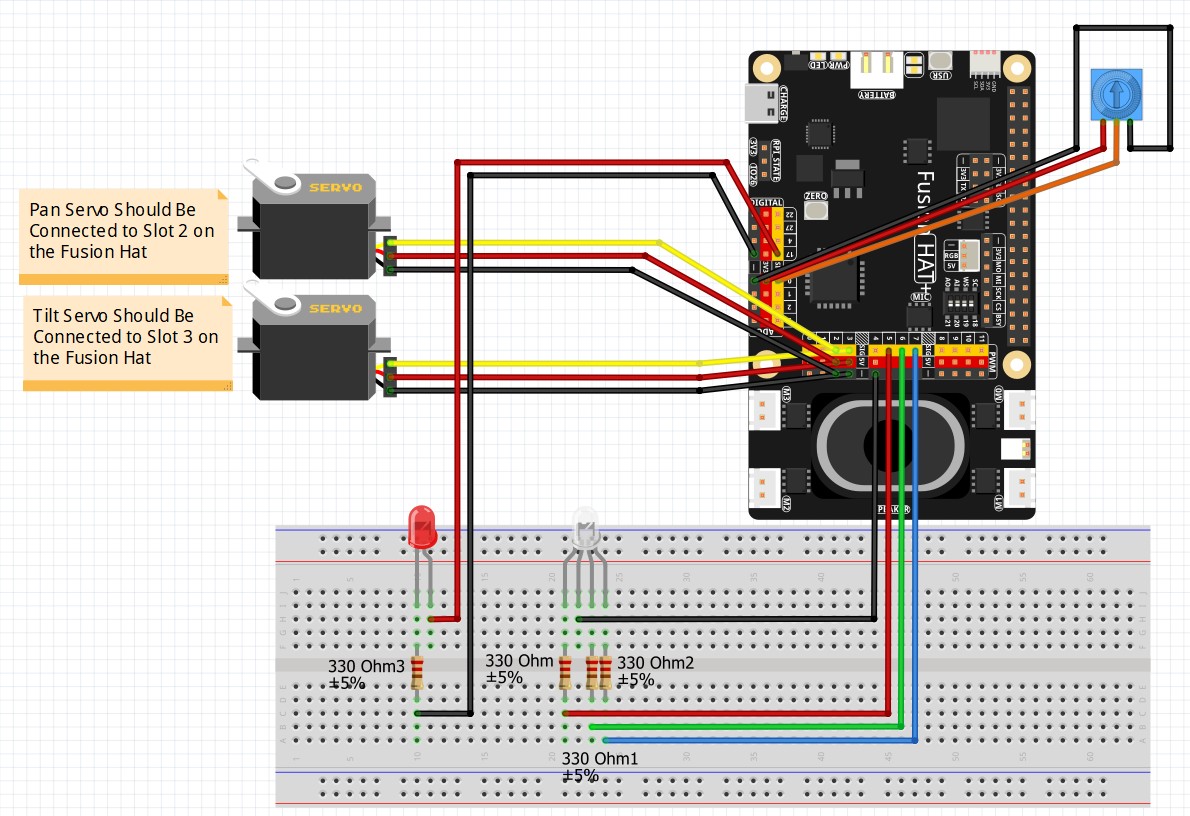
This is the schematic we are using in these lessons: