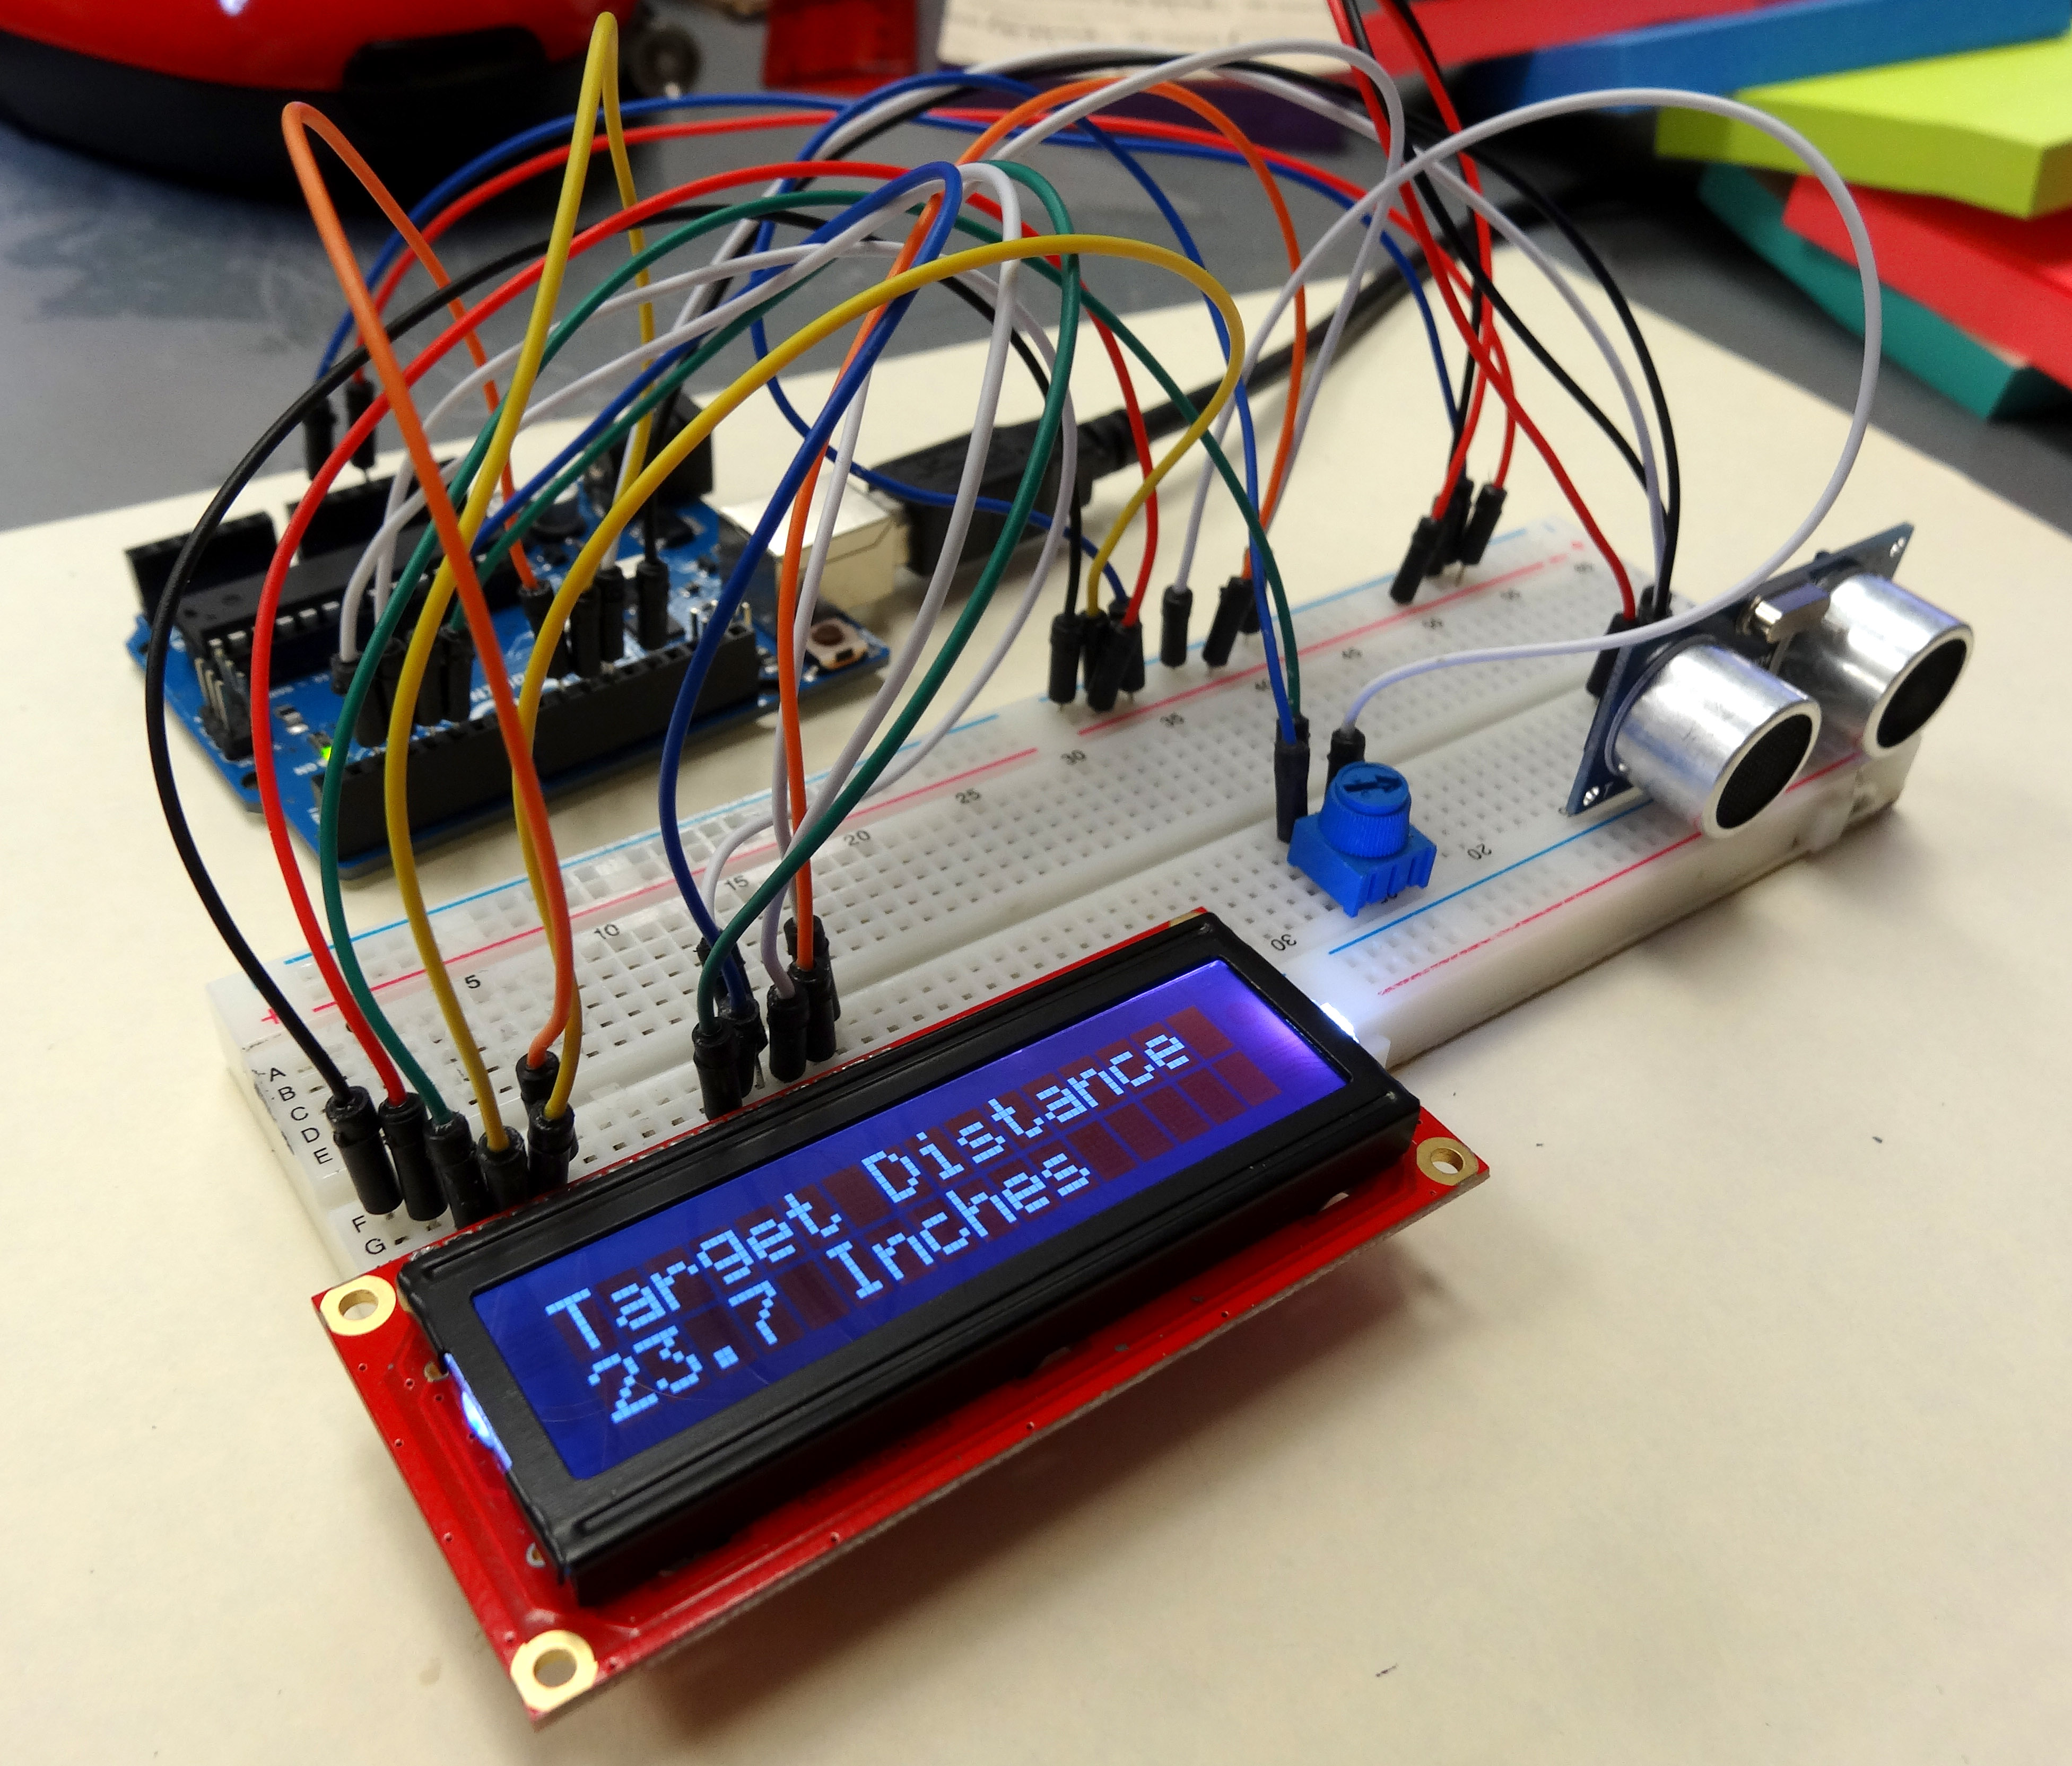
In LESSON 18 you learned how to use an ultrasonic sensor to measure distance, and in LESSON 19 you learned how to connect an LCD to the arduino. In this lesson we will combine what you have learned to create a circuit for measuring distance, and displaying results on an LCD display.

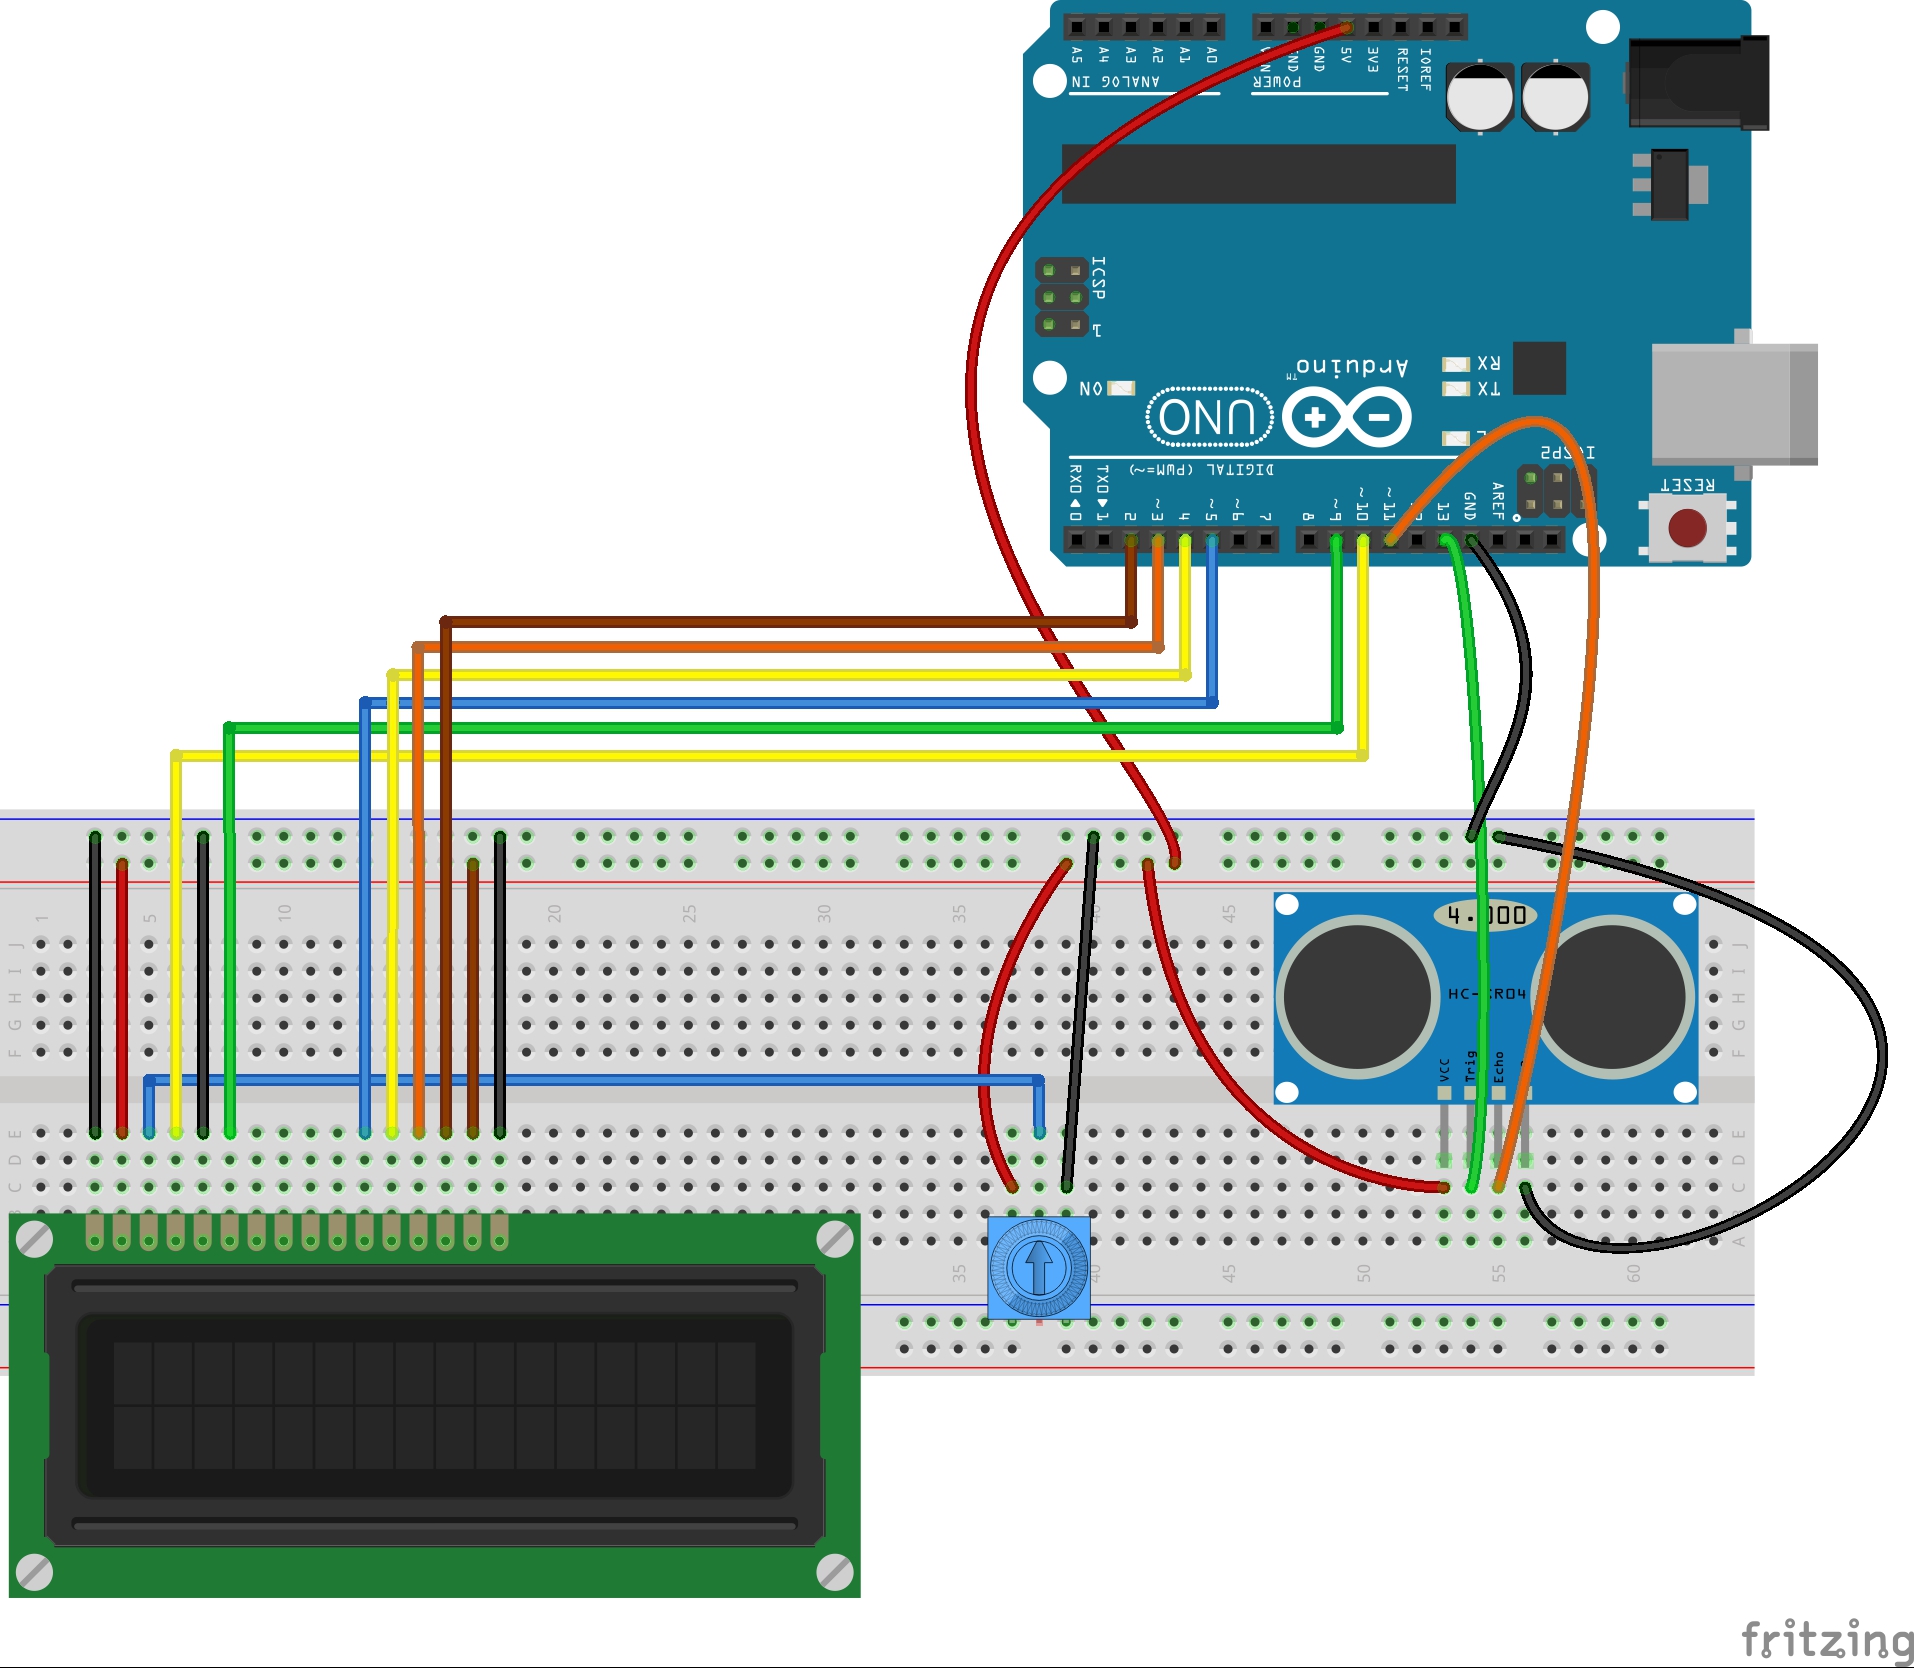
You can use the schematic below to connect the circuit. If you did LESSON 19, you should already have the LCD hooked up. For more info on connecting to the LCD, and how it works, review LESSON 19. This schematic is for the LCD in the Sparkfun Inventor Kit, or similar LCD. If you have a different LCD, you will have to determine the proper connections. There are some helps in LESSON 19. If you need the ultrasonic sensor, you can pick one up HERE.

Be very careful connecting the circuit. Check your work, and it helps to work with a Buddy. Have one person looking at the schematic, and one looking at the circuit. Sometimes it is easier to get it right working in pairs.
Now the objective of this project is to measure distance using the ultrasonic sensor, and then display that value on the LCD display. You should have the skills you need from the earlier lessons. Try and do this project on your own, but if you get stuck, you can look at my code below. As always, don’t copy and paste my code, but it should be used as a guide to help you write yours if you get stuck.
1 2 3 4 5 6 7 8 9 10 11 12 13 14 15 16 17 18 19 20 21 22 23 24 25 26 27 28 29 30 31 32 33 34 35 36 37 38 39 40 41 42 43 44 45 46 47 | #include <LiquidCrystal.h> //Load Liquid Crystal Library LiquidCrystal LCD(10, 9, 5, 4, 3, 2); //Create Liquid Crystal Object called LCD int trigPin=13; //Sensor Trip pin connected to Arduino pin 13 int echoPin=11; //Sensor Echo pin connected to Arduino pin 11 int myCounter=0; //declare your variable myCounter and set to 0 int servoControlPin=6; //Servo control line is connected to pin 6 float pingTime; //time for ping to travel from sensor to target and return float targetDistance; //Distance to Target in inches float speedOfSound=776.5; //Speed of sound in miles per hour when temp is 77 degrees. void setup() { Serial.begin(9600); pinMode(trigPin, OUTPUT); pinMode(echoPin, INPUT); LCD.begin(16,2); //Tell Arduino to start your 16 column 2 row LCD LCD.setCursor(0,0); //Set LCD cursor to upper left corner, column 0, row 0 LCD.print("Target Distance:"); //Print Message on First Row } void loop() { digitalWrite(trigPin, LOW); //Set trigger pin low delayMicroseconds(2000); //Let signal settle digitalWrite(trigPin, HIGH); //Set trigPin high delayMicroseconds(15); //Delay in high state digitalWrite(trigPin, LOW); //ping has now been sent delayMicroseconds(10); //Delay in high state pingTime = pulseIn(echoPin, HIGH); //pingTime is presented in microceconds pingTime=pingTime/1000000; //convert pingTime to seconds by dividing by 1000000 (microseconds in a second) pingTime=pingTime/3600; //convert pingtime to hourse by dividing by 3600 (seconds in an hour) targetDistance= speedOfSound * pingTime; //This will be in miles, since speed of sound was miles per hour targetDistance=targetDistance/2; //Remember ping travels to target and back from target, so you must divide by 2 for actual target distance. targetDistance= targetDistance*63360; //Convert miles to inches by multipling by 63360 (inches per mile) LCD.setCursor(0,1); //Set cursor to first column of second row LCD.print(" "); //Print blanks to clear the row LCD.setCursor(0,1); //Set Cursor again to first column of second row LCD.print(targetDistance); //Print measured distance LCD.print(" inches"); //Print your units. delay(250); //pause to let things settle } |
Your assignment is to get this project going, and show that you can measure distance and then display it on the LCD. After showing me your work, then you need to take the project in your own unique direction. What can you make based on what you have learned in the last few lessons. You should use some combination of Ultrasonic Sensor, LCD, and Servo to make a project or product or your own invention. You have the technical skills, you have the equipment, now go be creative!
