OK, we are ready to move forward and learn new circuit skills and new programming skills. In today’s lesson we will learn how to control an RGB (Red, Green, Blue) LED with an arduino microcontroller! This will introduce us to a new circuit component, and will require us to learn some new programming skills.

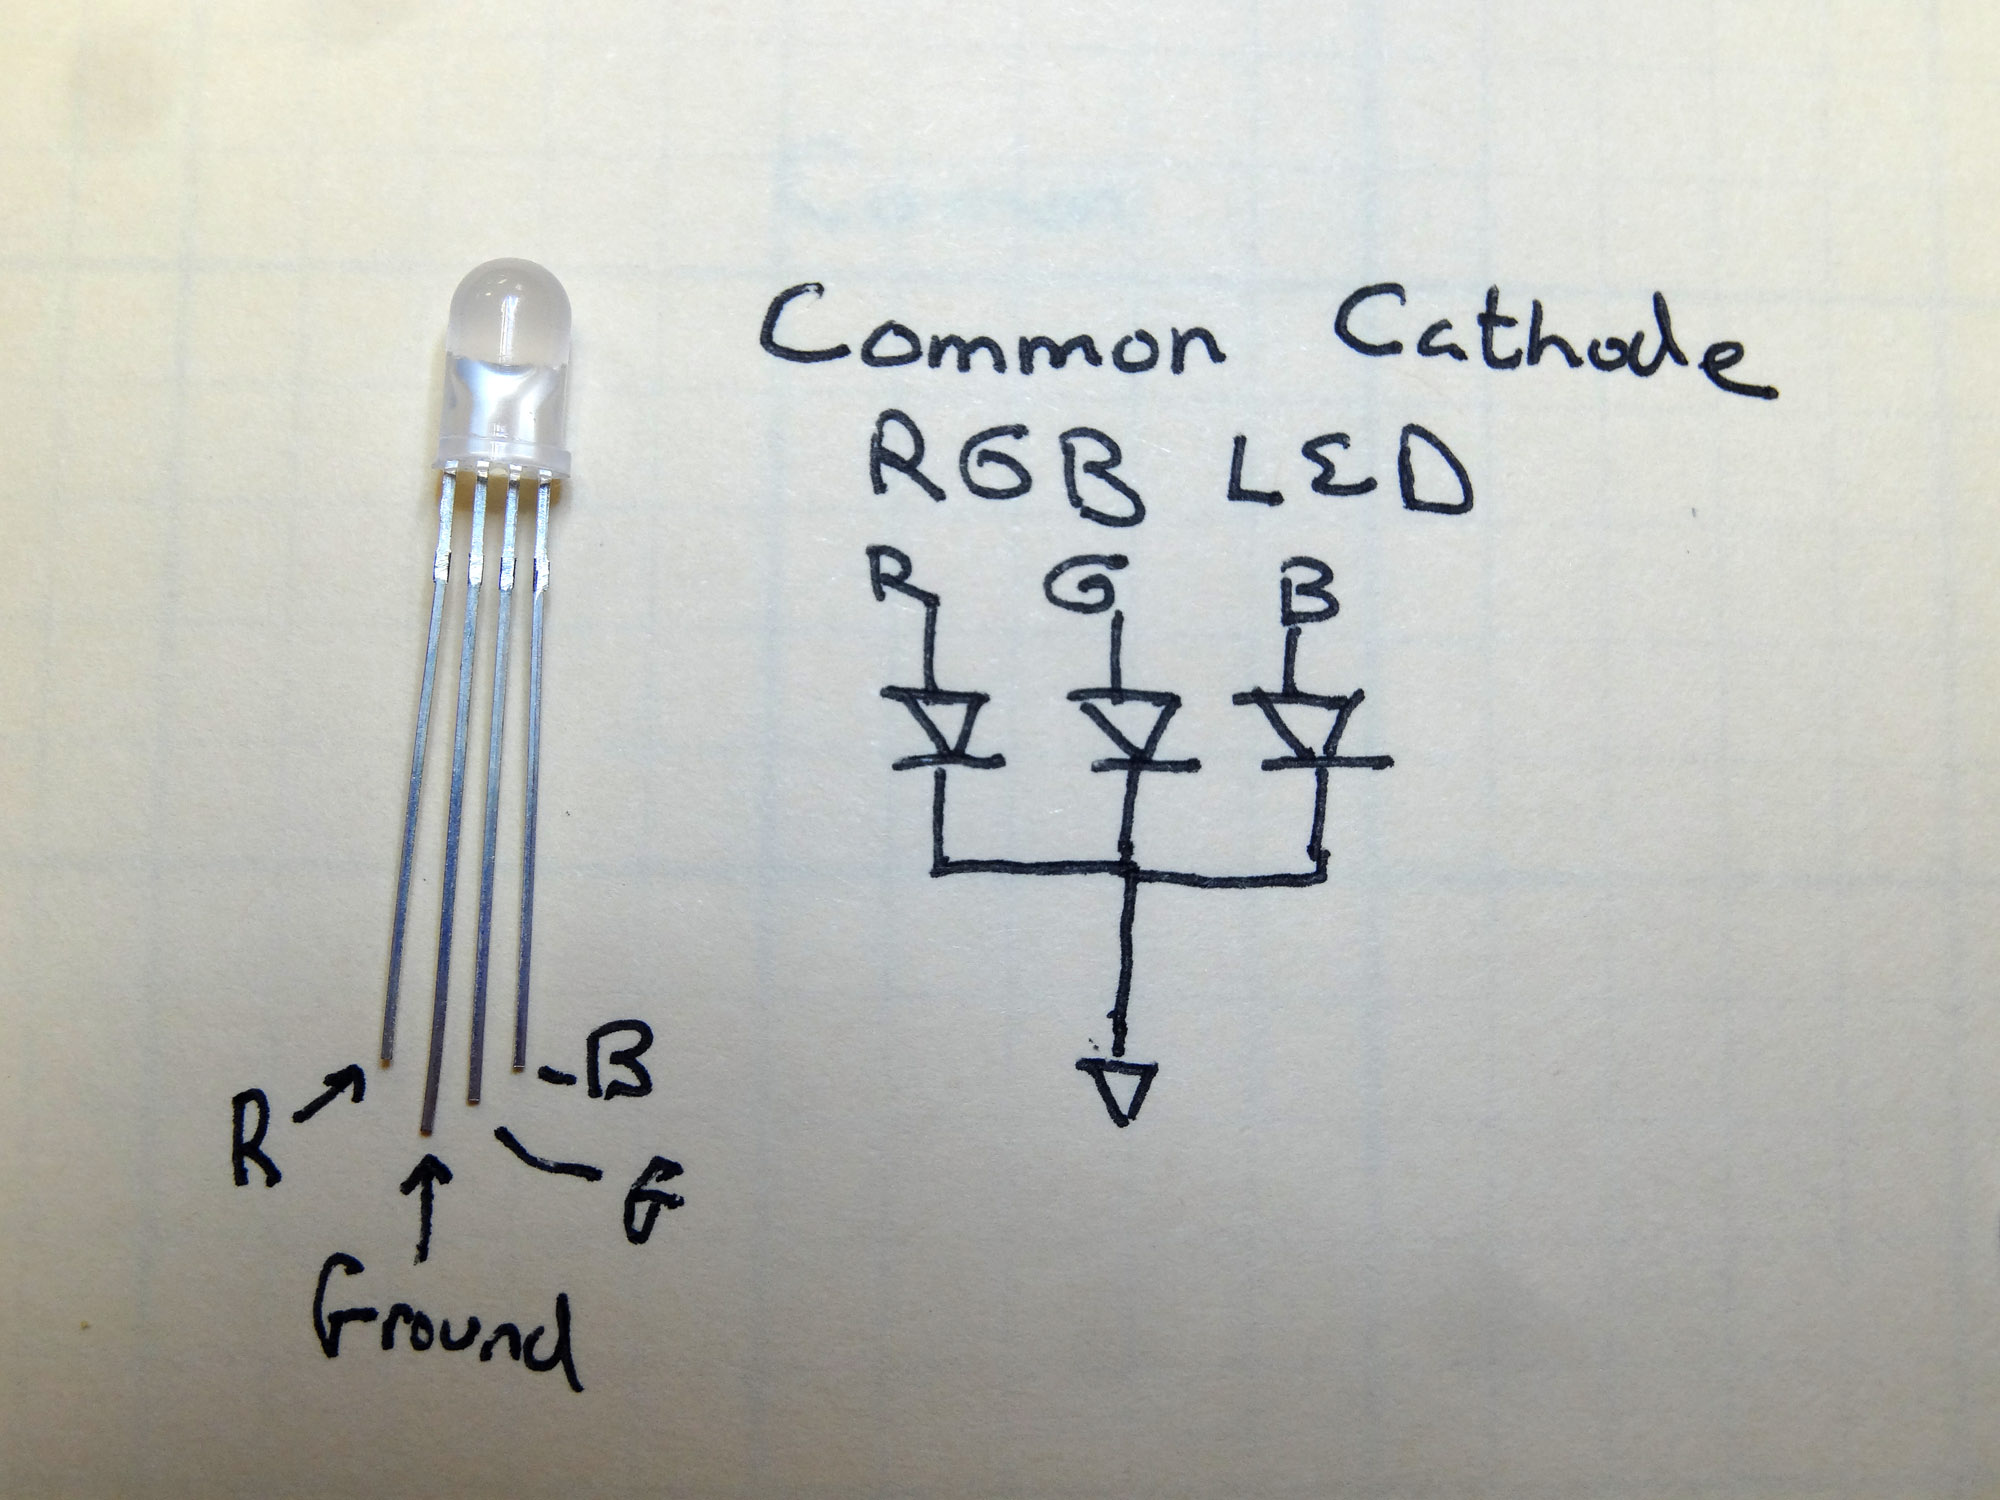
An RGB LED is basically three LED’s in one. It has 4 leads. One lead, the long lead, is the common ground. Then one lead controls the red LED, one lead controls the green LED, and one lead controls the blue LED. All three of the LED’s are connected to ground through the same pin. You can control the color you get out of the LED based on the voltages you write to the different control pins. A schematic will probably help you understand how the component works and how you should hook up to it.

This picture shows the four pins for a common cathode RGB LED. “Common Cathode” just means that the LED’s share the ground pin. There are also “Common Anode” LED’s which share a common high voltage pin, and then each color has its own ground. I think these are much more confusing, but just mention them so that you know that this tutorial is for the common cathode type. The Sparkfun Inventor Kit has the common cathode configuration, which is the type I prefer. Also note in the drawing you can see that the length of the pins is your clue as to which pin controls red, which green and which blue.
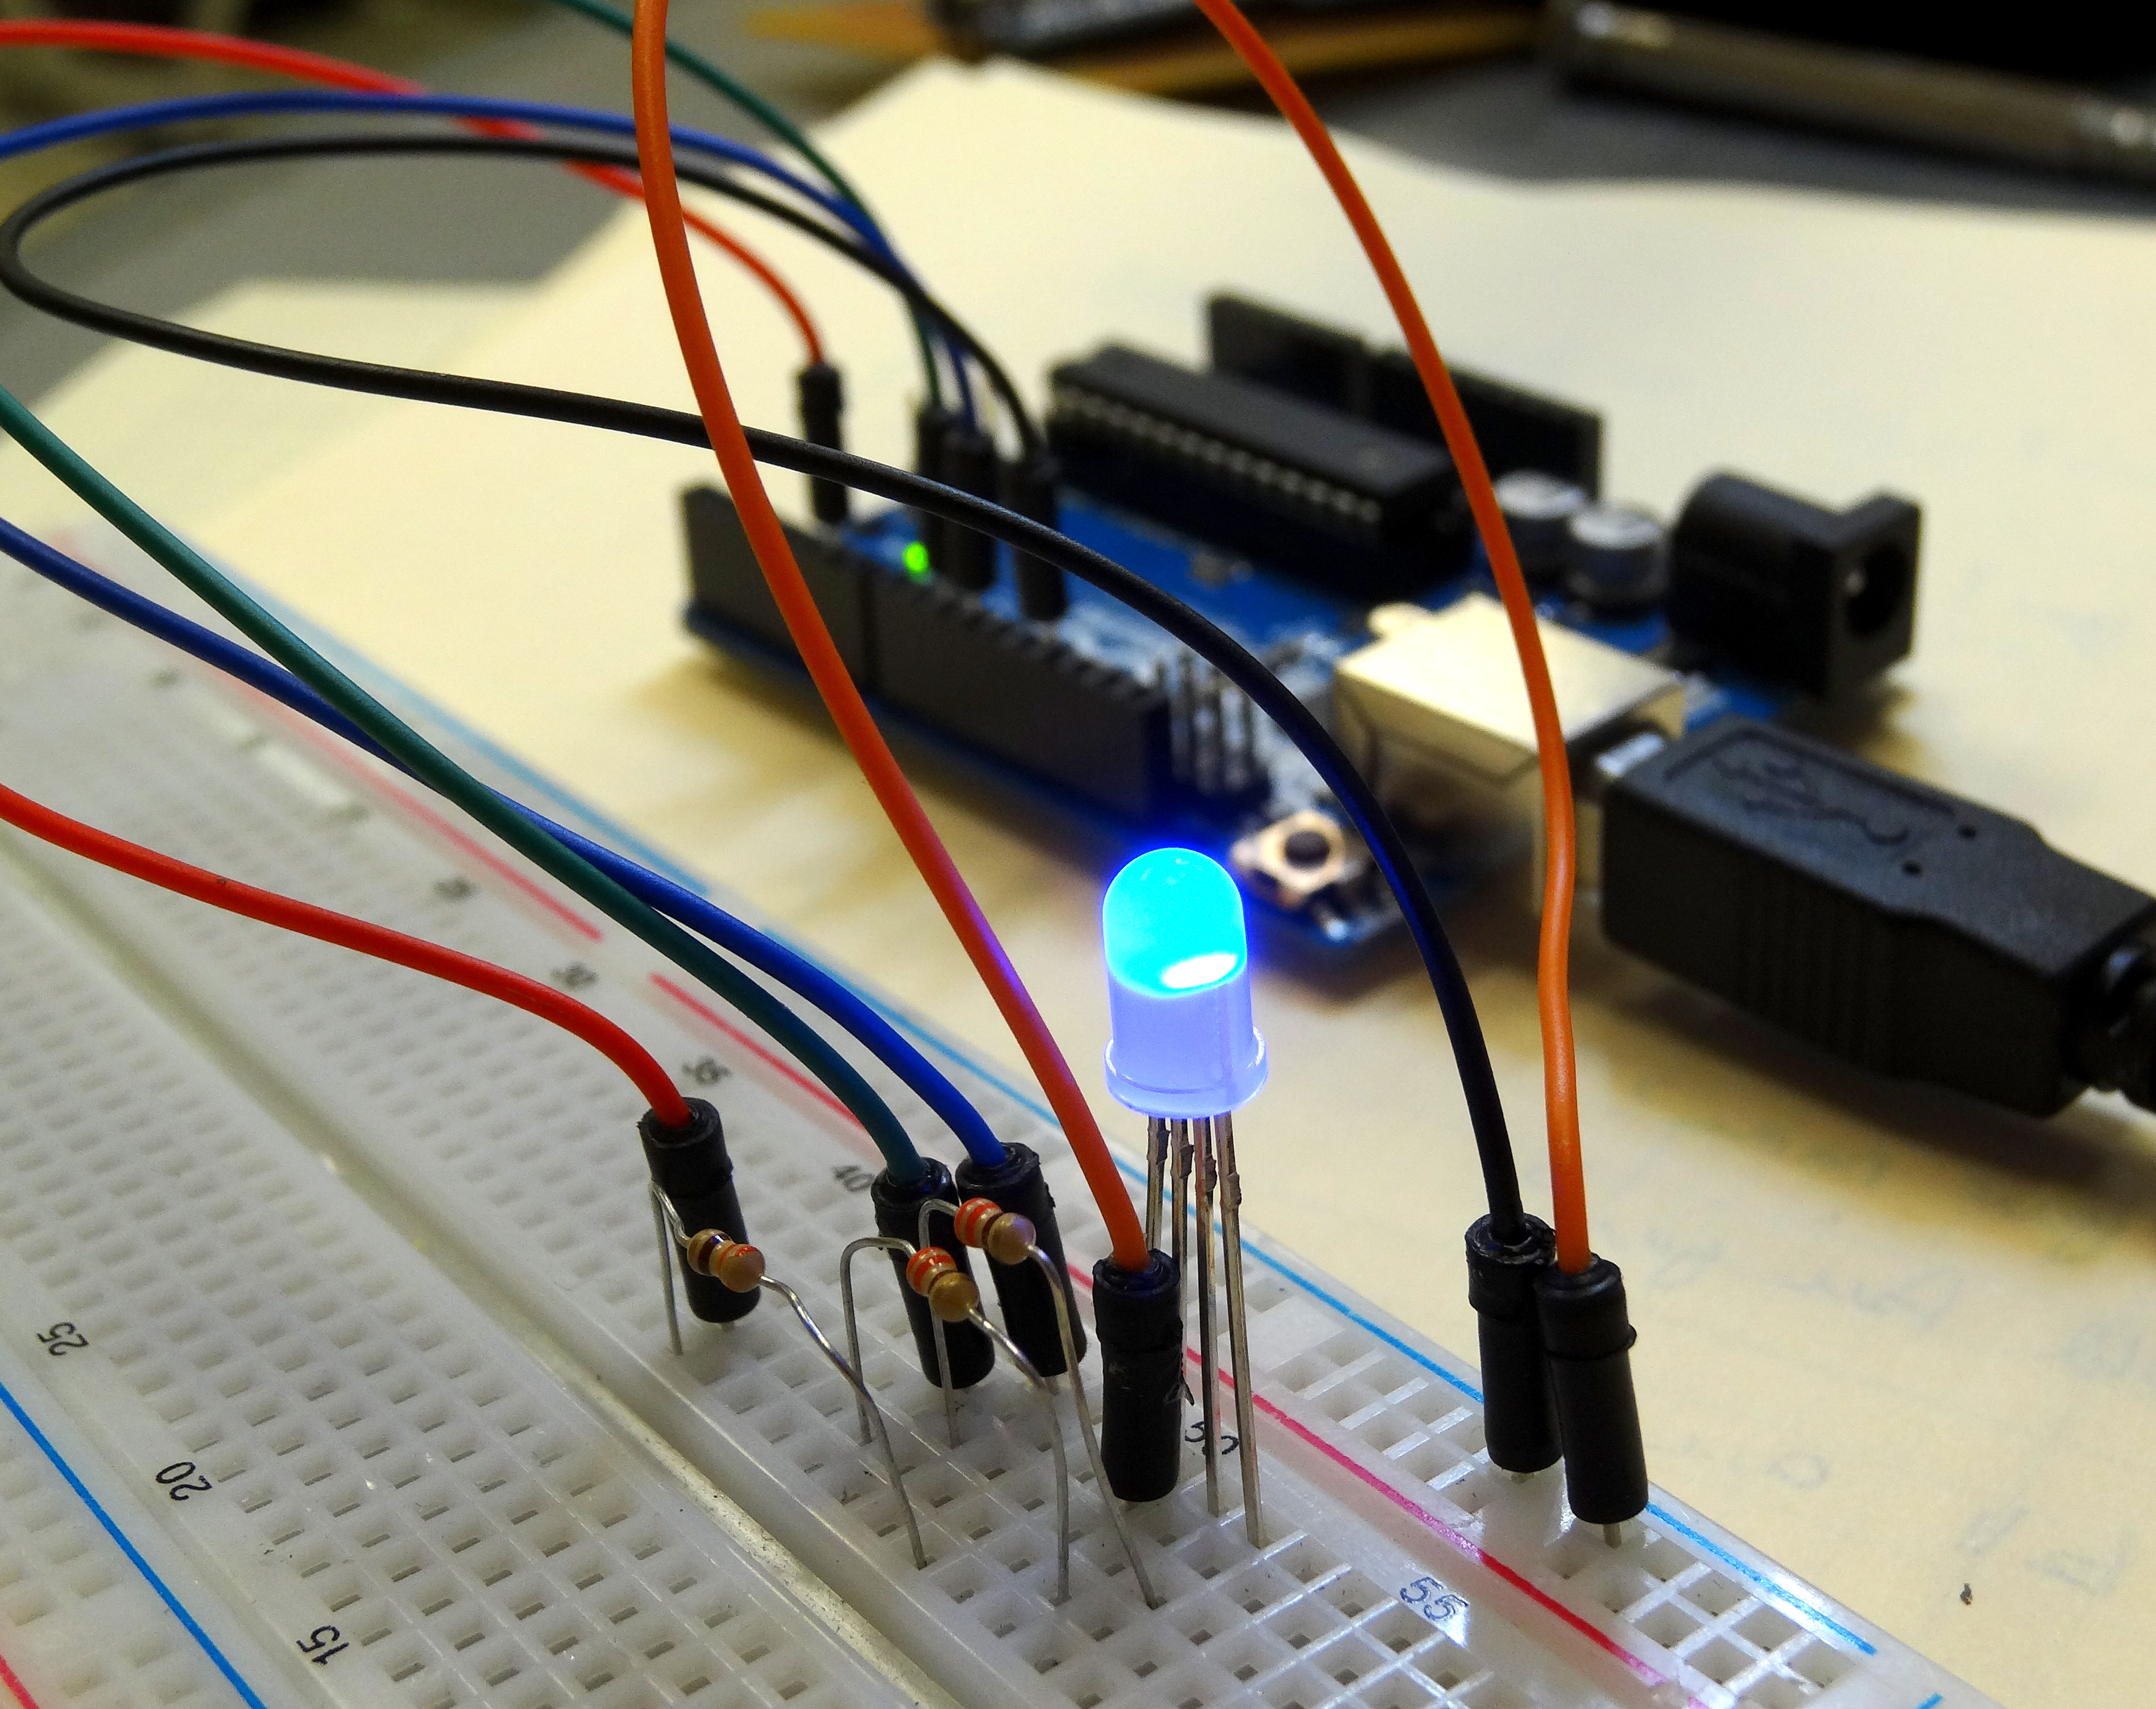
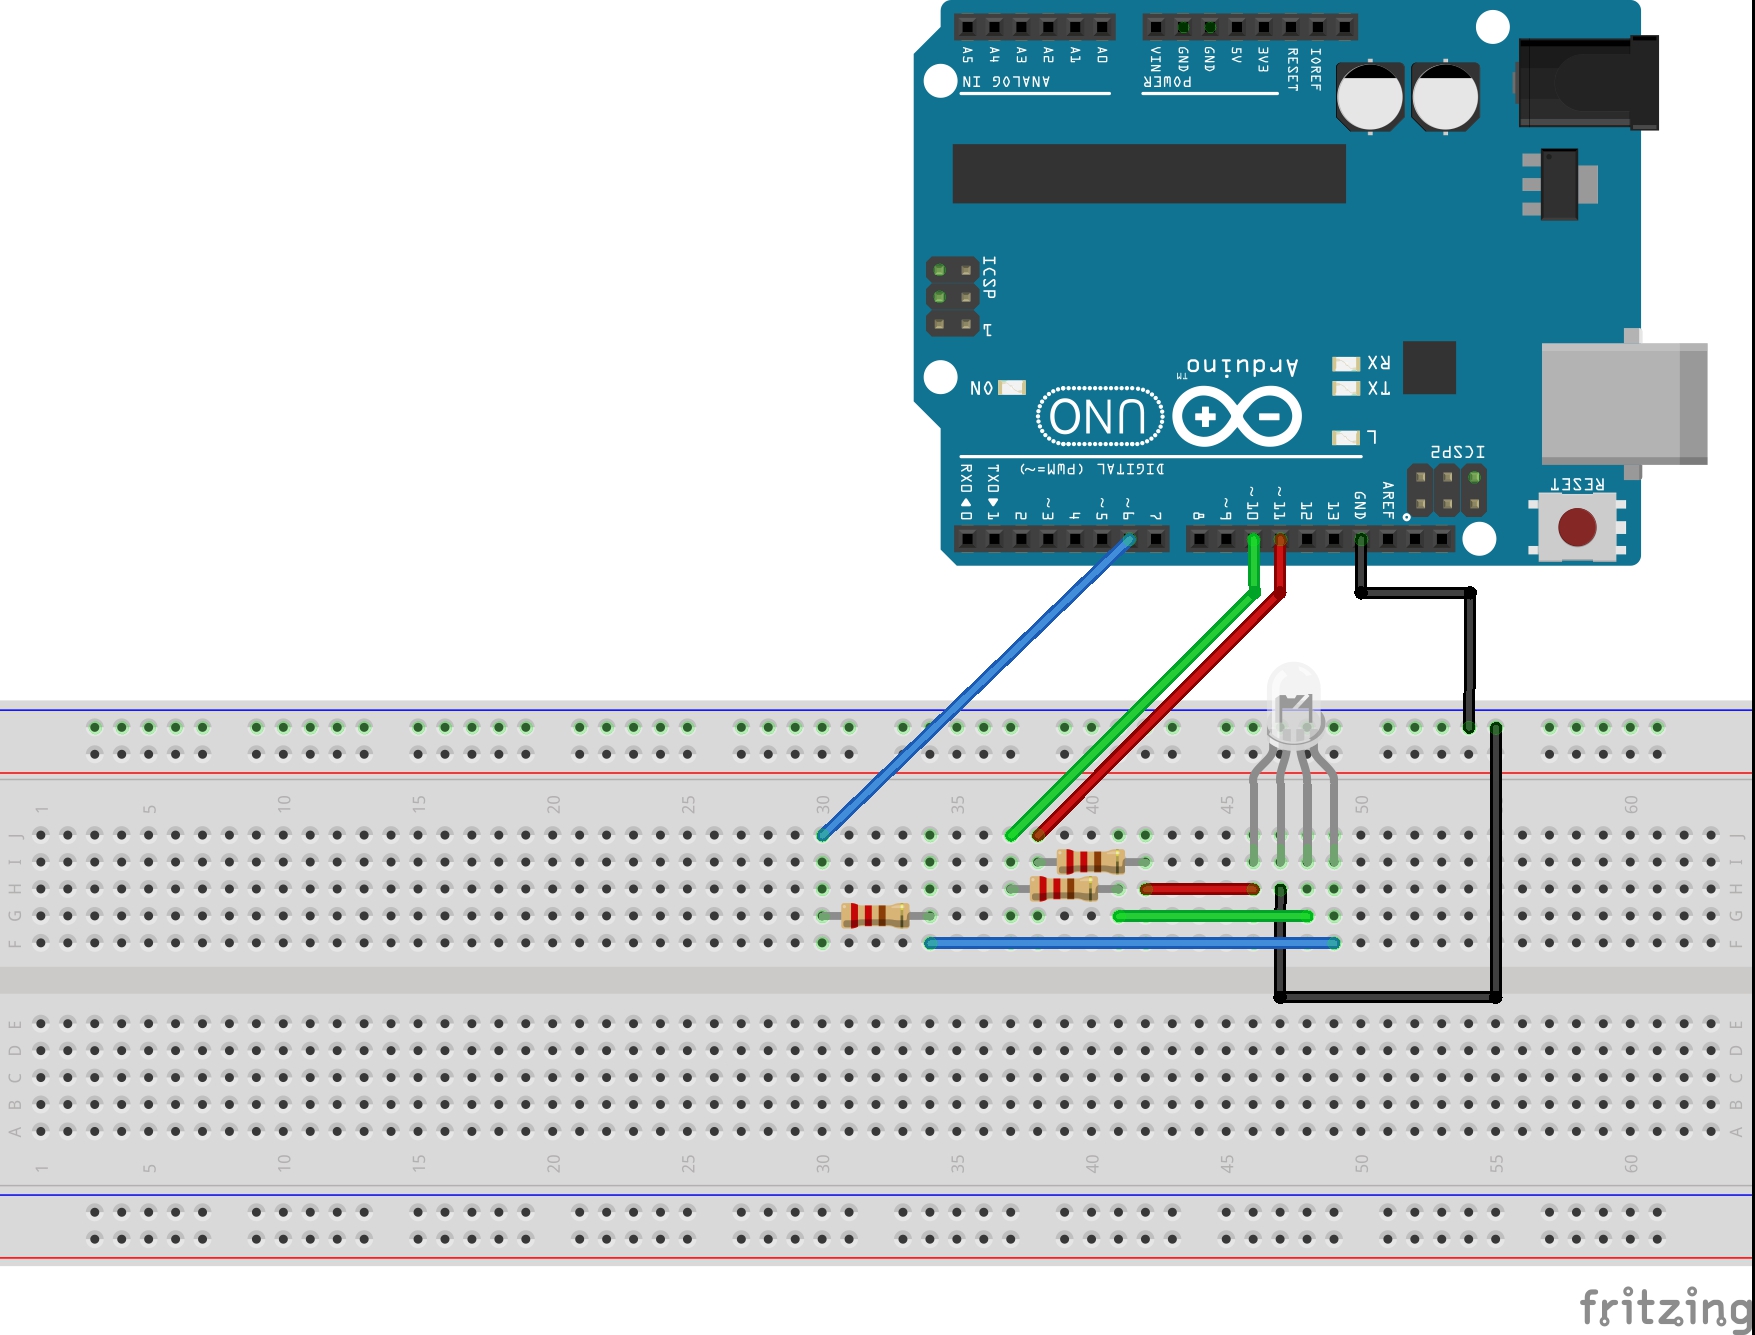
Now lets think about using this in a circuit. As you can see in the schematic, all three of the LED’s share a common ground pin. You can easily see that pin should be connected to your circuit ground. Now, think about how you would connect the control pins. To control a normal LED, you needed to connect to one arduino output pin. To control this LED, how many control pins will you need to use on the arduino? That’s right . . . you will need three control pins. Also, remember than you never connect an LED directly to a voltage source, you always use a series current limiting resistor (typically 330 ohms). For these new RGB LED’s how many current limiting resistors will we need? We will need three . . . each color control pin will need its own current limiting resistor. So each color control pin will connect to an arduino output pin through its own current limiting resistor. Once that is hooked up, we can control what color the LED is by writing voltages from the arduino to specific legs of the RGB LED. If we write a voltage to the red pin, the LED will be red. If we write a voltage to the blue pin, the LED will be blue. Also the exciting thing is that if you write voltages to multiple pins, you can get the in between blended colors. Basically by analogWrite-ing different values to the 3 different control pins, you can get any imaginable color. But first, lets go ahead and get our circuit set up. The following schematic controls red from arduino pin 6, green from arduino pin 10 and blue from arduino pin 11. Go ahead and hook this circuit up.

Now lets play around with a program that will independently turn on the different colors. We will start simple so we can get an intuitive feel for how the LED works.
1 2 3 4 5 6 7 8 9 10 11 12 13 14 15 16 17 18 19 20 21 22 | int redPin=11; //set red LED pin to 11 int greenPin=10; //set green LED pin to 10 int bluePin=6; //set blue LED pin to 6 int brightness=100; //Set brightness to 100 void setup() { // put your setup code here, to run once: Serial.begin(9600); //Turn on Serial port pinMode(redPin, OUTPUT); //Set redPin to be an output pinMode(greenPin, OUTPUT); //Set greenPin to be an output pinMode(bluePin, OUTPUT); //set bluePin to be an output } void loop() { // put your main code here, to run repeatedly: analogWrite(redPin, 0); //turn off red pin analogWrite(greenPin, 0); //turn off green pin analogWrite(bluePin, brightness); //write 100 (brightness) to blue pin } |
With the code above, what color do you anticipate the LED will be? Hook up the circuit and type in the code, and see what happens. It is important that you type in the code. Do not cut and paste my code. You need to type it in. When you type it in, you will probably make mistakes and when you do you will have to troubleshoot or debug your code. That means you have to find your mistakes. All programmers make mistakes, and it is important very early on to learn how to find your mistakes.
Modify the code above so that the LED turns green.
Now modify it again so that the LED turns red.
Now try for the in between colors. How would you get the LED to turn orange? Play around with achieving different colors. Try to get the following colors:
Cyan
Magenta
Yellow
Orange
Purple
