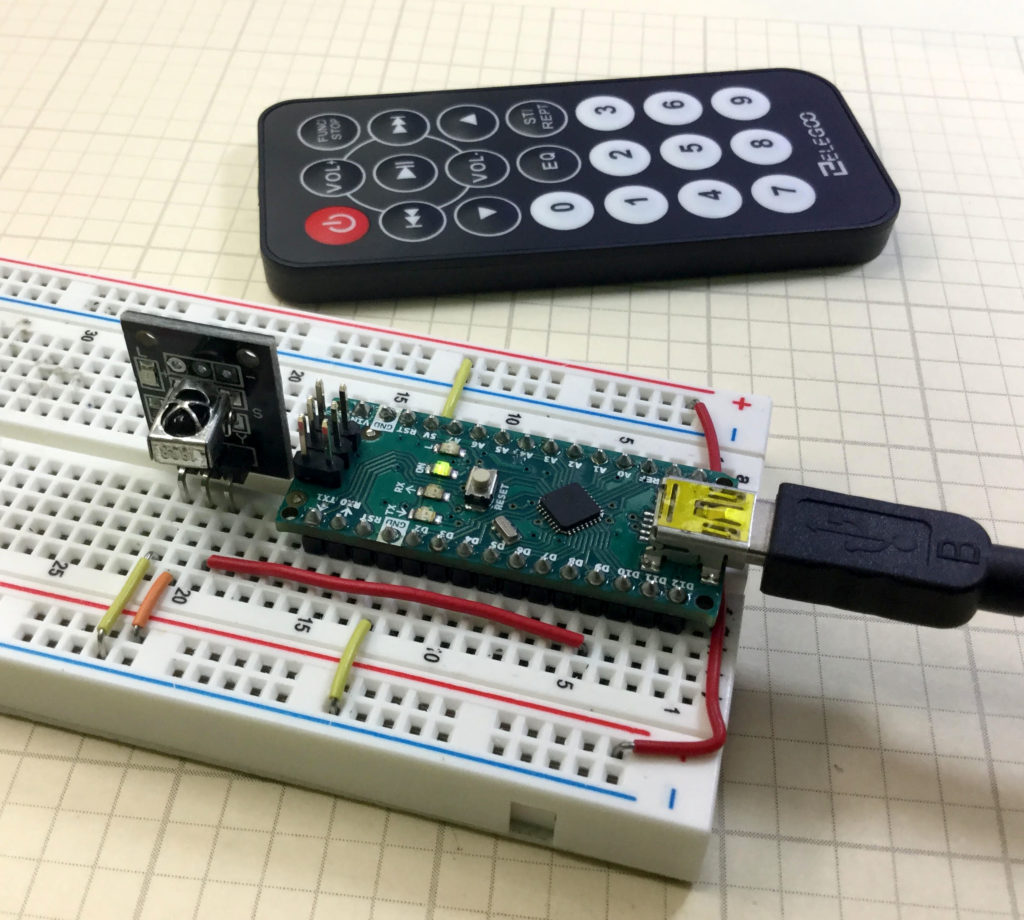
In this lesson we show you how to map button pushes on the Infrared Remote Control to useful functions in the Arduino. This code can serve as the basis for using the remote control in many different applications.
We are building this with parts from our Elegoo Kit , and our actual build is using an Arduino Nano, which allows the project to be built on a single breadboard. You can get the neat jumper wires HERE.
The code developed in the video is available below:
1 2 3 4 5 6 7 8 9 10 11 12 13 14 15 16 17 18 19 20 21 22 23 24 25 26 27 28 29 30 31 32 33 34 35 36 37 38 39 40 41 42 43 44 45 46 47 48 49 50 51 52 53 54 55 56 57 58 59 60 61 62 63 64 65 66 67 68 69 70 71 72 73 74 75 76 77 78 79 80 81 82 83 84 85 86 87 88 89 90 91 92 93 94 95 96 97 98 99 100 101 102 103 104 105 | #include <IRremote.h> int IRpin=9; IRrecv IR(IRpin); decode_results cmd; String myCom; void setup() { Serial.begin(9600); IR.enableIRIn(); } void loop() { while (IR.decode(&cmd)==0){ } delay(1500); IR.resume(); if (cmd.value==0xFF6897){ myCom="zero"; Serial.println(myCom); } if (cmd.value==0xFF30CF){ myCom="one"; Serial.println(myCom); } if (cmd.value==0xFF18E7){ myCom="two"; Serial.println(myCom); } if (cmd.value==0xFF7A85){ myCom="three"; Serial.println(myCom); } if (cmd.value==0xFF10EF){ myCom="four"; Serial.println(myCom); } if (cmd.value==0xFF38C7){ myCom="five"; Serial.println(myCom); } if (cmd.value==0xFF5AA5){ myCom="six"; Serial.println(myCom); } if (cmd.value==0xFF42BD){ myCom="seven"; Serial.println(myCom); } if (cmd.value==0xFF4AB5){ myCom="eight"; Serial.println(myCom); } if (cmd.value==0xFF52AD){ myCom="nine"; Serial.println(myCom); } if (cmd.value==0xFFA25D){ myCom="pwr"; Serial.println(myCom); } if (cmd.value==0xFF629D){ myCom="v+"; Serial.println(myCom); } if (cmd.value==0xFFE21D){ myCom="fun"; Serial.println(myCom); } if (cmd.value==0xFF22DD){ myCom="rew"; Serial.println(myCom); } if (cmd.value==0xFF02FD){ myCom="play"; Serial.println(myCom); } if (cmd.value==0xFFC23D){ myCom="ff"; Serial.println(myCom); } if (cmd.value==0xFFE01F){ myCom="dn"; Serial.println(myCom); } if (cmd.value==0xFFA857){ myCom="v-"; Serial.println(myCom); } if (cmd.value==0xFF906F){ myCom="up"; Serial.println(myCom); } if (cmd.value==0xFF9867){ myCom="eq"; Serial.println(myCom); } if (cmd.value==0xFFB04F ){ myCom="st"; Serial.println(myCom); } } |