
In this lesson we learn the ins and outs of controlling a DC Motor from an Arduino. A key aspect of this is to understand you must not connect a motor directly to an arduino. You need to either build a suitable transistor and diode circuit, or you need to utilize a motor controller, such as the L293D motor control chip.
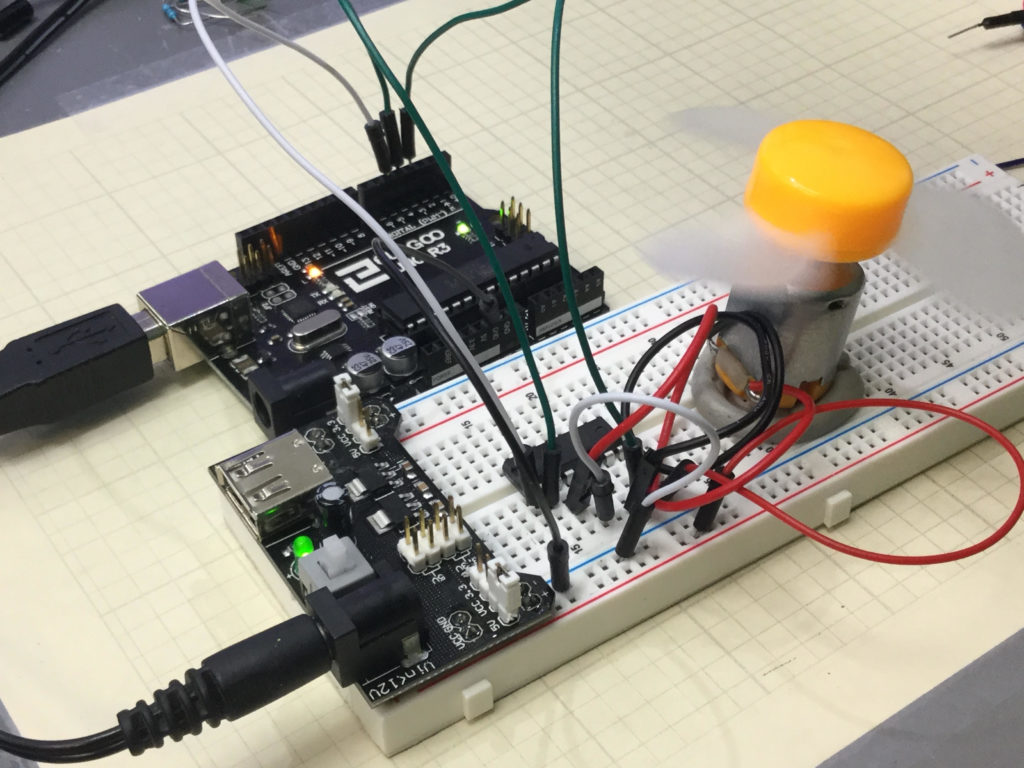
The video below explains how to hook things up and how the code works. You must always be mindful that you are using a motor with current requirements that are consistent with the motor controller and power supply you are working with. Failure to do so could result in damage to components or injury.
The circuit used in this video tutorial is shown below:
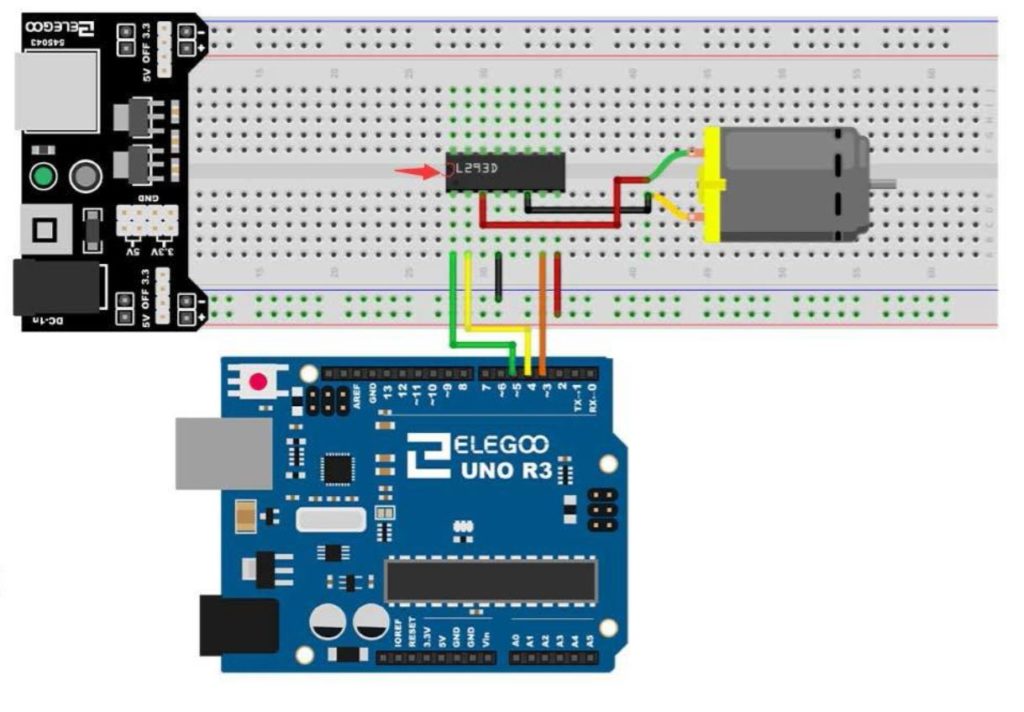
It is a good practice to have all grounds connected in a circuit, so I would connect an arduino ground to the ground rail of the breadboard.
An official Arduino Uno R3 is available HERE. In this new series of lessons, I will be using the sensor and other components found in this KIT.
The code is described in the video, but if you need help, this is the code we used in the lesson.
|
1 2 3 4 5 6 7 8 9 10 11 12 13 14 15 16 17 18 19 20 21 22 23 |
int speedPin=5; int dir1=4; int dir2=3; int mSpeed=90; void setup() { // put your setup code here, to run once: pinMode(speedPin,OUTPUT); pinMode(dir1,OUTPUT); pinMode(dir2,OUTPUT); Serial.begin(9600); } void loop() { // put your main code here, to run repeatedly: digitalWrite(dir1,LOW); digitalWrite(dir2,HIGH); analogWrite(speedPin,255); delay(25); analogWrite(speedPin,mSpeed); delay(5000); } |