
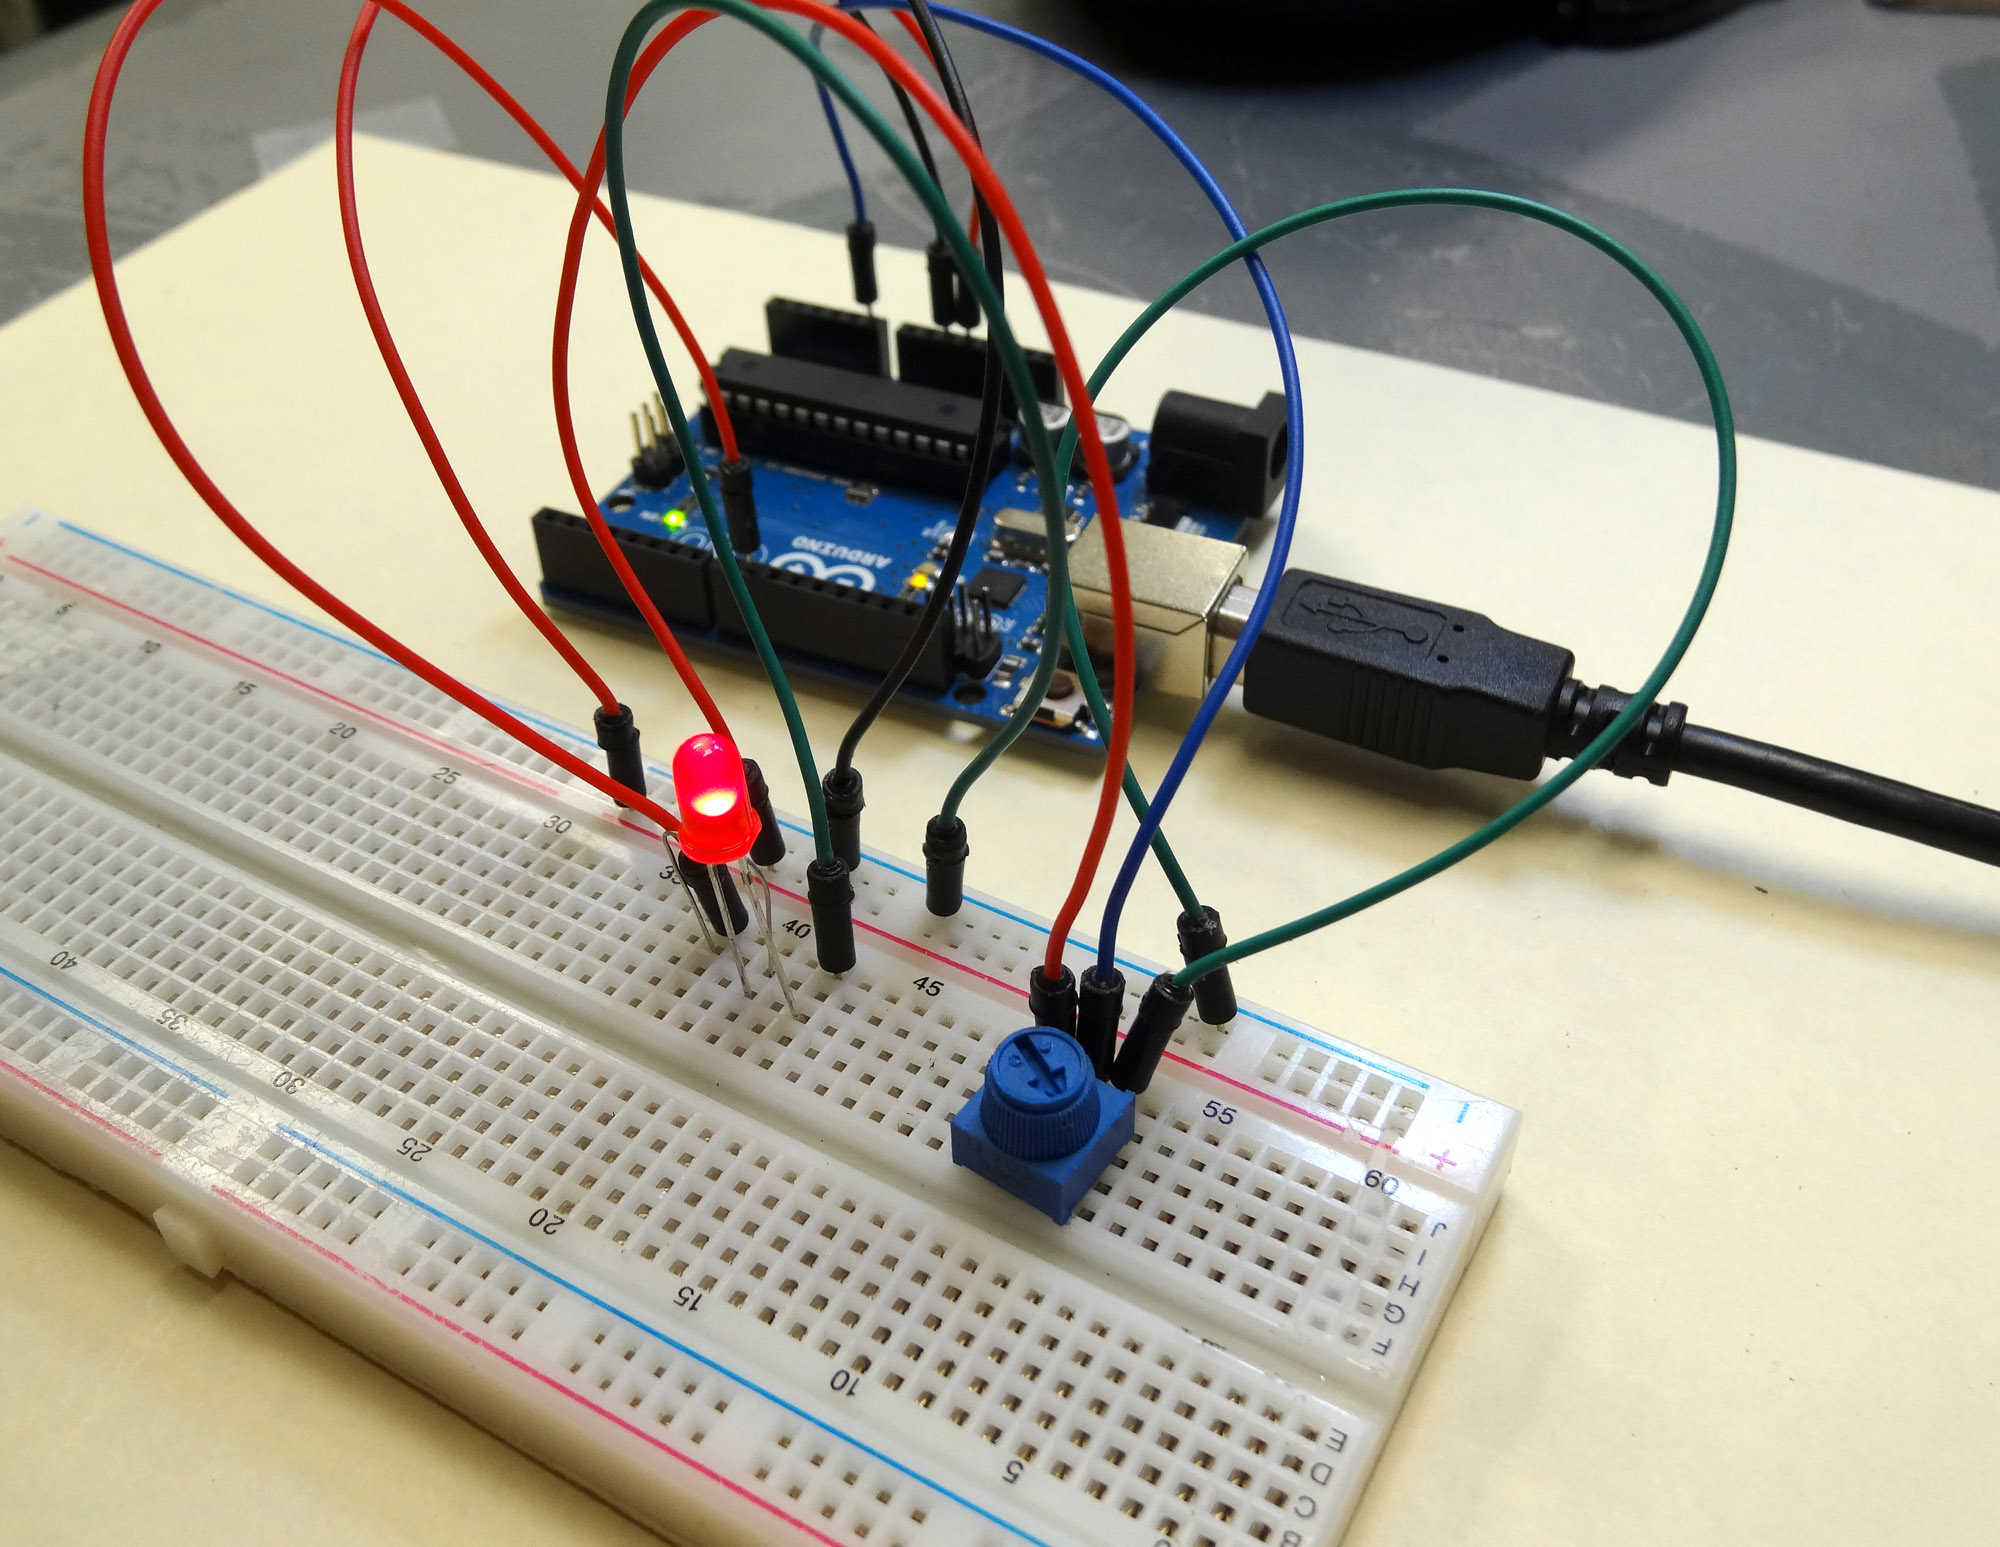
In Lesson 8 you learned to write analog voltages on the Arduiono, and in Lesson 10 you learned to read analog voltages from the arduino. In this lesson we will combine what you did in lessons 8, 9, and 10 to create an LED with adjustable brightness. The brightness will be set based on the position of the potentiometer. In order to do this, we need to set the potentiometer up as a voltage divider, and we need to drive the LED from one of the analog pins. For this example, I am using pin 9. The circuit schematic I am using is shown below.
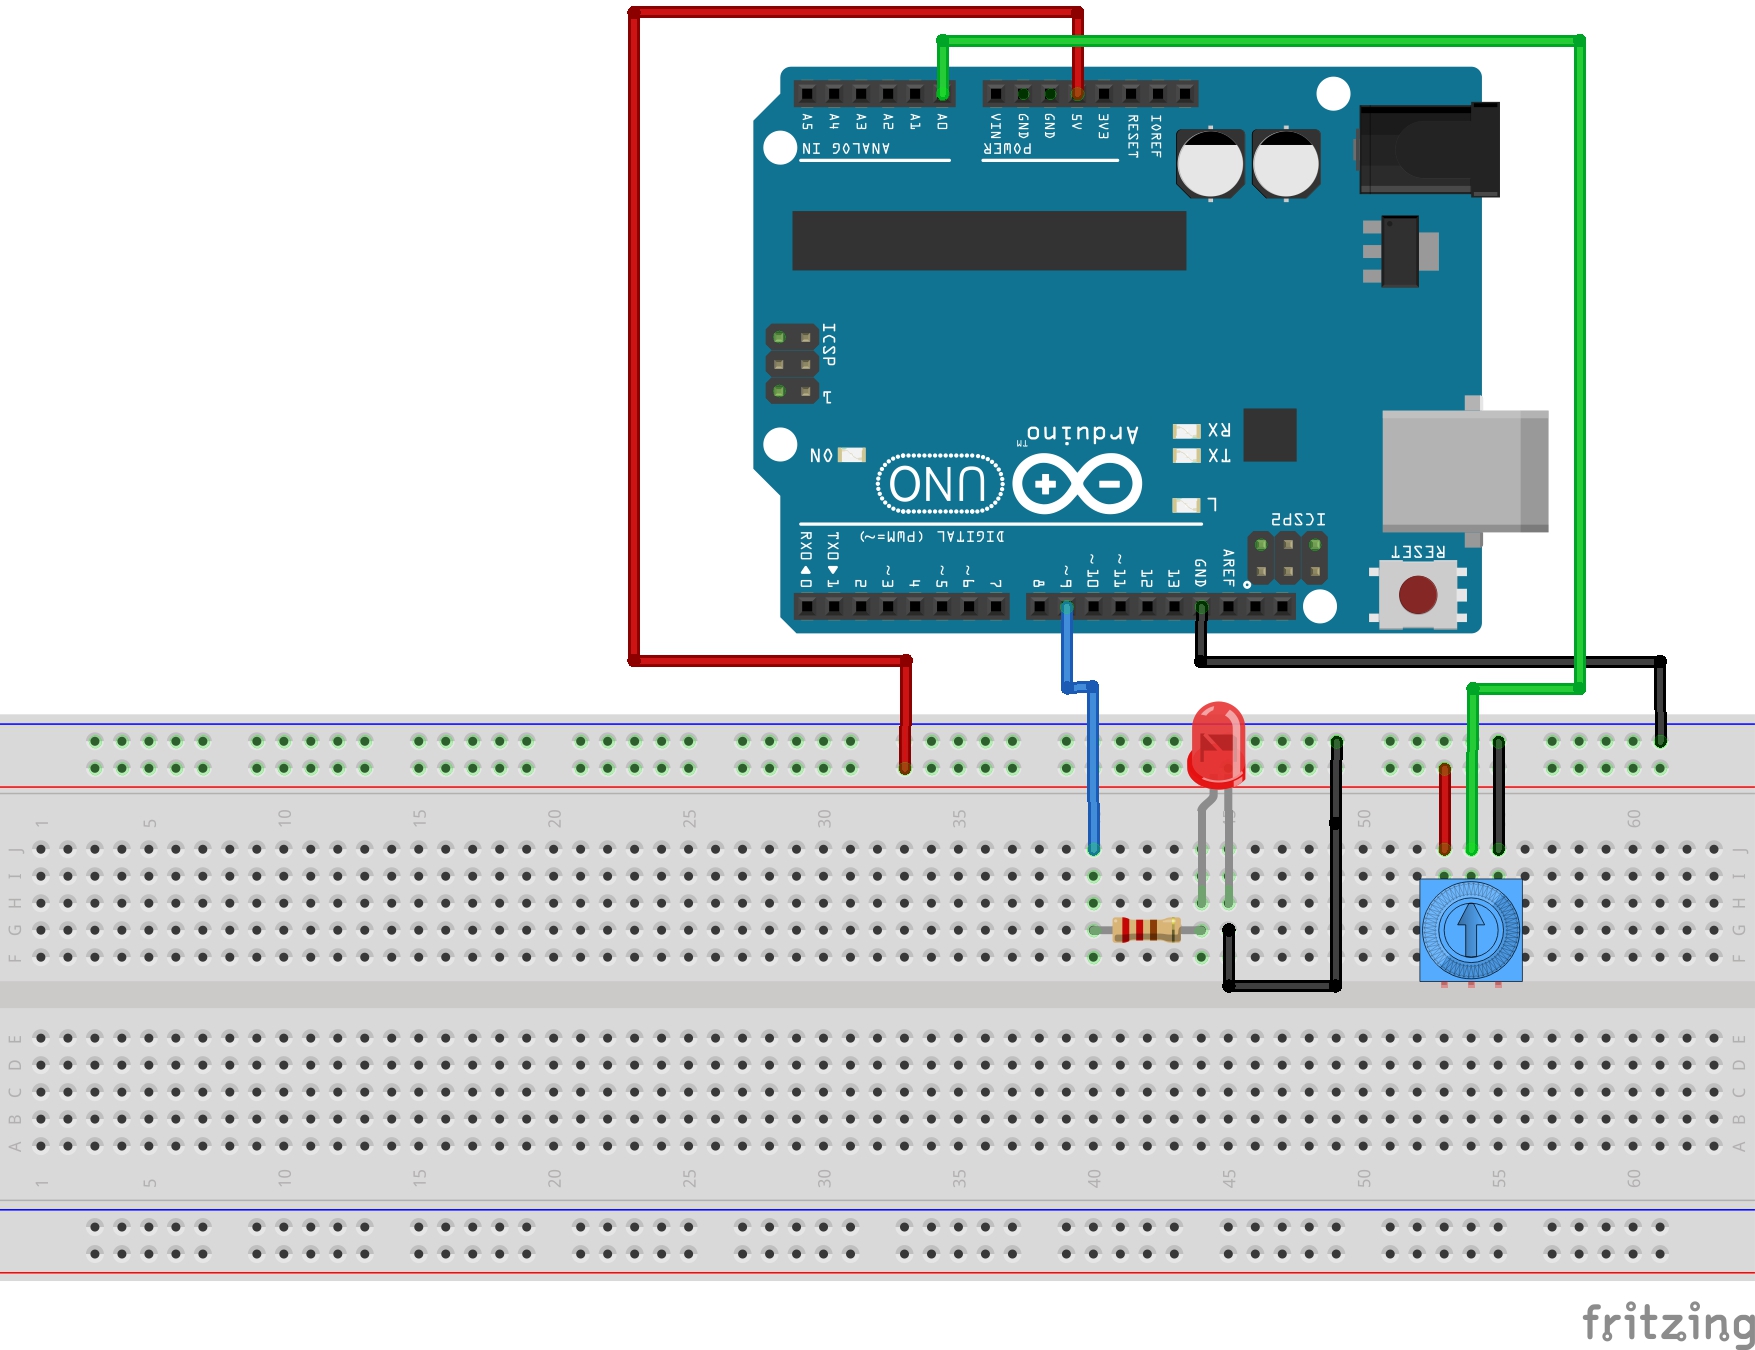
In placing the LED into the circuit, remember that you must always put the longer leg towards the positive voltage. In the case above, the longer leg should be connected to the resistor, and the shorter leg connected to ground. Also remember that we are using a 330 ohm resistor in the circuit to limit the current through the LED.
The goal now is to use what you learned in the last three lessons. You will want to read a value from the potentiometer, and then write a voltage to the LED based on the reading from the potentiometer. Remember that when you read an analog voltage between 0 and 5 volts, the arduino will report a number between 0 and 1023, with 0 representing 0 volts, and 1023 representing 5 volts.
Similarly, when you are writing an analog voltage between 0 and 5 volts, you must write a number between 0 and 255. If you write a “0” value, that corresponds to 0 volts. If you write a value of 255, that will output 5 volts. So, you must scale your write values between 0 and 255 to get voltages between 0 and 5 volts.
The tricky thing now is that we want to dim the LED based on what value we read from the potentiometer. If we read a 0 value from the potentiometer, we want to write a value of 0, which corresponds to a voltage of 0. If we read a value of 1023 from the potentiometer, then we will want to write our maximum voltage of 5 volts, which means we need to write a value of 255. Basically, we need to scale our read values, which will be between 0 and 1023 to suitable write values, which should be between 0 and 255.
Like in the earlier lessons, this is a simple linear relationship and allows us to use the skills we have learned in math class. This sheet explains the math:
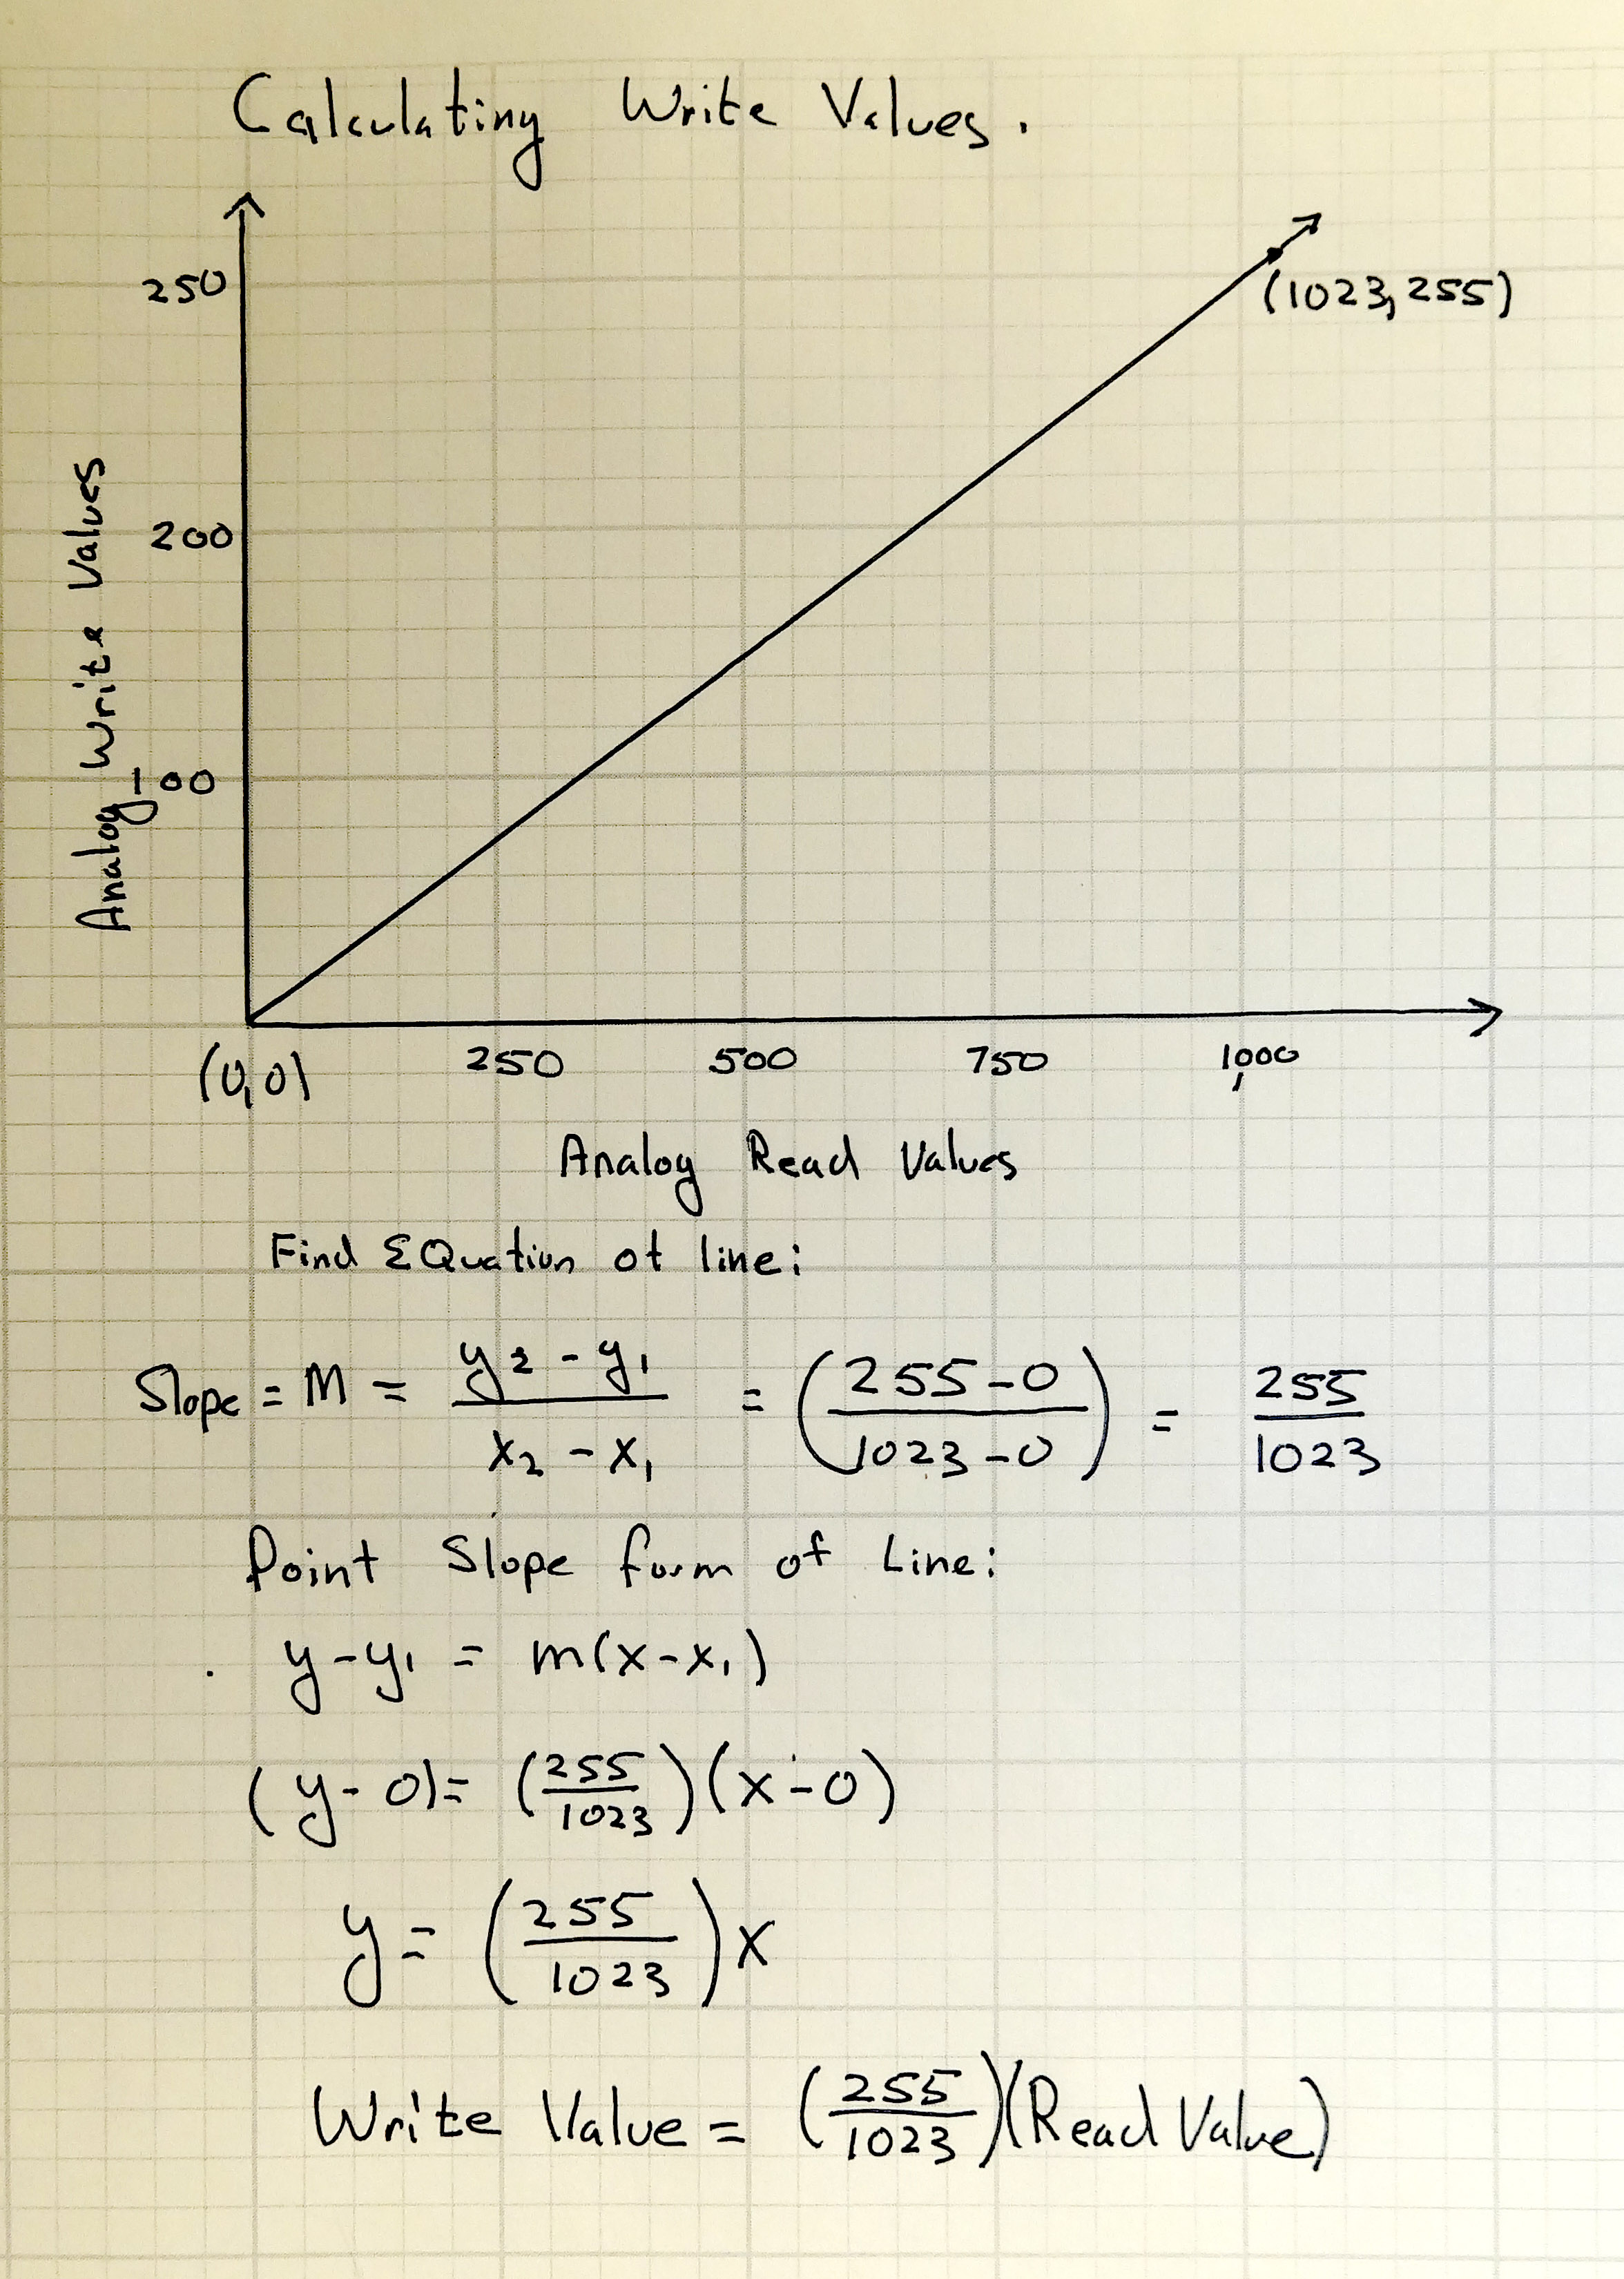
So, from the math above, we can see that the Write Value that we should write to the LED should be the value that we are reading from the potentiometer X (255/1023).
With the math out of the way we can write the program. This code is designed for the schematic above where the potentiometer center leg is read with pin A0 and the LED is written from pin 9.
|
1 2 3 4 5 6 7 8 9 10 11 12 13 14 15 16 17 18 19 20 |
int potPin= A0; //Declare potPin to be analog pin A0 int LEDPin= 9; // Declare LEDPin to be arduino pin 9 int readValue; // Use this variable to read Potentiometer int writeValue; // Use this variable for writing to LED void setup() { pinMode(potPin, INPUT); //set potPin to be an input pinMode(LEDPin, OUTPUT); //set LEDPin to be an OUTPUT Serial.begin(9600); // turn on Serial Port } void loop() { readValue = analogRead(potPin); //Read the voltage on the Potentiometer writeValue = (255./1023.) * readValue; //Calculate Write Value for LED analogWrite(LEDPin, writeValue); //Write to the LED Serial.print("You are writing a value of "); //for debugging print your values Serial.println(writeValue); } |
With this code, you should be able to set the brightness from the potentiometer. You read the voltage from the potentiometer and then scale the value you write to the LED based on the reading from the potentiometer.
RESOURCES: On all these lessons I will include resources on where you can purchase the items mentioned in the lecture.
Arduino Microcontroller: You can get a good deal on the arduino on Amazon. Arduinos are open source and many are cheap Chinese knockoffs, so you want to make sure you get an “official” version, which you can at the link above.
Sparkfun Inventor’s Kit: While the bare arduino will get you started, I really suggest getting the Sparkfun Inventor Kit. The projects I will feature in this tutorial set will use the components in this kit, and it is probably cheaper to go ahead and get the kit than to buy the individual components as you go along. The kit is under $100 on Amazon. The sparkfun kits has everything you need including the arduino.