


Tag Archives: Tutorial
Arduino Tutorial 55: Measuring Distance With HC-SR04 Ultrasonic Sensor

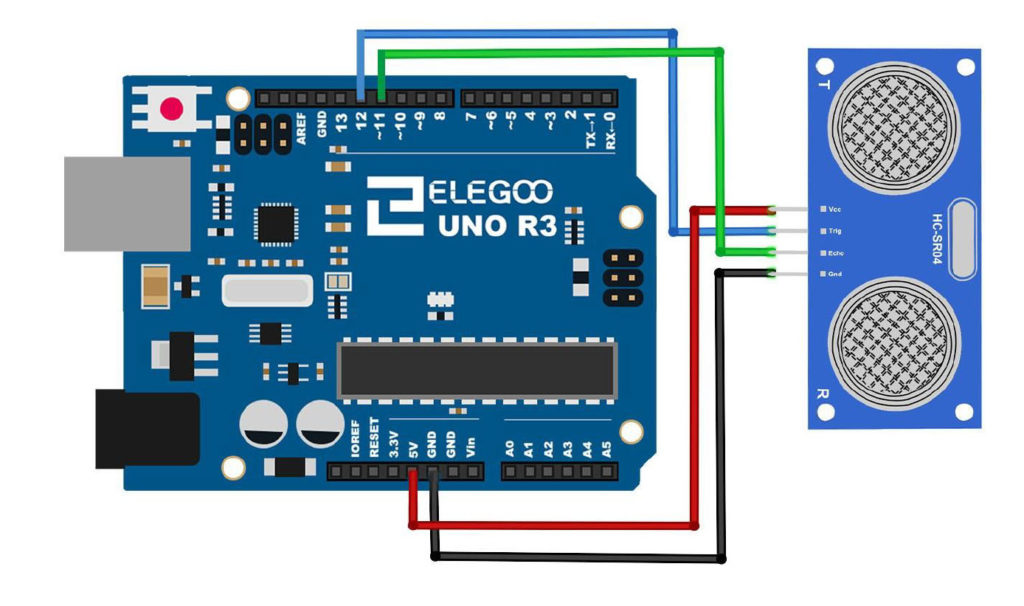
The circuit uses the following Schematic:

This is the code we develop in the video
|
1 2 3 4 5 6 7 8 9 10 11 12 13 14 15 16 17 18 19 20 21 22 23 24 25 26 27 28 29 30 |
int trigPin=12; int echoPin=11; int pingTravelTime; float pingTravelDistance; float distanceToTarget; int dt=50; void setup() { // put your setup code here, to run once: pinMode(trigPin,OUTPUT); pinMode(echoPin,INPUT); Serial.begin(9600); } void loop() { // put your main code here, to run repeatedly: digitalWrite(trigPin,LOW); delayMicroseconds(10); digitalWrite(trigPin,HIGH); delayMicroseconds(10); digitalWrite(trigPin,LOW); pingTravelTime=pulseIn(echoPin,HIGH); delay(25); pingTravelDistance=(pingTravelTime*765.*5280.*12)/(3600.*1000000); distanceToTarget=pingTravelDistance/2; Serial.print("Distance to Target is: "); Serial.print(distanceToTarget); Serial.println(" in."); delay(dt); } |
The sensor is part of our Elegoo Kit , so if you get this kit, you will be using the same hardware we are using. This project builds on the work we did in Lesson 53.
For this build we will be using an Arduino Nano, which allows the project to be built on a single breadboard. You can use the Arduino Uno if you do not have a Nano, and things will work out the same. The build neatness is also facilitated by using small straight jumper wires, which you can get HERE.
Arduino Tutorial 40: Controlling DC Motor Speed and Direction with Pushbuttons


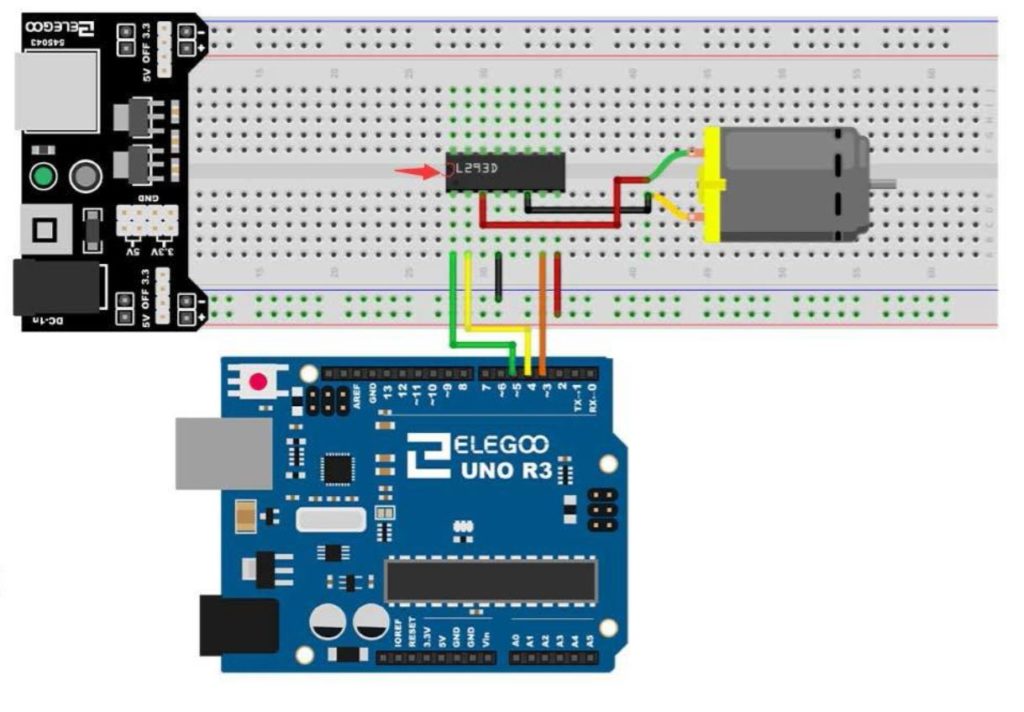
The code we developed in the video lesson is shown below for your convenience.
|
1 2 3 4 5 6 7 8 9 10 11 12 13 14 15 16 17 18 19 20 21 22 23 24 25 26 27 28 29 30 31 32 33 34 35 36 37 38 39 40 41 42 43 44 45 46 47 48 49 50 51 52 53 54 55 56 57 58 59 60 61 62 63 64 65 66 67 68 69 70 71 72 |
int speedPin=5; int dir1=4; int dir2=3; int BP1=8; int BP2=9; int B1Val; int B2Val; int mSpeed=0; int dt=500; void setup() { // put your setup code here, to run once: pinMode(speedPin,OUTPUT); pinMode(dir1,OUTPUT); pinMode(dir2,OUTPUT); pinMode(BP1,INPUT); pinMode(BP2,INPUT); digitalWrite(BP1, HIGH); digitalWrite(BP2, HIGH); Serial.begin(9600); } void loop() { // put your main code here, to run repeatedly: B1Val=digitalRead(BP1); B2Val=digitalRead(BP2); Serial.print("Motor Speed "); Serial.println(mSpeed); if (B1Val==0){ mSpeed=mSpeed-10; delay(dt); } if (B2Val==0){ mSpeed=mSpeed+10; delay(dt); } if (mSpeed>255){ mSpeed=255; } if (mSpeed<-255){ mSpeed=-255; } if (mSpeed==10){ mSpeed=100; } if (mSpeed==-10){ mSpeed=-100; } if (mSpeed==90 || mSpeed ==95){ mSpeed=0; } if (mSpeed==-90 || mSpeed==-95){ mSpeed=0; } if (mSpeed==0){ analogWrite(speedPin,0); } if (mSpeed>0){ digitalWrite(dir1,LOW); digitalWrite(dir2,HIGH); analogWrite(speedPin,mSpeed); } if (mSpeed<0){ digitalWrite(dir1,HIGH); digitalWrite(dir2,LOW); analogWrite(speedPin,abs(mSpeed)); } } |
Arduino Tutorial 36: Understanding How to Use Tilt Switches in Your Projects

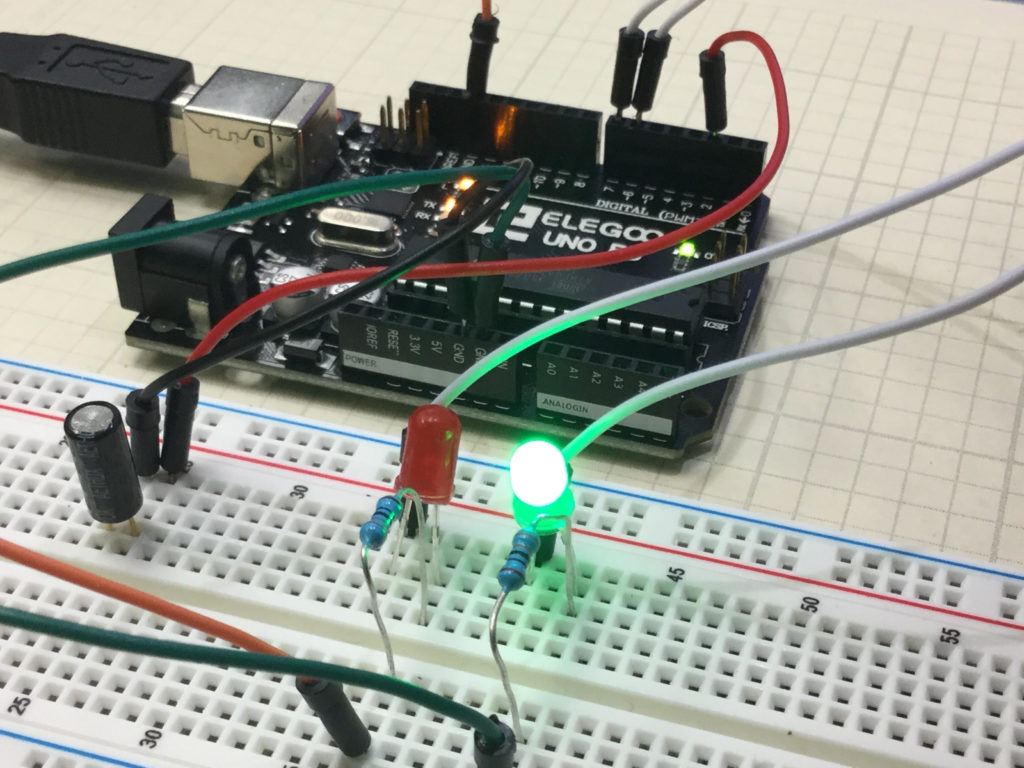
This is a simple project that allows you to create a circuit which will give a visual indication if the breadboard has been tilted. In the upright position, the Green LED is illuminated. To the left of the board is a tilt switch. If the project is tilted, the switch will go from the closed to the open condition. This can be detected on the arduino, and then the red LED is illuminated. The video below explains how to do this simple project.
You can get the kit we are using in these lessons HERE. You should create your own code based on the instructions in the video, but if you are having trouble, I include the code developed in the video below:
|
1 2 3 4 5 6 7 8 9 10 11 12 13 14 15 16 17 18 19 20 21 22 23 24 25 26 27 28 |
int tiltPin=2; int tiltVal; int redPin=7; int greenPin=6; void setup() { // put your setup code here, to run once: pinMode(tiltPin,INPUT); pinMode(redPin,OUTPUT); pinMode(greenPin,OUTPUT); digitalWrite(tiltPin,HIGH); Serial.begin(9600); } void loop() { // put your main code here, to run repeatedly: tiltVal=digitalRead(tiltPin); Serial.println(tiltVal); if (tiltVal==0){ digitalWrite(greenPin,HIGH); digitalWrite(redPin,LOW); } if (tiltVal==1){ digitalWrite(greenPin,LOW); digitalWrite(redPin,HIGH); } } |
Arduino Tutorial 33: Understanding How to Control Servos with a Joystick

If you want to follow along at home, you can order the Arduino Kit we are using HERE.
Typically, the servos in electronics kits are not the best ones, but are suitable to learn with. If you want a more stable and better quality servo, this is the one I user in more of my projects: HiTEC
Below is the code we developed in this project.
|
1 2 3 4 5 6 7 8 9 10 11 12 13 14 15 16 17 18 19 20 21 22 23 24 25 26 27 28 29 30 31 32 33 34 35 36 37 38 39 40 41 42 43 44 45 46 47 48 49 50 51 52 53 54 55 56 57 58 59 60 |
#include <Servo.h> Servo Xservo; Servo Yservo; int Xpin=A0; int Ypin=A1; int Spin=2; int XSpin=9; int YSpin=10; int buzzPin=7; int WVx; int WVy; int Xval; int Yval; int Sval; int dt=200; void setup() { // put your setup code here, to run once: Serial.begin(9600); pinMode(Xpin,INPUT); pinMode(Ypin,INPUT); pinMode(Spin,INPUT); pinMode(XSpin,OUTPUT); pinMode(YSpin,OUTPUT); pinMode(buzzPin,OUTPUT); Xservo.attach(XSpin); Yservo.attach(YSpin); digitalWrite(Spin,HIGH); } void loop() { Xval=analogRead(Xpin); WVx=(180./1023.)*Xval; Yval=analogRead(Ypin); WVy=(180./1023.)*Yval; Sval=digitalRead(Spin); Xservo.write(WVx); Yservo.write(WVy); if (Sval==0){ digitalWrite(buzzPin, HIGH); } else { digitalWrite(buzzPin, LOW); } delay(dt); Serial.print("X Value = "); Serial.print(Xval); Serial.print(" Y Value = "); Serial.print(Yval); Serial.print(" Switch State is "); Serial.println(Sval); } |