In this lesson we work towards a stand alone Temperature and Humidity project using the DHT11 sensor.
This video will take you through the build and coding step-by-step, and the schematics below will help you follow along at home.
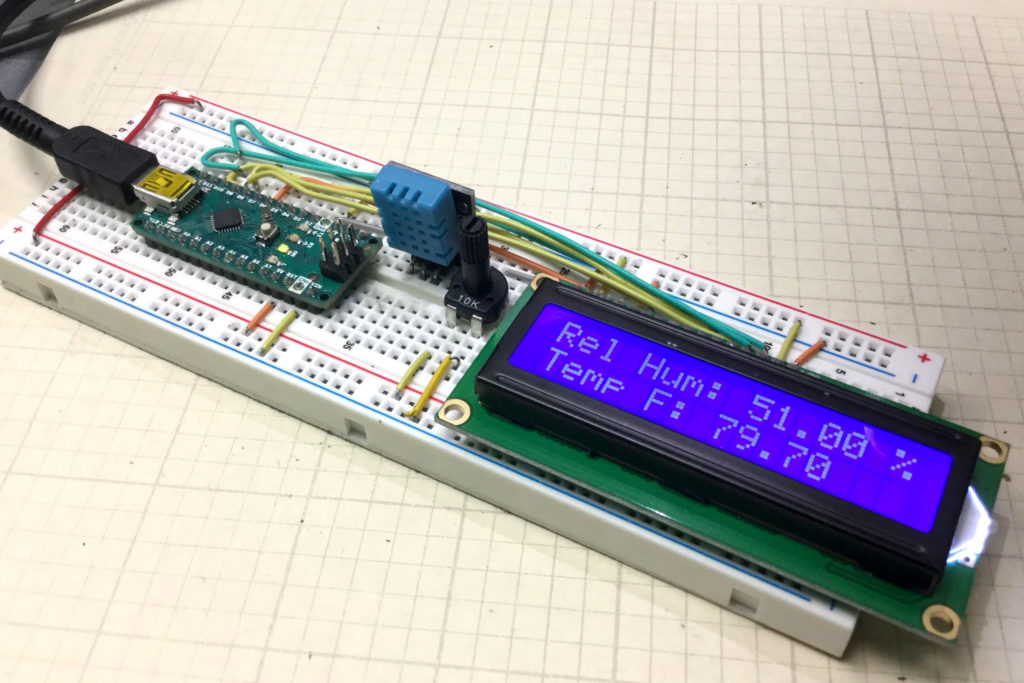
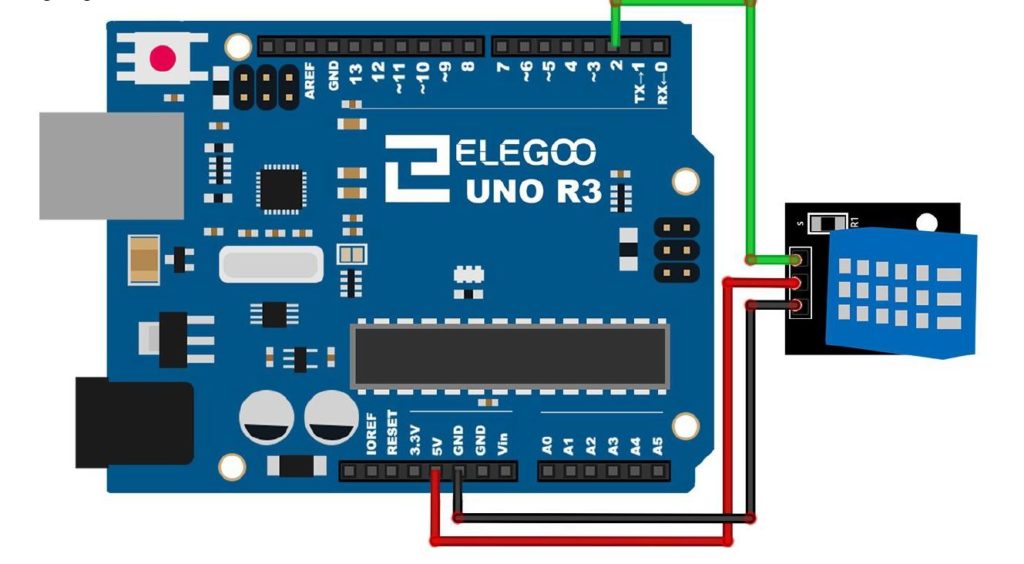
Our goal in this lesson is to add an LCD to the project. In lesson 50, we got the sensor working, and here we want to get the LCD connected. We are working with components from the Elegoo kit, which you can get HERE. In addition, your build can be much neater, cleaner and more stable is you use an arduino nano, instead of the standard arduino uno. The nano is small, and has male pins that allow it to be plugged directly into the breadboard, as seen above. I strongly suggest picking up an Arduino Nano, which you can get HERE. This lesson follows on to the work done in lesson 50. To recap, the DHT11 is connected as follows:

You will also need to add the LCD, using the following schematic:

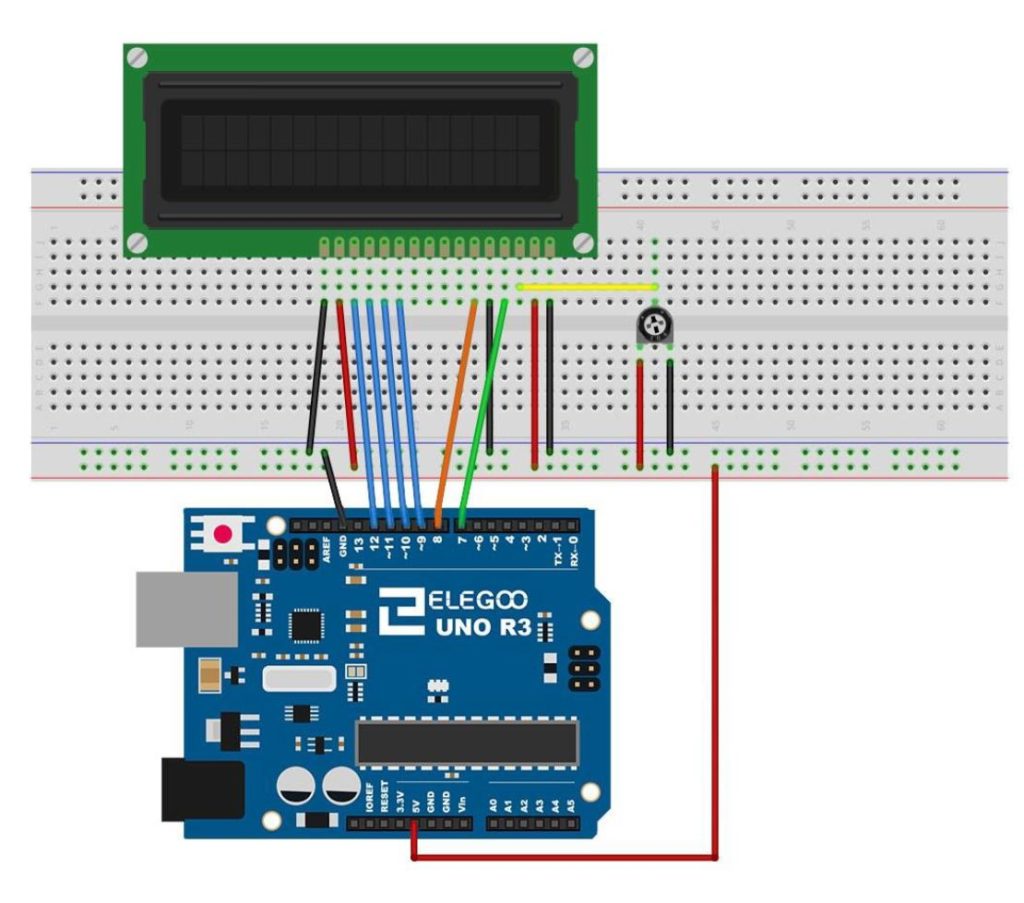
In my photograph at the top of the post, you can see it is important to keep the build neat, as there are lots of connections which must be made. Neat work is facilitated is you use short jumper wires, instead of the big male to male wires. You can get a jumper wire set that will keep your work neat HERE. I am not trying to sell you a bunch of junk, but as projects get more complicated, you really need to use the short straight wires, or your build will become a rat’s nest.
We develop the code in the video in detail, but you can get the finished code down below.
|
1 2 3 4 5 6 7 8 9 10 11 12 13 14 15 16 17 18 19 20 21 22 23 24 25 26 27 28 29 30 31 32 33 34 35 36 37 38 39 40 41 42 43 44 45 46 47 48 49 50 51 52 |
#include "DHT.h" #define Type DHT11 #include <LiquidCrystal.h> int rs=7; int en=8; int d4=9; int d5=10; int d6=11; int d7=12; LiquidCrystal lcd(rs,en,d4,d5,d6,d7); int sensePin=2; DHT HT(sensePin,Type); float humidity; float tempC; float tempF; int setTime=500; int dt=1000; void setup() { // put your setup code here, to run once: Serial.begin(9600); HT.begin(); delay(setTime); lcd.begin(16,2); } void loop() { humidity=HT.readHumidity(); tempC=HT.readTemperature(); tempF=HT.readTemperature(true); lcd.setCursor(0,0); lcd.print("Temp F= "); lcd.print(tempF); lcd.setCursor(0,1); lcd.print("Humidity= "); lcd.print(humidity); lcd.print(" %"); delay(500); lcd.clear(); Serial.print("Humidity: "); Serial.print(humidity); Serial.print("% Temperature "); Serial.print(tempC); Serial.print(" C "); Serial.print(tempF); Serial.println(" F "); } |