Tag Archives: LED

Arduino Tutorial 36: Understanding How to Use Tilt Switches in Your Projects

This Circuit Gives Visual Indicator if Board Has Been Tilted

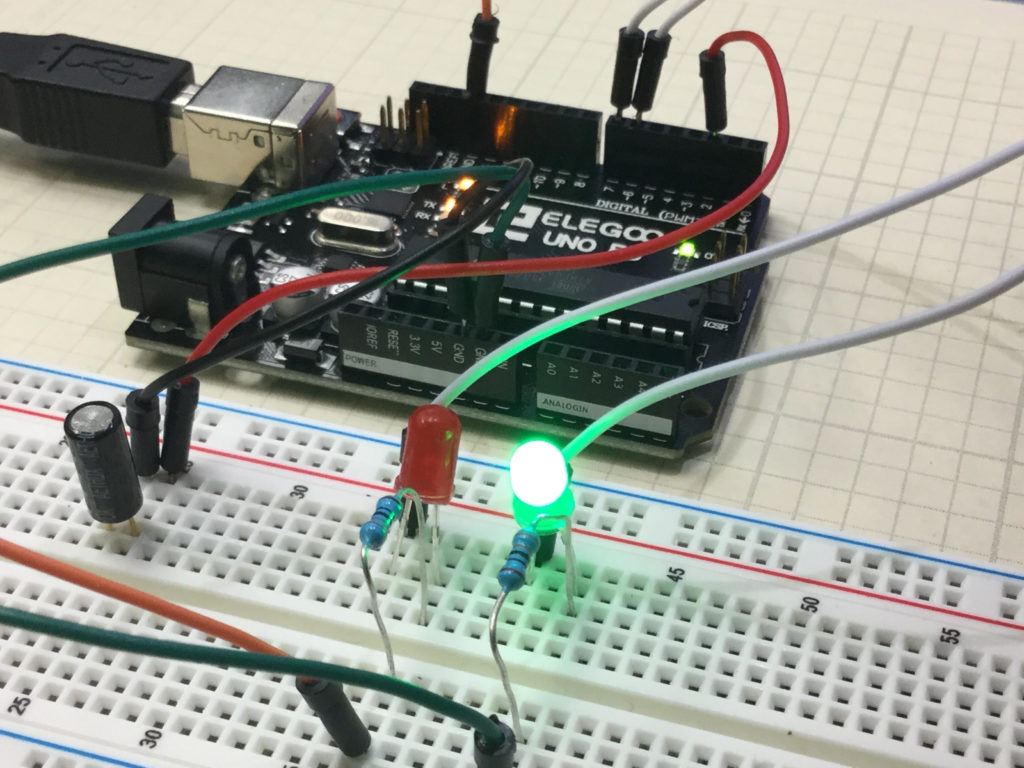
This is a simple project that allows you to create a circuit which will give a visual indication if the breadboard has been tilted. In the upright position, the Green LED is illuminated. To the left of the board is a tilt switch. If the project is tilted, the switch will go from the closed to the open condition. This can be detected on the arduino, and then the red LED is illuminated. The video below explains how to do this simple project.

You can get the kit we are using in these lessons HERE. You should create your own code based on the instructions in the video, but if you are having trouble, I include the code developed in the video below:


Arduino Tutorial 29: Using Push Buttons to Create Dimmable LED

In this lesson we show you how to create a Dimmable LED using two pushbuttons. Pressing one button will gradually increase the brightness, while pressing the other button will gradually decrease the brightness. The project also includes an active buzzer to provide the user feedback that either maximum or minimum brightness have been reached. I encourage you to try and build this yourself before watching the video. Then see if you can do it on your own, and then see if you are doing the way I do it, or if you find an alternative suitable solution.

If you want to follow along at home, you can order the Arduino Kit we are using HERE.

Below is the code we used to achieve the toggle operation. The video gives details on how to connect up the circuit.


Arduino Tutorial 25: Understanding Photoresistors and Photo Detectors


In this lesson we learn how to use photoresistors. A photoresistor is a semiconductor material. In the darkness, it has almost no free electrons, so its resistance is very high. When light shines on the device, electron hole pairs are created, and these electron hole pairs are free to conduct electricity. This lowers the resistance of the material. The brighter the light, the more electron hole pairs that are generated, and hence the lower the resistance. Hence, the resistance of these devices is inversely proportional to the brightness of the light. By hooking a photoresistor in series with a fixed resistor, the current will change as the resistance of the sensor changes. This leads to a measurable change in the voltage across the series resistor. Hence, by measuring this voltage, you get a signal that is proportional to the light. This can be read via an analog pin on the Arduino, and then the arduino can be programmed to do different things based on the brightness of the light. In this simple project we have a red LED and a green LED. If the light is on, the green LED is turned on. If the light is off, the red LED is on.

If you want to follow along at home, you can order the Arduino Kit we are using HERE.

The nice digital voltmeter used in the lesson is available HERE.

Below is the code we developed in this video lesson above.


Arduino Tutorial 20: Understanding RGB LED’s

In this lesson you will learn how to work with RGB LED’s. RGB LED’s can be used to create not only the primary colors, but also all mixtures of the primary colors. This video shows you how to connect up a Common Cathode RGB LED. This project is a little more complex than the ones we have done in the past, so I include the code down below. While the code is here for your reference, you should not just copy and paste it. In order to really learn, you need to type it in for yourself, and then find and debug your mistakes. If you just copy and paste from me, you will never learn how to troubleshoot.

In these lessons, we are using the Elegoo Arduino kit, which you can purchase HERE.

Arduino Tutorial 14: Dimmable LED Project

You have actually learned quite a bit in the first 13 lessons, and now we are ready to bring it all together in an interesting project. In this lesson, we will show you how to build a dimmable LED. You will read values from a potentiometer, and then based on what value you read, you will set the brightness of the LED. This is a really cool little project, and will no doubt get you thinking about bigger and better things.  If you want to follow along at home, you can order the Arduino Kit we are using HERE.