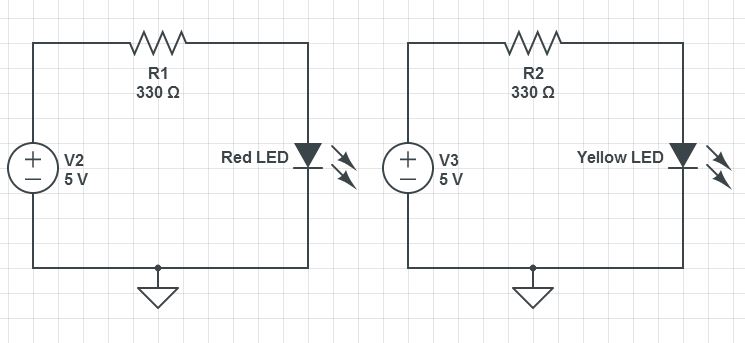
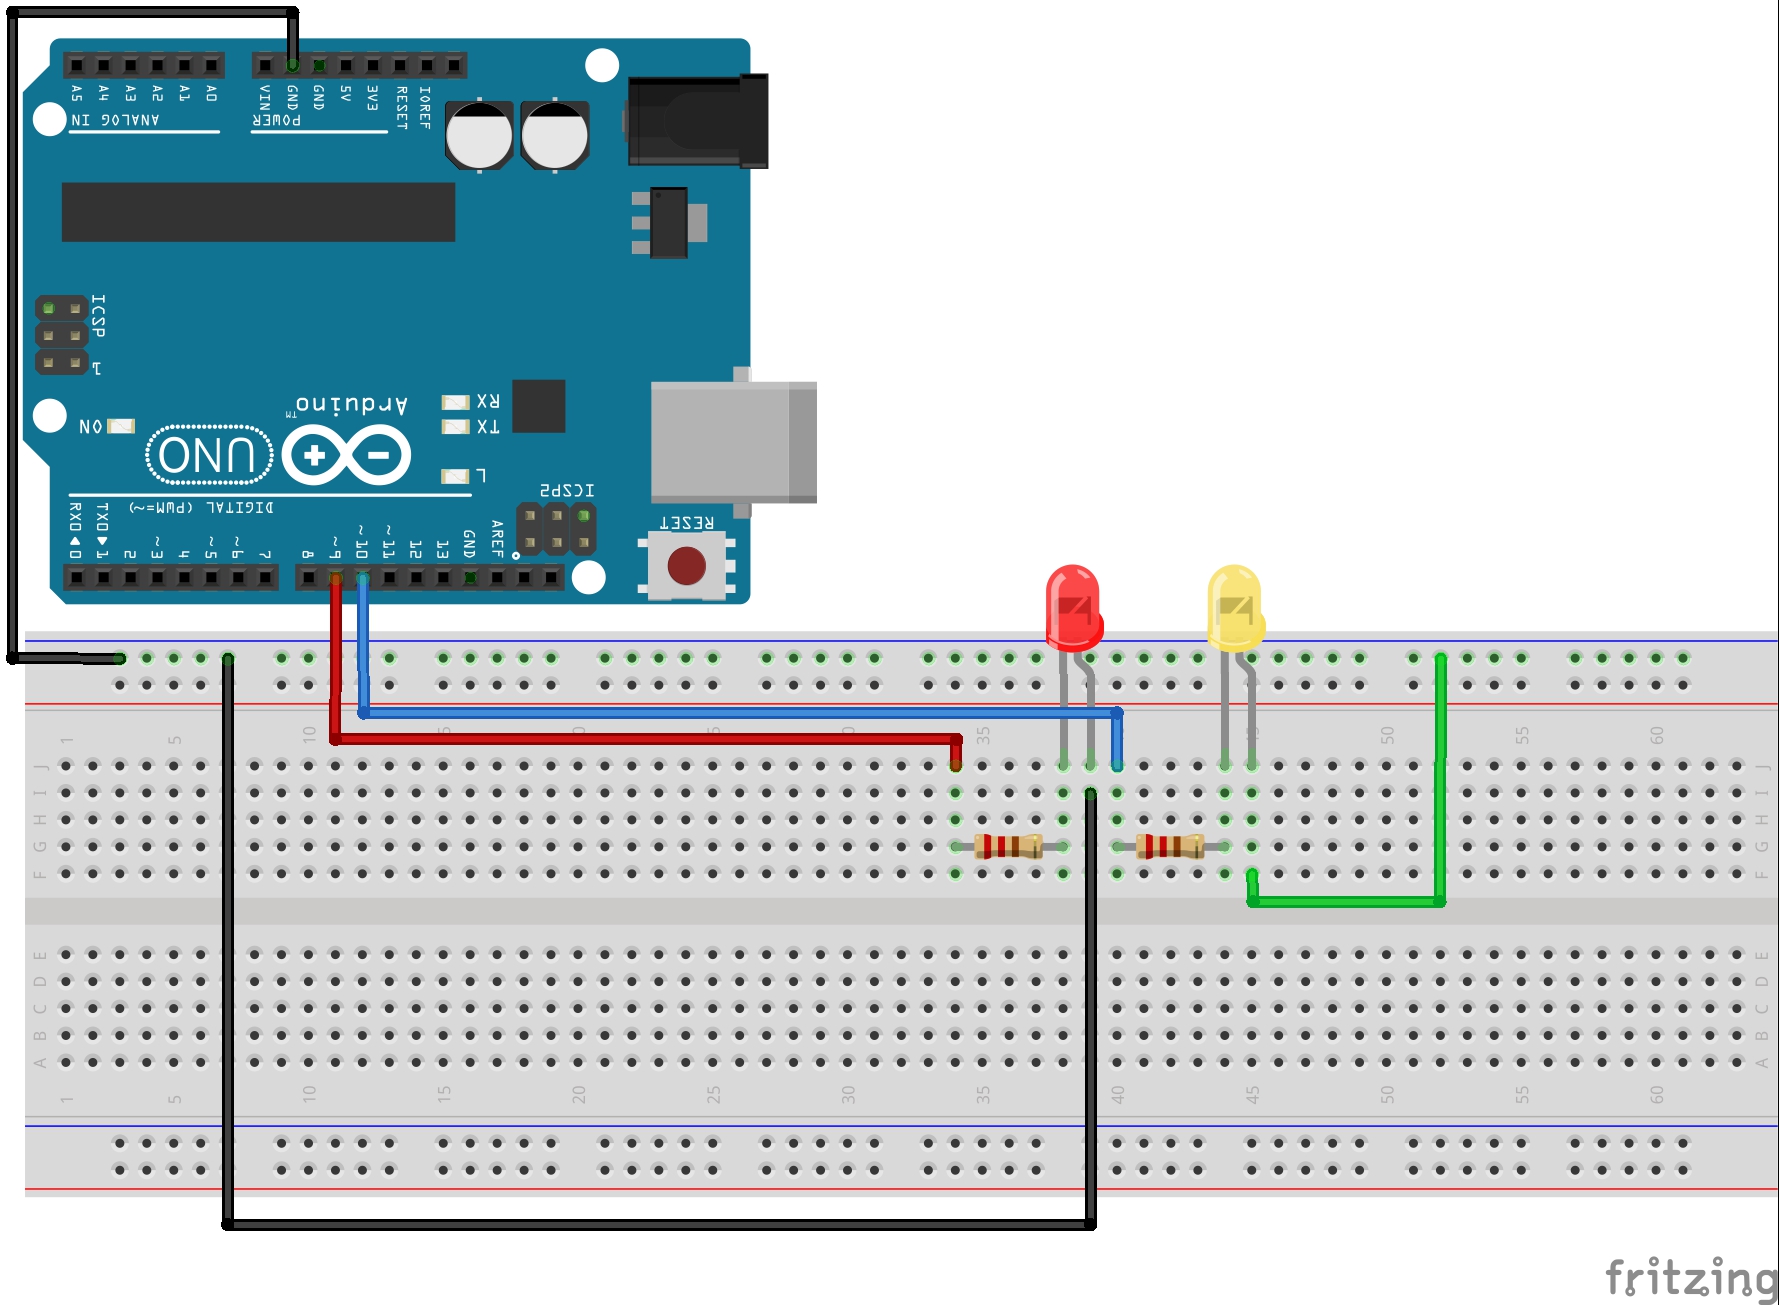
In Lesson 3 we learned how to use for loops. For loops are very powerful and they are sufficient to take care of most of your looping needs. However, there is another type of loop called a ‘while loop’. The while loop is not better than a for loop, it is just a different way of looping. In most scenarios you could choose to loop with either a for loop or a while loop. In lesson 6 we briefly introduced while loops, and used one to pause the program to wain on user input. In this lesson we will look in more detail at how while loops work. We will continue to work with this circuit, which you first built in lesson 3. If you need help putting it together go back and see Lesson 3.

Also, we will continue to expand the code we developed in Lesson 6. At the end of Lesson 6, our code looked something like this:
|
1 2 3 4 5 6 7 8 9 10 11 12 13 14 15 16 17 18 19 20 21 22 23 24 25 26 27 28 29 30 31 32 33 34 35 36 37 38 39 40 41 42 43 44 45 46 47 48 |
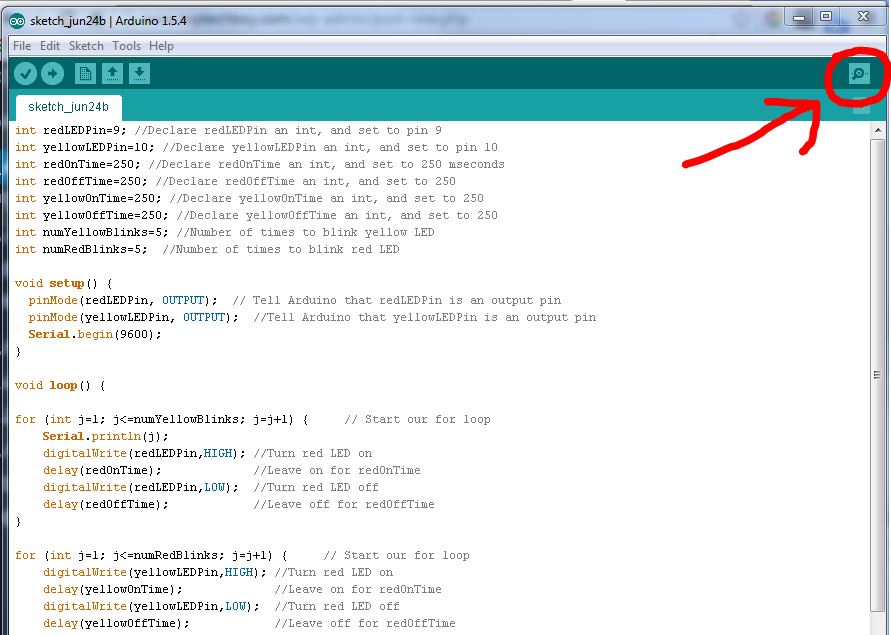
int redLEDPin=9; //Declare redLEDPin an int, and set to pin 9 int yellowLEDPin=10; //Declare yellowLEDPin an int, and set to pin 10 int redOnTime=250; //Declare redOnTime an int, and set to 250 mseconds int redOffTime=250; //Declare redOffTime an int, and set to 250 int yellowOnTime=250; //Declare yellowOnTime an int, and set to 250 int yellowOffTime=250; //Declare yellowOffTime an int, and set to 250 int numYellowBlinks; //Number of times to blink yellow LED int numRedBlinks; //Number of times to blink red LED String redMessage="The Red LED is Blinking"; //Declaring a String Variable String yellowMessage= "The Yellow LED is Blinking"; //Declaring a String Variable void setup() { Serial.begin(115200); // Turn on the Serial Port pinMode(redLEDPin, OUTPUT); // Tell Arduino that redLEDPin is an output pin pinMode(yellowLEDPin, OUTPUT); //Tell Arduino that yellowLEDPin is an output pin Serial.println("How Many Times Do You Want the Red LED to Blink? "); //Prompt User for Input while (Serial.available()==0){ } //Wait for User Input numRedBlinks = Serial.parseInt(); //Read User Input Serial.println("How Many Times Do You Want the Yellow LED to Blink? "); //Prompt User for Input while (Serial.available()==0){ } //Wait for Input numYellowBlinks = Serial.parseInt(); //Read User Input } void loop() { Serial.println(redMessage); for (int j=1; j<=numRedBlinks; j=j+1) { // Start our for loop Serial.print(" You are on Blink #: "); Serial.println(j); digitalWrite(redLEDPin,HIGH); //Turn red LED on delay(redOnTime); //Leave on for redOnTime digitalWrite(redLEDPin,LOW); //Turn red LED off delay(redOffTime); //Leave off for redOffTime } Serial.println(" "); Serial.println(yellowMessage); for (int j=1; j<=numYellowBlinks; j=j+1) { // Start our for loop Serial.print(" You are on Blink #: "); Serial.println(j); digitalWrite(yellowLEDPin,HIGH); //Turn yellow LED on delay(yellowOnTime); //Leave on for yellowOnTime digitalWrite(yellowLEDPin,LOW); //Turn yellow LED off delay(yellowOffTime); //Leave off for yellowOffTime } Serial.println(" "); } |
You can see in the code above, we are prompting the user for data, then waiting, then entering the data for both numRedBlinks and numYellowBlinks. This allows the user to set the number of times the LED’s blink from the serial monitor. The way we actually do the blinking is with the two for loops. There is another way to loop, and that is with ‘while loops’. When you are writing code, often times you can choose a for loop or a while loop. Some people frequently use both types of loops and some have a preference for one or the other and almost always use their preferred type of loop. It is good to know how to use both types, so here we will explore the while loop.
Lets look at how one might work:
|
1 2 3 4 5 |
int j = 1 ; //declare the variable j to be an int and set value to 1 while (j<=10) { //start your while loop Serial.println(j); // print the number j j=j+1 // increment j by 1 } // end of the while loop |
Lets unpack this code and see how it works. First, notice that the while loop will have one or more commands that it executes. It will execute the commands that are between the curly brackets. It will continue to execute the commands between the curly brackets as long as the ‘condition’ described in the parenthesis of the while loop is true. In the case above, it will continue to execute the commands between the curly brackets as long as j is less than or equal to ten. notice that inside the loop we are incrementing j by 1 each time through the loop. This ensures that it will eventually exit the loop. If we were to forget to increment j, the program would become hung in the loop. This would create what is called an infinite loop, and the program would become hung in the infinite loop.
So, for the code above, we start by making j=1, then each time through the loop we increment j by 1. The program will continue executing this loop until the condition is no longer true . . . for this case, at the point that j=11 the condition would no longer be true, the program would not enter the curly bracket, and would jump to the first line of code after the closing curly bracket.
So, for this lesson what we want to do is replace the for loops in the original code shown at the top of this lesson with while loops. There is one for loop that blinks the red LED and one for loop that blinks the yellow LED. Replace those two for loops with while loops. Lets look at the first for loop again:
|
1 2 3 4 5 6 7 8 |
for (int j=1; j<=numRedBlinks; j=j+1) { // Start our for loop Serial.print(" You are on Blink #: "); Serial.println(j); digitalWrite(redLEDPin,HIGH); //Turn red LED on delay(redOnTime); //Leave on for redOnTime digitalWrite(redLEDPin,LOW); //Turn red LED off delay(redOffTime); //Leave off for redOffTime } |
Lets do the same function with a while loop. We could replace this code with:
|
1 2 3 4 5 6 7 8 9 10 |
int j=1; while (j<=numRedBlinks) { // Start our while loop Serial.print(" You are on Blink #: "); Serial.println(j); digitalWrite(redLEDPin,HIGH); //Turn red LED on delay(redOnTime); //Leave on for redOnTime digitalWrite(redLEDPin,LOW); //Turn red LED off delay(redOffTime); //Leave off for redOffTime j=j+1 //don't forget to increment your j; } // this curly bracket ends the while loop |