Arduino Tutorial 4: Understanding Arduino Variables

In our earlier lessons we would program using “constants” when we needed numbers. For example, if we wanted to set pin 13 to an output, we would use the command:

pinMode(13, OUTPUT);

The problem with using constants like the number 13, if you decided later to use pin 8 instead, you would have to edit every line of code that used that number. It is much better practice to use variables when coding. In this video we show you have to program using variables. We start by doing things the wrong way, using constants, then show you the advantages of using variables.

Hopefully you can see from this video how much better it is, and more efficient to use variables instead of constants. In all the future lessons, we expect you to use variables.

Arduino Tutorial 3: Understanding How Breadboards Work


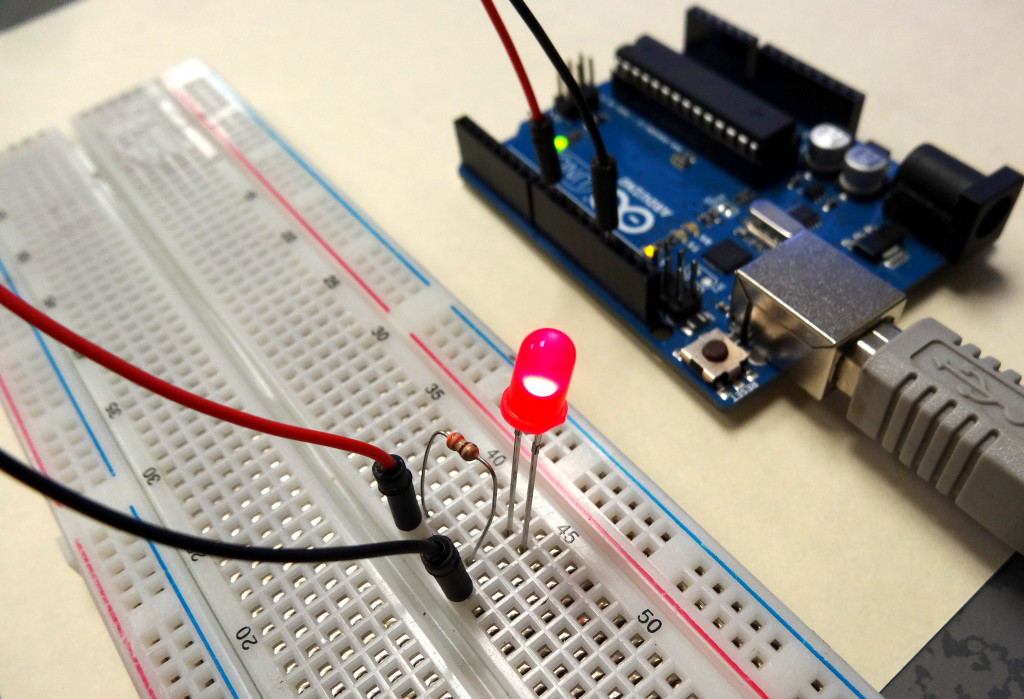
LED Arduino CircuitThe cool thing about the arduino is you can program it to interact with the real world. The arduino can connect to and interact with a variety of sensors and actuators which allow you to monitor what is happening around you, and to control things like motors, relays, and servos. To do this though, you need to be able to connect components to the arduino. For prototyping, that is most easily done by using a breadboard. If you want to play along at home, and follow all these lessons with the same components I am using, you can order this Arduino kit. 

The video below describes in detail how to use a breadboard, and even helps you get your first circuit prototype up and running.


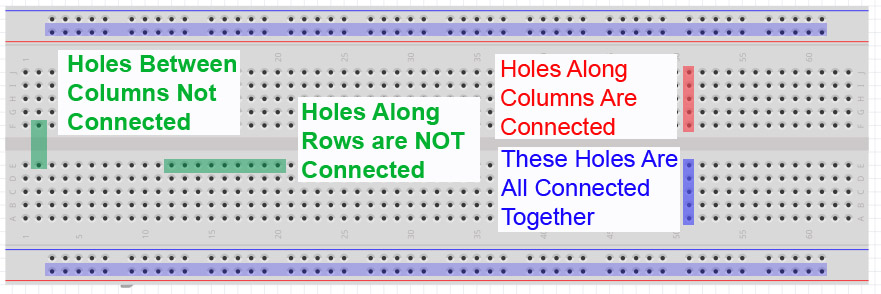
As explained in the video, key to using the breadboard to create circuits is to understand how the little holes on the breadboard are connected. This graphic will help you understand which holes are connected and which are not.

Breadboard
Breadboard for prototyping your Arduino Circuits

Study this graphic, and make sure you understand how the breadboard works. You can see that to connect two leads together, they should be plugged into the same column on the breadboard. It does not matter which column, as long as the two leads are in the same column.

It will take some practice, but if you follow the video carefully, you should be able to get your first circuit connected and working.

Arduino Tutorial 2: Understanding How Light Emitting Diodes (LEDs) Work

In this series of Arduino lessons, I really want you to begin to understand how the arduino works. That is, open the hood, and begin to understand how the magic happens. You already are thinking about how you can type commands to make the Arduino do what you want, but how does it all work. The magic happens because of special materials called semiconductors. Semiconductors are used to make computer chips, microprocessors, LED’s and just about any electronic component you can imagine. Since semiconductors are so important, this lesson will give you a little bit of an introduction to the Physics behind semiconductor materials. We will do this by really explaining how LED’s work. The video will serve as an introduction to these amazing materials that have enabled computer technology. In this new series of lessons, I will be using this Arduino kit. If you order this kit, you can play along at home as I go through all these lessons.